
Image Source: i.ytimg.com
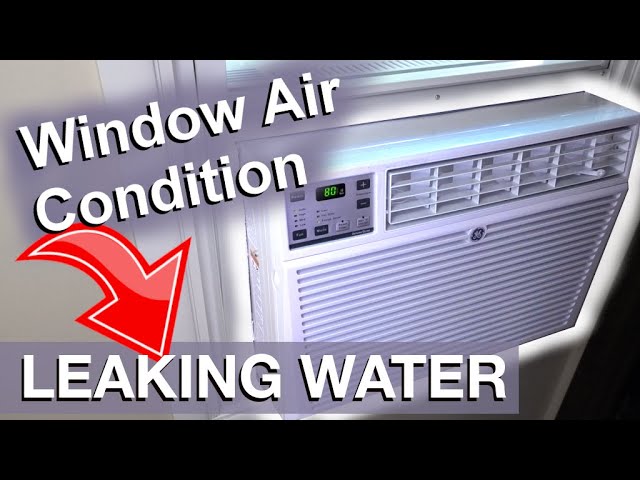
Troubleshoot: Why Is My Air Conditioner Blowing Water?
When your air conditioner is blowing water, it means something is not right with how the unit handles condensation. Normally, AC units take moisture out of the air as they cool it, and this water drips safely away. But when water blows out the vents or pools around the unit, it usually points to a blockage in the drain system, a frozen coil melting, or another issue stopping the water from draining correctly. Let’s look at the main reasons this happens and how to fix them.
Comprehending AC Condensation
Air conditioners do two main jobs. They cool the air, and they take moisture out of it. As warm, humid air hits the cold parts inside the AC unit (the evaporator coil), the air cools down. This makes the moisture in the air turn into liquid water, just like water drops form on a cold drink glass. This process is called condensation.
A healthy central air conditioner makes a lot of water, especially on hot, sticky days. This water needs a place to go. The AC system has a built-in drainage system to catch this water and move it away from your home.
- The Evaporator Coil: This is where the air gets cold and condensation happens.
- The Drain Pan: A tray sits under the evaporator coil to catch the water drops.
- The Condensate Drain Line: A pipe connects the drain pan to the outside or to a drain inside your home.
- The Condensate Pump: Some systems use a pump to push the water up or over to the drain spot, often needed when the drain point is higher than the pan.
If any part of this system fails or gets blocked, the water can back up. When it backs up, it can overflow the pan or get pulled back into the airflow and blown out through your vents as water or moisture. This leads to problems like water dripping from AC vent or general air conditioner leaking water indoors.
Common Reasons for Water Leaks and Blowing Water
Several things can cause your AC to blow or leak water. Most issues relate to the system designed to handle the condensation water.
Blockages in the Drain System
This is perhaps the most common cause of central air conditioner leaking water. The system that moves water away from the unit can get blocked.
The AC Condensate Drain Clog
The drain line is a small pipe that carries water away. Over time, gunk can build up inside it. This gunk is usually made of algae, mold, dirt, and dust. It grows in the warm, wet conditions of the drain line. This buildup can create an AC condensate drain clog. When the pipe is blocked, the water can’t flow out.
- How Clogs Happen: The drain line is a perfect place for mold and algae to grow. Dust and dirt from the air filter area can also wash into the drain pan and down the pipe, adding to the blockage.
- Where Clogs Occur: Clogs often happen where the pipe bends, where it connects to the drain pan, or near the end where the water comes out.
The AC Drain Pan Overflowing
When the AC condensate drain clog stops water from leaving the pan, the water level in the pan rises. Eventually, the pan holds too much water and starts to overflow. This leads to air conditioner leaking water indoors. The water might pool around the indoor unit or drip down from the ceiling if the unit is in an attic. An AC drain pan overflowing is a clear sign the water isn’t draining properly.
The Condensate Pump Not Working
Some homes, especially those with AC units in basements or attics, use a condensate pump. This pump pushes the water from the drain pan to a higher drain point or outside. If the condensate pump not working, the water collects in the pump’s reservoir, and then the drain pan itself. When the pump fails, water cannot be moved away, leading to an overflow of the pan and leaks.
- Signs a Pump is Bad: The pump might make strange noises, run constantly without pumping water, or simply not turn on at all when the water level rises.
Frozen Evaporator Coil
Sometimes, the evaporator coil gets too cold and freezes over. Ice builds up on the coil. This ice is frozen condensation.
Why the Evaporator Coil Frozen
Several things can cause the evaporator coil frozen:
- Poor Airflow: This is a very common reason. The coil needs warm air moving over it to work right. If not enough air flows over the cold coil, the coil gets too cold, below freezing point.
- Air conditioner filter dirty: A air conditioner filter dirty is a main cause of poor airflow. A clogged filter blocks air from reaching the coil.
- Blocked return vents or supply registers in your home.
- Problems with the blower fan or motor.
- Closed dampers in the ductwork.
- Low Refrigerant: The substance that cools the air is called refrigerant (often called Freon). If the system is low on refrigerant, the pressure drops. Low pressure makes the evaporator coil get much colder than it should, causing ice to form. Low AC refrigerant symptoms include weak cooling, hissing or bubbling sounds from the lines, and eventually, a frozen coil. Low refrigerant usually means there is a leak in the system.
How a Frozen Coil Causes Water Issues
When the AC system turns off (either because it’s reached the set temperature, or you turn it off), the ice on the evaporator coil frozen starts to melt. This melting ice creates a large amount of water quickly. The drainage system might not be able to handle this sudden rush of water, especially if there’s already a small clog. The water can overwhelm the drain pan, leading to AC drain pan overflowing and leaks. Also, strong airflow from the blower fan can pick up dripping water from the melting ice and push it out through the vents, causing water dripping from AC vent.
Other Less Common Reasons
While drain issues and frozen coils are the top reasons, other problems can also cause water leaks.
- Incorrect Installation: If the AC unit or drain line was not installed with the correct slope, water might not drain downhill properly. The drain pan might also be tilted wrong.
- Damaged Drain Pan: The drain pan itself can crack or rust over time, allowing water to leak out before it even reaches the drain line.
- High Humidity: In very humid conditions, the AC unit removes a lot of moisture from the air. While the drainage system is built for this, extremely high humidity combined with another small issue (like a slight clog) can sometimes overwhelm the system, leading to minor leaks.
Recognizing the Symptoms
It’s important to spot the signs that your AC is having trouble with water.
- Water Dripping from AC Vent: If you see or feel water coming directly out of the vents in your rooms, this is a strong sign that water is getting pulled into the airflow. This often happens when a frozen coil melts or if the drain pan is full and water is splashing around near the blower fan.
- Air Conditioner Leaking Water Indoors: This is a general term. It could mean puddles near the indoor unit, stains on the ceiling or walls below the unit, or water coming from the vents. It points to a failure in the system’s ability to contain and drain condensation.
- Pooling Water: Puddles around the base of the indoor unit (like the furnace/air handler if it’s a central system in a closet or basement) or in the overflow safety pan if one is installed underneath the unit.
- Musty Smells: Standing water encourages mold growth, which can lead to a musty or moldy smell coming from your vents.
- AC Turning Off: Many modern AC systems have a safety switch connected to the drain pan. If the pan fills up (due to a clog or pump failure), the switch trips and turns off the AC to prevent water damage.
- Poor Cooling: A frozen evaporator coil or a system low on refrigerant will not cool your home effectively. You might notice the air isn’t as cold as it should be.
Troubleshooting Steps You Can Take
Before calling for help, there are a few simple things you can check yourself.
Checking the Air Filter
This is the easiest thing to check and often the culprit for airflow issues leading to freezing.
Is the Air Conditioner Filter Dirty?
Locate your air filter. It’s usually in the return air vent grille in a wall or ceiling, or in the air handler unit itself. Pull it out and look at it. If it’s gray or black with dust and dirt, it needs changing. A clean filter is crucial for good airflow.
- Action: Replace a dirty filter with a new one. Make sure the new filter is the correct size and is installed facing the right direction (look for arrows on the filter showing airflow direction).
Inspecting the Drain Pan
The drain pan is located directly beneath the evaporator coil.
- Location: If you have a split system, the evaporator coil and drain pan are usually in the indoor unit (the air handler or furnace). If it’s a package unit (all in one), check the drain pan access panel.
- What to Look For: See if the drain pan has standing water in it. If it’s full or nearly full, the water is not draining away. This confirms a problem with the drain line or condensate pump.
Examining the Condensate Drain Line
The drain line is typically a PVC pipe, usually white or gray, about 3/4 inch in diameter. It runs from the drain pan, often leaving the indoor unit and going outside or connecting to a household drain.
- Check for Blockage: Look at the end of the pipe where it exits your home. Is water dripping out? If not, or if it’s just a slow trickle when the AC is running and making water, the line might be blocked.
- Visible Signs of Clog: You might see standing water in the drain pan or even backing up into the unit if the clog is severe.
Looking at the Evaporator Coil
If you can safely access the indoor unit and the evaporator coil, you can check it.
- Safety First: Make sure the power to the unit is turned off at the breaker box before opening any panels.
- What to Look For: Look at the coil. Does it look like a block of ice? If it’s covered in frost or a solid sheet of ice, it’s frozen.
Checking the Condensate Pump (If Applicable)
If your system has a condensate pump, check if it’s working.
- How to Test: If the drain pan or pump reservoir has water, the pump should eventually turn on. Listen for it. If it doesn’t turn on, or if it runs but the water level doesn’t go down, the pump may be faulty.
Simple Fixes You Can Try
Based on what you find during troubleshooting, some issues have easy DIY solutions.
Replacing the Air Filter
This is the simplest fix and prevents a lot of problems.
- Step 1: Find your filter and note its size (printed on the side).
- Step 2: Turn off the AC system at the thermostat and the breaker.
- Step 3: Remove the old, dirty filter.
- Step 4: Insert the new filter, making sure the airflow arrow points in the direction the air moves through the system (usually towards the air handler/furnace).
- Step 5: Turn the power back on.
Emptying the Drain Pan
If the pan is full but the drain line isn’t completely blocked yet, you can sometimes buy time by emptying it.
- Step 1: Turn off the AC unit’s power.
- Step 2: Use a wet/dry vacuum or towels to carefully remove the water from the drain pan.
- Step 3: Check the drain line opening in the pan to see if you can spot a visible clog right there.
How to Unclog AC Drain Line
A clogged drain line is a very common issue and can often be fixed by the homeowner.
Steps to Unclog AC Drain Line
You’ll need a wet/dry vacuum, vinegar, or a plumber’s snake.
- Using a Wet/Dry Vacuum (Recommended):
- Find the end of the drain line outside your house. It’s usually near the outdoor AC unit or where the indoor unit is located.
- Set your wet/dry vacuum to the “wet” setting and make sure it’s empty.
- Create a tight seal around the end of the drain pipe with the vacuum hose. You might need tape or a wet cloth to get a good seal.
- Turn on the vacuum for 2-3 minutes. This should suck out the clog.
- Check the drain pan again. Pour a cup of water into it. Does the water drain freely outside? If yes, you cleared the clog.
- Alternative Vacuum Method (If You Can Access the Start of the Line): If you can access where the drain line connects to the drain pan inside the unit, you can disconnect the pipe there and try vacuuming from that end as well, sucking air into the pipe to push the clog out the other end. Be careful not to damage connections.
- Using Vinegar:
- Locate the access point for the drain line near the indoor unit. This might be an open pipe or a cap on the pipe near the drain pan.
- Carefully pour about 1/4 cup of plain white vinegar into the drain line. Vinegar helps kill mold and algae.
- Let the vinegar sit for about 30 minutes.
- Follow up by pouring a cup of water into the line to flush it.
- Check the outdoor drain end to see if water is now flowing.
- Note: Do NOT use bleach. Bleach can produce dangerous fumes when mixed with other substances potentially in the drain line and can damage certain pipe materials or connections in your system.
- Using a Plumber’s Snake:
- If the above methods don’t work, you can try gently using a small, flexible plumber’s snake (like one for sink drains) to break up the clog.
- Insert the snake into the drain line opening (either near the pan or from the outside end).
- Twist and push gently until you feel resistance, then work the snake through the blockage.
- Flush with water or use the wet/dry vacuum again to pull out loosened debris.
Addressing a Frozen Coil
If you found the evaporator coil frozen, you must let it thaw before the AC can work right and before trying to unclog the drain line (as melting ice will add more water).
- Step 1: Turn off the AC unit completely at the thermostat and the breaker.
- Step 2: Turn on the system’s fan (usually a “Fan On” setting on your thermostat). This blows air over the coil to help it thaw faster. Do not turn the cooling back on.
- Step 3: Place towels around the indoor unit to catch melting water.
- Step 4: Let the coil thaw completely. This can take anywhere from a few hours to 24 hours, depending on how much ice there is.
- Step 5: Once thawed, address the cause of the freezing (e.g., change the dirty filter, check for airflow issues). If you suspect low AC refrigerant symptoms, you’ll need a professional.
- Step 6: After the coil is thawed and the cause is addressed, clear any standing water from the drain pan and ensure the drain line is clear using the steps above.
- Step 7: Turn the AC back on and monitor it.
When to Call an HVAC Professional
While some fixes are simple, many AC issues require expert knowledge and tools.
- Persistent Water Leaks: If you’ve cleaned the drain line and changed the filter, but the air conditioner leaking water indoors continues, there’s likely a deeper problem.
- Suspected Refrigerant Issues: Handling refrigerant requires special training and equipment. If you notice low AC refrigerant symptoms like poor cooling or hissing sounds, or if the coil freezes repeatedly even with a clean filter, call a technician. There is likely a refrigerant leak that needs to be found and fixed, and the system needs to be recharged.
- Faulty Condensate Pump: Replacing a condensate pump is usually not a DIY task for most homeowners. If you’ve determined the condensate pump not working, call a pro.
- Frozen Coil Returns: If your evaporator coil freezes even after you’ve ensured good airflow (clean filter, open vents), there might be an issue with the refrigerant charge or another mechanical problem.
- Any Doubt or Discomfort: If you’re unsure about any step or uncomfortable working near your AC unit, it’s always safest to call a qualified HVAC technician. Messing with electrical components or refrigerant lines can be dangerous and can cause further damage to the system.
- Mold Growth: If you see significant mold growth in or around your unit due to water leaks, a professional can assess the situation and recommend cleaning or remediation.
Preventing Future Water Problems
Taking simple steps can often prevent these frustrating water issues.
- Change Your Air Filter Regularly: This is the single most important maintenance task you can do. Check it every month, especially during peak cooling season. Change it when it looks dirty, usually every 1-3 months depending on the filter type and how much you use your AC.
- Clean the Condensate Drain Line: Make cleaning the drain line a part of your routine maintenance, perhaps once or twice a year. You can simply pour a 1/4 cup of vinegar into the access opening to prevent buildup.
- Check the Drain Pan: Glance at the drain pan periodically to make sure it’s empty.
- Schedule Professional Maintenance: Have an HVAC technician inspect your system annually, ideally before the cooling season starts. They will clean the coils, check the drain line, test the condensate pump, check refrigerant levels, and identify potential issues before they cause problems.
Visualizing the Issues
Here’s a simple table summarizing common symptoms and likely causes:
| Symptom | Most Likely Cause(s) |
|---|---|
| Water dripping from AC vent | Frozen evaporator coil melting, Full drain pan |
| Air conditioner leaking water indoors | Clogged condensate drain, Full drain pan, Condensate pump failure, Frozen coil melting |
| Pooling water near indoor unit | Clogged condensate drain, Full drain pan, Condensate pump failure, Cracked drain pan |
| Musty or moldy smell | Standing water in drain pan or drain line |
| AC shuts off unexpectedly | Full drain pan (safety switch activated) |
| Poor cooling + water issue | Frozen evaporator coil (often due to low refrigerant or dirty filter) |
Interpreting Low AC Refrigerant Symptoms
Low AC refrigerant symptoms go beyond just poor cooling. The system relies on a specific amount of refrigerant to work efficiently.
- Weak Cooling: The air coming from the vents isn’t as cold as it should be.
- Ice on Coil/Lines: A common result is the evaporator coil frozen. You might also see frost or ice on the larger copper line (the suction line) leading into the outdoor unit.
- Hissing or Bubbling Sounds: A leak in the refrigerant line can sometimes make these noises as the gas or liquid escapes.
- Higher Electric Bills: The system works harder to try and cool, using more energy.
If you suspect low refrigerant, do not try to add more yourself. This is a job for a certified technician. Adding the wrong type or amount of refrigerant can damage the system. A technician will find the leak, fix it, and then add the correct amount of refrigerant.
Fathoming How to Unclog AC Drain Line Properly
Let’s go over the steps to unclog AC drain line in a bit more detail, focusing on safety and effectiveness.
Step-by-Step Guide to Unclogging
Using a Wet/Dry Vacuum
- Locate the Drain End: Find where the drain pipe finishes outside. It’s usually a short piece of pipe sticking out of the wall near the ground, often close to the outdoor AC unit.
- Prepare the Vacuum: Empty the wet/dry vacuum. Make sure the hose attachment is secure.
- Seal and Vacuum: Put the vacuum hose over the end of the drain pipe. Use duct tape or hold a wet rag around the connection to make a tight seal. You want to create strong suction from the outside end. Turn the vacuum on for about 2-3 minutes.
- Check for Debris: Turn off the vacuum. Look inside the vacuum tank. You should see water and hopefully the clog material (slimy gunk, dirt).
- Test the Drain: Go back to the indoor unit. Carefully pour about a cup of water into the drain pan, trying to get it into the drain line opening. Watch to see if the water flows freely out of the pipe end outside. If it does, you likely cleared the clog. If not, repeat the vacuuming or try the vinegar method.
Using Vinegar to Flush
- Locate the Access Point: Find the access point near the indoor unit. This might be where the pipe leaves the drain pan, or a T-shaped fitting with a cap on top somewhere along the pipe run.
- Pour the Vinegar: Remove the cap or access the pipe opening. Slowly pour about 1/4 cup of undiluted white vinegar into the pipe.
- Let it Sit: Allow the vinegar to sit in the pipe for about 30 minutes. It needs time to break down the mold and algae.
- Flush with Water: After 30 minutes, slowly pour about a cup of plain water into the pipe to flush the vinegar and loosened debris through.
- Test the Drain: Check the outdoor end of the pipe to ensure water is flowing. If not, you might need to vacuum from the outside end after using the vinegar to pull out the loosened clog.
Using a Plumber’s Snake (Use with Caution)
- Choose a Small Snake: Use a small, flexible drain snake (usually 1/4 inch thick).
- Insert Gently: Insert the snake into the drain line access point (either near the pan or the outside end).
- Work Through Clog: Push the snake slowly, twisting gently as you go. Stop if you meet firm resistance – you might be hitting a bend or the actual clog. Work the snake back and forth slightly to break up the blockage. Do not force it hard, as you could damage the pipe.
- Flush/Vacuum: Once you believe you’ve cleared the clog, flush the line with water or use the wet/dry vacuum method again to ensure all debris is removed.
After successfully clearing the drain line, keep an eye on the system for the next few hours or days to make sure the water is draining correctly and no more leaks appear.
The Impact of a Dirty Air Conditioner Filter
We mentioned the air conditioner filter dirty as a key cause of frozen coils and airflow problems. Let’s emphasize why changing it is so crucial.
When the filter is clean, air moves easily through it and over the cold evaporator coil. This air movement allows the coil to absorb heat from the air efficiently.
When the filter is clogged with dust and dirt, it’s like trying to breathe through a thick cloth. Less air passes through.
- Reduced Airflow: The volume of air hitting the evaporator coil drops significantly.
- Coil Gets Too Cold: With less warm air passing over it to absorb the cold, the coil gets colder and colder.
- Freezing Point Reached: Eventually, the surface temperature of the coil drops below the freezing point of water (32°F or 0°C).
- Condensation Freezes: The moisture that condenses on the coil turns to ice instead of dripping into the drain pan.
- Ice Buildup: More and more ice forms, creating a barrier that blocks even more airflow, making the problem worse.
- The Melt and Leak: When the system cycles off, or when the ice build-up gets bad enough, the ice melts rapidly, creating excess water that overwhelms the drain system and causes water dripping from AC vent or air conditioner leaking water indoors.
Regularly checking and changing your filter is the simplest and cheapest way to prevent this cascade of problems, including potential AC condensate drain clog issues caused by dirt washing into the pan, and the significant headache of a central air conditioner leaking water.
Central Air Conditioner Leaking Water
When we talk about a central air conditioner leaking water, we’re usually talking about the indoor part of a split system or a package unit. The causes are the same: problems with condensation management.
- Indoor Unit Location: In split systems, the indoor unit (air handler or furnace with an evaporator coil) is often in an attic, closet, basement, or crawl space. A leak here can cause damage to ceilings, walls, or floors below.
- Package Unit Location: Package units are usually outside, but they still have a drain pan and drain line. A leak might be visible on the ground around the unit.
- Symptoms: Puddles near the unit, water stains, musty smells, or the AC shutting off are signs of a central air conditioner leaking water.
Addressing a leak in a central system follows the same troubleshooting steps: check the filter, check the drain pan, check the drain line for clogs, check the coil for ice, and check the condensate pump if present. Because central systems are often larger and more complex, calling a professional is often necessary if simple fixes don’t work.
FAQ Section
Q: Is the water leaking from my AC dangerous?
A: The water itself is usually just condensation, like distilled water. However, it can pick up contaminants from the coil and drain pan like mold and bacteria. More importantly, the water can cause significant damage to your home’s structure (ceilings, walls, floors, insulation) and can lead to hazardous mold growth. Standing water also poses an electrical hazard near the unit. So, while the water itself isn’t typically toxic, the consequences of the leak can be harmful and costly.
Q: Can I keep running my AC if it’s leaking water?
A: It’s generally not recommended. Continuing to run an AC that is leaking water can cause more damage to the unit itself, lead to further water damage in your home, and potentially create a safety hazard (electrical shock, mold). If the leak is due to a frozen coil, running the AC will make the freezing worse. If it’s a drain issue, the leak will just continue and potentially get worse. Turn off the AC and troubleshoot or call a professional.
Q: How often should I clean my AC drain line?
A: It’s a good idea to flush your condensate drain line with vinegar once or twice a year as a preventative measure. Doing it at the start of the cooling season is recommended. If you’ve had problems with clogs before, you might want to do it more often.
Q: Can a full drain pan cause my AC to shut off?
A: Yes, many modern AC systems have a safety float switch in the drain pan or connected to it. When the water level rises due to a clog or pump failure, the switch activates and turns off the unit to prevent the pan from overflowing and causing water damage. If your AC is shutting off randomly, check the drain pan.
Q: I saw ice on my AC pipes outside. Is that normal?
A: A little bit of frost on the larger, insulated copper pipe (the suction line) leading to the outdoor unit on a very hot and humid day might be normal. However, if the pipe is heavily iced over, or if the smaller, uninsulated pipe (the liquid line) is also iced, it’s a sign of a serious problem, usually low AC refrigerant symptoms or very poor airflow. This indicates a problem requiring professional help.
Q: How much does it cost to fix an AC water leak?
A: The cost varies greatly depending on the cause. Changing a dirty filter is cheap. Unclogging a drain line yourself is also very inexpensive (cost of vinegar or vacuum). However, repairing a refrigerant leak, replacing a condensate pump, or fixing a cracked drain pan can cost several hundred dollars or more, depending on the complexity and parts needed. Water damage caused by the leak can also add significant repair costs.
Addressing the issue promptly can save you money in the long run by preventing more serious problems and costly home repairs. If you’re seeing water, don’t ignore it!