
As the leaves change color and a chill fills the air, it’s time to think about preparing your home for winter. One key task is getting your air conditioner ready for the cold months. Many people wonder, “How do I get my AC ready for winter?” Getting your AC ready for winter, or winterizing it, means protecting it from harsh weather like ice, snow, and freezing temperatures. This simple process helps stop damage, makes your unit last longer, and saves you money on costly repairs later. The most important simple steps are to shut off AC power supply, clean outdoor AC unit, and decide if you will cover central air conditioner. These steps to winterize AC are easy and important.
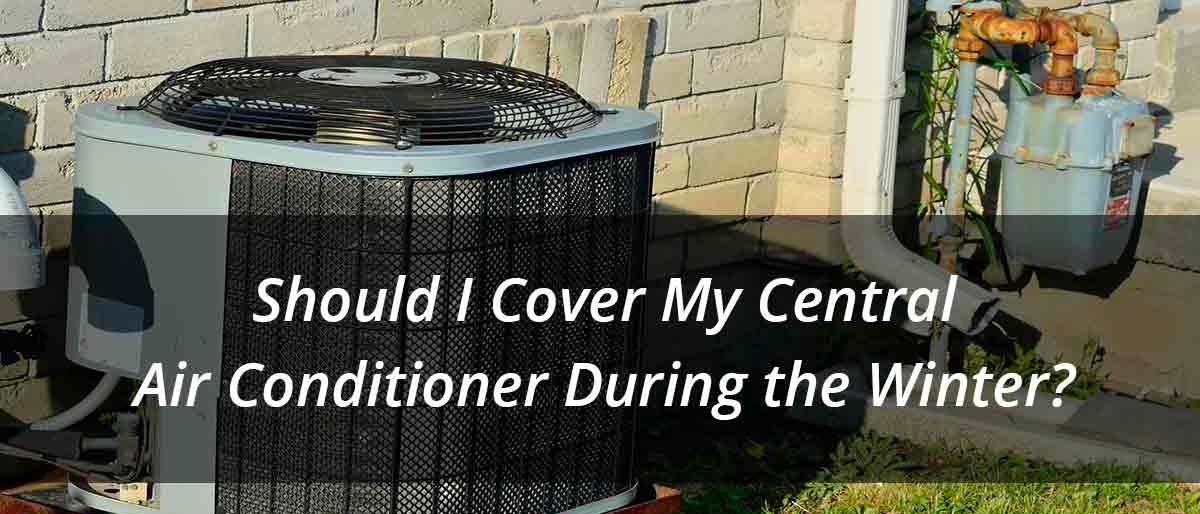
Image Source: www.jdsplumbingservice.com
Grasping Why Winter Prep Matters
Why should you take time to prepare your AC for winter? Isn’t it just sitting there? Well, winter weather can be tough on your unit. Freezing water inside or around parts can cause big problems. Snow and ice can build up, putting weight on the unit. Also, dirt and leaves that stayed on the unit after summer can mix with rain and snow, making a muddy mess that sits on parts and causes rust. Small animals might try to make a home inside for warmth, chewing wires. Proper winter air conditioner preparation stops these things from happening. It helps protect AC compressor, which is the heart of your AC unit. Doing AC maintenance winter tasks now keeps your AC working well for many summers to come.
Easy Steps to Get Your Outdoor AC Ready
Preparing your outdoor AC unit for winter is not hard. You can do most of the work yourself in an hour or two. Following these steps helps keep your unit safe and ready for spring.
Step 1: Turn Off the Electricity Safely
This is the very first and most important step. You must shut off AC power supply to your outdoor unit. This is for your safety. Never work on any appliance with the power still on.
h5 How to find the power switch
- Look for a metal box on the wall near your outdoor AC unit. It might be gray or another color.
- This box is the disconnect switch. It cuts the power to the unit.
- Open the box. Inside, you will see a switch or a pull-out block.
- Flip the switch to the “Off” position.
- If it’s a pull-out block, firmly pull it straight out. Take the block out and keep it somewhere safe, like in your garage or taped to the electrical box itself, so no one turns the power back on by accident.
h5 Check power at the main box
- For extra safety, you can also turn off the power at your home’s main electrical panel (the breaker box).
- Find the breaker or fuse labeled for your air conditioner.
- Flip the breaker to the “Off” position or remove the fuse.
- This makes sure no power can reach the outdoor unit at all.
Make sure the power is truly off before you touch anything on the unit. This step is not optional. It is necessary for safety.
Step 2: Clean Your Outdoor Unit
After the power is off, it’s time to clean outdoor AC unit. Removing dirt, leaves, and other stuff is important. This stops gunk from sitting on parts all winter and causing rust or other damage.
h5 Get rid of big stuff
- First, look around the base of the unit. Remove any leaves, branches, grass clippings, or trash.
- Clear away any plants or bushes that have grown too close. You want space around the unit for air to move, even in winter. About two feet of clear space is good.
h5 Clean the outside fins
- The fins are the thin metal slats around the sides of the unit. They can get clogged with dirt and debris.
- Use a soft brush or a fin comb (you can buy these at hardware stores) to gently brush down the fins. Brush from the top down.
- Be careful not to bend the fins. They are delicate. Bent fins can stop air flow.
- If the fins are very dirty, you can use a hose to gently spray water through them from the inside out. This pushes dirt away from the center of the unit. Make sure the power is OFF before using water.
h5 Clean the top of the unit
- Remove any leaves, sticks, or nests that have built up on top of the unit’s grille.
- Be careful if you remove the top grille to clean inside. Some units allow this easily, others do not. If you are not sure, just clean the outside well.
Cleaning helps keep parts from rusting and makes sure the unit is clean when you start it up again in the spring. It’s a simple but important part of AC maintenance winter.
Step 3: Check for Damage
With the unit clean, look it over closely. This is a good time to spot small problems before they become big ones.
h5 What to look for
- Check the fins again. Are any badly bent? You can try to gently straighten them with a fin comb or a dull knife, but be very careful.
- Look at the base of the unit. Is it sitting flat? Or has the ground shifted?
- Check for any loose wires. Do not touch them if the power isn’t completely off!
- Look at the insulation on the copper pipes that go into your house. Is it cracked or missing? This insulation protects the pipes.
If you see major damage, like a loose fan motor or bad electrical wires, it’s best to call a pro. But catching small things like bent fins or missing pipe insulation now is helpful.
Step 4: Think About Covering Your Unit
Should you cover central air conditioner? This is a common question. There are different ideas on this.
h5 Reasons to cover
- A cover can stop leaves, dirt, ice, and snow from getting inside the unit.
- It can stop animals from nesting inside.
- It might protect against falling ice or branches.
h5 Reasons not to cover fully
- Some people say a full cover can trap moisture inside, which can cause rust.
- Trapped moisture can also attract pests like mice.
- Modern units are built to handle snow and rain.
h5 What kind of cover?
- Most experts agree a full, airtight cover is not the best idea.
- A better option is a partial cover or a cover only for the top of the unit.
- A top-only cover is like a lid. It stops leaves and ice from falling inside but lets air flow freely through the sides. This lets moisture escape.
- You can buy covers made for AC units. Make sure it is breathable if it covers the sides.
h5 Making your choice
- If you live where winters are very harsh with lots of ice or falling debris, a top-only or breathable cover is a good idea.
- If you live where winter is mild, you might not need a cover at all. Clearing snow away from the unit after a storm might be enough.
- If you do use a cover, make sure it is made for AC units. Don’t use plastic sheeting or a tarp, as they trap moisture.
Using an AC unit winter cover, especially just on top, helps protect AC compressor and other vital parts from falling things and heavy snow load. This is a good step in protect AC compressor efforts.
Step 5: Protecting the Pipes and Lines
The insulated copper pipes (called the refrigerant lines) connect your outdoor unit to the indoor unit. They run along the side of your house. It’s important to check these too.
h5 Check the insulation
- Look at the foam insulation covering these pipes. Is it cracked, split, or missing in places?
- Damaged insulation means the pipes are exposed to the cold. While the liquid inside usually doesn’t freeze in these lines (it’s not water), the insulation protects the lines themselves and helps the system work right when it’s running.
- More importantly, damaged insulation can let water get to the pipes, and if that water freezes around the pipes, it could potentially cause issues, though prevent frozen AC pipes mainly applies to drain lines or water systems, not the refrigerant lines themselves which handle a special fluid. However, protecting the insulation is still good practice.
h5 Replace damaged insulation
- You can buy foam pipe insulation tubes at hardware stores.
- Cut the new insulation to the right length.
- Split it open lengthwise (many are already split).
- Wrap it around the pipe and tape the seam shut with weather-resistant tape.
- Replace all insulation that looks worn or damaged.
Protecting these lines keeps them in good shape and ready for work in the spring.
Putting Together the Steps to Winterize AC
Let’s put these tasks together into a simple plan. These are the main steps to winterize AC for an outdoor central air conditioning unit:
- Shut off AC power supply at the outdoor disconnect box AND ideally at the main breaker panel inside. Safety first!
- Clean outdoor AC unit: Remove leaves, dirt, and debris from around and on the unit. Gently clean the fins.
- Check the unit for any visible damage like bent fins or loose parts.
- Decide if you will cover central air conditioner. If so, use a breathable cover or a top-only cover. Don’t use a full, airtight plastic tarp. Using an AC unit winter cover helps protect AC compressor.
- Check and repair insulation on the refrigerant pipes running along the wall.
Doing these steps to winterize AC is a big part of proper AC maintenance winter. It helps protect AC compressor and the whole unit.
Winterizing Window AC Unit: Different Needs
Winterizing window AC unit is a bit different from a central AC unit. Window units are smaller and more exposed. You have a few options: remove it, or leave it in.
Option 1: Remove the Window Unit
Taking the unit out of the window is the best way to protect it.
h5 How to remove and store
- Carefully remove the unit from the window following the maker’s instructions. They are heavy, so get help if you need it.
- Clean the unit well. Remove the filter and clean it (or replace it if needed). Wipe down the inside and outside surfaces.
- Let the unit dry completely.
- Wrap the unit in plastic sheeting or a tarp. Use tape to seal it well. This stops dust, dirt, and pests from getting inside while it’s stored.
- Store the unit in a safe, dry place like a garage or basement. Avoid damp places. Store it upright if the maker says so, or lay it on its side if the instructions allow.
Removing the unit completely protects it from all kinds of winter weather. It also seals the window opening, stopping cold drafts from coming into your home. This saves on heating costs.
Option 2: Leave the Window Unit in Place
If you can’t remove the unit, you must protect it while it’s still in the window.
h5 How to protect a unit left in place
- Clean the unit well, just like you would if you were removing it.
- Shut off AC power supply to the unit. Unplug it from the wall. If it’s wired directly, turn off the breaker for that unit.
- Get a special window AC cover. These covers go over the outside part of the unit.
- Make sure the cover fits snugly. It should be made of a durable, weather-resistant material.
- Some covers include ties or straps to hold them in place against wind.
- You should also cover the inside part of the unit that is facing into your room. You can buy indoor AC covers or use thick plastic and tape to seal around the edges. This stops cold air from leaking in around the unit.
h5 What not to do
- Do not just wrap the outside unit in a plastic garbage bag. It won’t stay on well and can trap moisture, causing rust.
- Don’t forget to seal the inside part of the unit and the gaps around it in the window. Cold air leaks cost you money on heating.
Protecting a window unit left in place is important. It stops damage from weather and pests and helps keep your home warm and drafts out. This is a key part of winterizing window AC unit.
Going Deeper: Why Each Step Matters
Let’s look more closely at why these steps are so important for winter air conditioner preparation.
Why Shutting Off Power is Non-Negotiable
Ignoring the command to shut off AC power supply before cleaning or covering your unit is risky. The outdoor unit has electrical parts, including the fan motor and the compressor. If the power is on, even if the thermostat inside is off, a sudden temperature change or a faulty wire could cause the unit to start. Imagine cleaning fins or trying to put a cover on and the fan suddenly kicks on! This could cause serious injury. Also, working with electricity is dangerous. Always turn off the power at the disconnect box and the main breaker to be completely safe. This is step one for a reason.
Comprehending the Need for Cleaning
Cleaning the outdoor unit is more than just making it look nice. Leaves, dirt, grass, and other stuff build up over the cooling season.
h5 How debris causes problems
- Holds moisture: When this debris gets wet from rain or snow, it stays wet. This can cause parts of the metal unit to rust or corrode over the winter.
- Blocks drainage: Some units have drain holes in the base. Debris can block these holes, letting water collect inside, which can freeze and expand, potentially cracking parts.
- Attracts pests: Leaves and dirt are nice nesting materials for mice, insects, and other small animals looking for shelter from the cold. These pests can chew on wires or build nests that block air flow in the spring.
- Ready for spring: A clean unit is ready to go when warm weather returns. If it’s full of leaves and dirt, the fan might struggle to spin, or the coils might not work well, making your AC less efficient or even causing it to break down.
So, cleaning is not just busy work. It’s a critical part of AC maintenance winter that prevents damage and ensures smooth startup next year.
Interpreting the Role of the Cover
As we touched on, the AC unit winter cover debate is real. But focusing on protection from specific threats helps decide.
h5 What a cover truly protects against
- Falling objects: Ice dams falling from the roof, heavy snow, or branches can hit and damage the top or sides of the unit. A sturdy top cover offers protection.
- Heavy snow/ice build-up: While units can handle some snow, a very deep snowfall or layers of ice can put heavy weight on the top grille and fan, potentially bending or breaking them. A cover prevents this direct build-up.
- Internal debris: The biggest benefit is stopping leaves, dirt, and seeds from filling the inside of the unit through the top grille over the fall and winter. This reduces the cleaning needed in spring and stops debris from sitting on sensitive components like the contactor or wires.
The key is not to trap moisture. A cover that allows air flow from the sides or is just a top ensures debris protection without creating a damp, rust-prone environment. Using an AC unit winter cover correctly is about preventing physical damage and internal contamination while allowing the unit to breathe. This step especially helps protect AC compressor and the fan motor from direct impact or heavy load from snow/ice.
Fathoming How to Prevent Frozen Pipes
The phrase “prevent frozen AC pipes” most often applies to drain lines connected to the indoor unit, especially in systems that run in very cold weather (like heat pumps in defrost mode) or condensate drains. For the main refrigerant lines outside, the fluid inside does not freeze at typical winter temperatures. However, water can get under damaged insulation on the refrigerant lines and freeze, potentially expanding and causing issues over time, or just degrading the lines and insulation faster.
h5 Protecting drain lines
- If your system has an external drain line near the outdoor unit (less common for standard AC, more for heat pumps or condensate pumps), ensure it is clear of debris.
- Check the main condensate drain line connected to your indoor unit’s pan. While indoors, sometimes these run through unheated areas. Ensure this line isn’t clogged. A clogged line in cold weather could potentially back up and cause water damage or freeze where it exits the house, though this is less likely for a pure AC system that isn’t running in winter.
The main point for outdoor units related to “prevent frozen AC pipes” is ensuring any drain openings in the base are clear so melting snow or rain doesn’t pool and freeze inside the unit. Also, checking and fixing the pipe insulation on the refrigerant lines protects them from weathering and secondary issues like water getting trapped underneath and freezing.
The Importance of Protecting the Compressor
The compressor is the most expensive part of your AC unit. It’s a large, heavy component inside the outdoor unit. It’s built to be tough, but winter weather can still be a threat.
h5 Risks to the compressor
- Physical impact: Heavy ice or debris falling from above, or damage from snowplows near the unit, can potentially harm the compressor’s housing or the lines connected to it. Using an AC unit winter cover (especially a sturdy top cover) helps shield it.
- Internal moisture: While the compressor is sealed, moisture trapped inside the unit by a poor cover or clogged drains can lead to corrosion over time.
- Pests: Animals nesting inside can chew on the compressor’s wiring.
Proper winter air conditioner preparation, including cleaning, checking for damage, and using a sensible cover, all contribute to efforts to protect AC compressor. Think of these steps as putting your compressor into hibernation mode safely.
Detailed Steps for Different Climates
The steps to winterize AC might vary slightly based on where you live and the type of winter you usually have.
For Areas with Mild Winters
- Shut off AC power supply is still essential for safety when cleaning.
- Clean outdoor AC unit thoroughly to remove fall leaves and debris. This is likely the most important step here.
- Checking pipe insulation is still a good idea.
- Covering the unit might not be necessary at all. Just clear leaves and debris from around it. If you want some protection from falling leaves, a lightweight top-only cover might be used, but ensure good airflow.
- Check on the unit periodically to make sure it hasn’t filled up with leaves during windy spells.
For Areas with Heavy Snow and Ice
- Shut off AC power supply is critical for safety before any work.
- Clean outdoor AC unit well in the late fall before the first snow.
- Use a sturdy, breathable AC unit winter cover or a durable top-only cover designed to handle weight. This helps protect AC compressor from heavy snow and ice load.
- Consider building a small frame or enclosure around the unit (leaving plenty of space for air) to protect it from deep snow drifts or snowplows if it’s close to a driveway. Do NOT build an airtight box right up against the unit.
- Ensure the base of the unit is clear of debris so water can drain if snow melts and refreezes. This helps prevent frozen AC pipes (specifically, drain areas in the base).
- After heavy snowfalls, gently clear snow away from the sides and top of the unit, even if it is covered, to reduce overall load and ensure airflow isn’t blocked. Do not use sharp tools.
For Window Units in Cold Climates
- The best option remains removing the unit. This fully protects it and seals the window for better home insulation.
- If left in place, winterizing window AC unit means using a high-quality, snug-fitting outdoor cover AND sealing the inside part well with a cover or plastic sheeting and tape to stop drafts. Shut off AC power supply by unplugging or turning off the breaker.
Adjusting your winter air conditioner preparation based on your climate helps provide the right level of protection.
Common Mistakes to Avoid
When doing your AC maintenance winter, watch out for these common errors:
- Forgetting to turn off power: We said it before, but it’s worth repeating. Always shut off AC power supply.
- Using the wrong cover: Using a full, non-breathable plastic tarp traps moisture and does more harm than good. Use covers designed for AC units or just a top cover.
- Covering too early or removing too late: Wait until temperatures are consistently cold and you are sure you won’t need the AC again before covering. Remove the cover in early spring once cold weather has passed and before you might accidentally turn the unit on.
- Skipping the cleaning: Debris left inside or on the unit will sit there all winter, potentially causing damage.
- Ignoring damage: Don’t just cover up problems. If you see significant damage during cleaning, get it fixed by a pro before winter hits.
- Not sealing window units properly: If you leave a window unit in, drafts around it will waste energy and make your home cold. Seal it inside and out.
Avoiding these simple mistakes makes your steps to winterize AC much more effective.
When to Call a Professional
While much of winter air conditioner preparation is DIY friendly, there are times when calling a pro is wise:
- You are unsure how to safely shut off AC power supply.
- You find significant damage to the unit (like refrigerant leaks, damaged fan blades, or electrical issues).
- Your unit is very old or complex.
- You have a heat pump system (which runs in winter for heating and has different winterizing needs than a pure AC unit).
- You need help with specific tasks like checking refrigerant levels (which is not a winterization step but might be part of overall AC maintenance winter if a pro is there).
Most steps to winterize AC, like cleaning and covering, are easy for homeowners. But know your limits and prioritize safety.
Making Sense of AC Maintenance Winter Overall
Winter is a great time to do other related HVAC tasks. While you’re thinking about your outdoor unit, consider these:
- Change your furnace filter: If you use a furnace for heat, a clean filter helps it run better and saves energy.
- Check vents: Make sure heating vents inside your home are not blocked by furniture or rugs.
- Get furnace maintenance: Fall is the best time to have your furnace checked by a pro before the heavy heating season starts.
- Clear area around furnace/boiler: Make sure there’s clear space around your heating system indoors.
- Check carbon monoxide detectors: Ensure they are working properly.
Adding AC maintenance winter tasks to a broader fall home maintenance checklist helps get your whole home ready for the cold season.
Benefits of Proper Winterization
Taking the time for winter air conditioner preparation has real benefits:
- Protects against damage: Stops weather, ice, snow, and pests from harming the unit.
- Extends lifespan: A protected unit lasts longer, delaying the need for costly replacement. Proper care helps protect AC compressor.
- Prevents costly repairs: Simple steps now can avoid expensive fixes needed in the spring. Prevent frozen AC pipes (like drain areas) or damage from falling ice saves money.
- Ensures spring readiness: Your unit will be clean and ready to cool your home as soon as warm weather arrives.
- Saves energy: A well-maintained unit runs more efficiently. Also, properly winterizing window units stops drafts, saving on heating bills.
- Keeps warranty valid: Some manufacturers require basic maintenance, which includes proper seasonal preparation.
By following the steps to winterize AC, you invest a little time now to save a lot of hassle and money later.
Final Thoughts on Getting Ready for Winter
Preparing your air conditioner for winter is a simple process that offers big rewards. By safely turning off the power, cleaning the unit, checking for issues, and considering a breathable cover, you protect your investment. Winter air conditioner preparation is not just about covering a machine; it’s about preventing damage from the elements and pests, ensuring the unit is ready for efficient use next spring, and avoiding expensive repairs. Whether you are winterizing window AC unit or a central system, the core principles of safety, cleaning, and protection apply. Make AC maintenance winter a part of your fall home routine, and your AC will thank you for it with many more seasons of cool, reliable service.
Frequently Asked Questions (FAQ)
h4 How late in the year can I winterize my AC?
You should aim to winterize your AC after you are sure you won’t need it again, usually in late fall before the first hard freeze or heavy snowfall. Waiting until just before really cold weather hits is fine.
h4 Does winterizing an AC save energy?
Yes, indirectly. For central units, protecting the unit helps it run efficiently next year. For window units, properly sealing and covering them when they are not in use stops cold drafts, which absolutely saves energy on heating bills.
h4 Can I just throw a tarp over my AC unit?
No, this is not recommended. Full, non-breathable covers like tarps can trap moisture inside the unit, leading to rust and corrosion. Use a cover specifically designed for AC units that is breathable, or just a top-only cover.
h4 Do I need to do anything to the indoor part of my central AC?
Not usually. The indoor unit (air handler or furnace coil) is inside your home and not exposed to winter weather. Your main winter prep is for the outdoor unit. However, ensure your furnace filter is clean if you use forced air heating.
h4 Will snow damage my AC unit if I don’t cover it?
Modern AC units are built to withstand snow and rain. A moderate amount of snow is usually not harmful. The main risks are heavy ice buildup, physical damage from falling ice or snow, or debris mixed with snow sitting on the unit. Covering is mainly for preventing debris buildup and potential physical damage, and perhaps heavy snow load in certain climates.
h4 How do I know if my AC unit has a drain hole that needs clearing?
Most outdoor central AC units have small drain openings in the base pan to allow water to escape. You can usually see them by looking into the base of the unit after removing outer debris. Ensure these holes are clear of leaves or dirt.
h4 Is it necessary to protect AC compressor separately?
No, you don’t typically need to protect the compressor separately with its own cover. The steps to winterize the whole outdoor unit (cleaning, covering the top or using a breathable unit cover) are designed to protect all the internal components, including the compressor, from the main winter threats. Protect AC compressor is an outcome of the overall winterization process.