
Can you roast coffee beans in your oven at home? Yes, you absolutely can! Roasting coffee beans in your oven is a great way to start home coffee roasting. You can turn simple green coffee beans into fresh, tasty coffee right in your kitchen. This guide will show you how to do it. It is a fun DIY coffee roasting project.
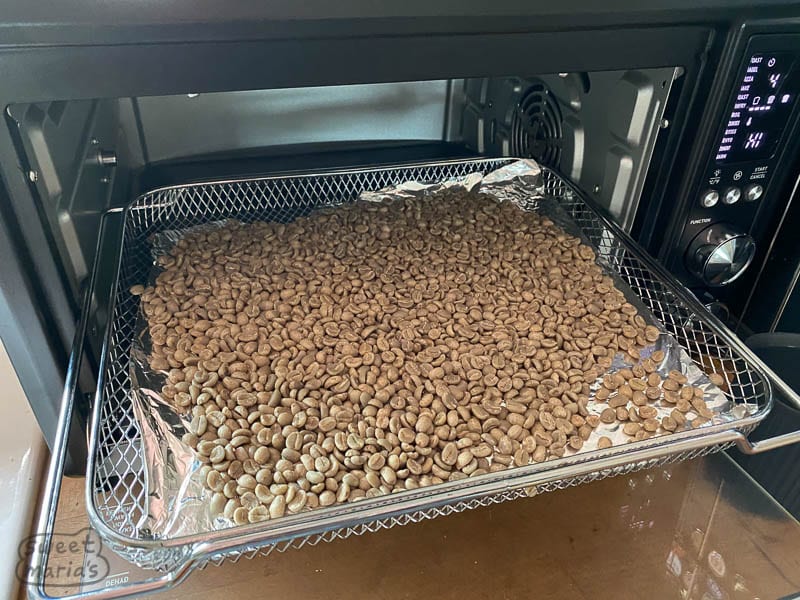
Image Source: library.sweetmarias.com
Why Roast Coffee at Home?
Roasting coffee at home lets you have super fresh beans. Freshness gives you the best flavor. You can also pick the green coffee beans you like. Then you can roast them just how you want. You control the roast level. This means you can make coffee that tastes just right for you. It is a fun and rewarding hobby.
What You Need
You do not need fancy tools to start. The oven method is quite simple. You likely have most things already.
Basic Supplies
- Green Coffee Beans: This is where you start. Buy good quality green coffee beans. Look for ones meant for home roasting.
- Oven: You need a working oven. Most home ovens will do.
- Baking Sheet: A standard metal baking sheet works well. A rimmed one is best. This stops beans from rolling off.
- Something to Stir With: A wooden spoon or spatula is fine.
- Timer: Use your phone or a kitchen timer. Timing is important for controlling the roast.
- Oven Mitts: The baking sheet gets very hot.
- Something to Cool Beans: More on this later. It is key for cooling roasted coffee beans fast.
Optional but Helpful Items
- Thermometer: An oven thermometer helps check your oven’s true heat. Ovens can be wrong.
- Colander or Sieve: Good for quickly cooling beans.
- Fan: A small fan helps cool beans faster.
- Jars or Bags: For storing roasted coffee.
Getting Ready to Roast
Before you start the oven temperature for roasting coffee, you need to get things ready. This part is easy.
Clean Up
Make sure your oven is clean. Leftover food smells can mess up your coffee flavor. Wipe down the inside. Make sure your baking sheet is clean too.
Prepare the Beans
Measure out your green coffee beans. Do not put too many on the baking sheet. A thin layer is best. One layer deep is perfect. About 1/2 to 1 cup of green beans is a good start. Too many beans will pile up. This causes an uneven coffee roast. Spread them out evenly on the baking sheet coffee roasting surface.
Heat the Oven
This is a key step. You need the oven temperature for roasting coffee to be high. Most people start between 400°F and 500°F (about 200°C to 260°C). A common starting point is 450°F (about 230°C).
Set your oven to your chosen temperature. Let it heat up fully. This takes time. Maybe 15-20 minutes or more. An oven thermometer helps you know when it is truly hot enough inside. A stable temperature is important for a good roast.
The Roasting Process: Watching the Change
Now for the fun part! You will see the green coffee beans change color. They will make sounds too. This is part of the home coffee roasting magic.
Putting Beans In
Carefully slide the baking sheet with the green beans into the hot oven. Close the door. Start your timer right away.
Watching and Listening
Stay near the oven. Do not leave the kitchen. Coffee roasting happens fast, especially at the end. Look through the oven window. Watch the beans change.
- Minute 0-5: The beans are still green. They might start to smell a bit grassy or like hay. They are drying out.
- Minute 5-8: The beans start to turn yellow. They look like roasted nuts sometimes. Water is leaving the beans. Steam might come out.
- Minute 8-12: The beans get lighter brown. They are roasting now. They start to smell like coffee.
- First Crack: Listen carefully! You will hear popping sounds. It sounds like popcorn popping, but not as loud. This is called first crack coffee. This sound means the beans are starting to expand. They are getting bigger. Water is turning to steam inside. This is an important point. Your roast is entering the lighter roast levels. First crack can last for a few minutes.
Stirring the Beans
You need to stir the beans. This helps prevent an uneven coffee roast. Take the baking sheet out carefully using oven mitts. Stir the beans around with your spoon. Spread them back out evenly. Do this maybe every 3-5 minutes. Put the baking sheet back in the oven quickly. Close the door. This keeps the heat inside.
After First Crack
Keep watching and listening after first crack coffee starts.
- Light Roast: The beans have just finished popping the first crack. They are light brown. They have a bright, often fruity or floral taste.
- Medium Roast: The beans get darker brown. The popping from first crack slows down or stops. You might hear some snaps or crackles now, but not the full pops of first crack. Medium roasts balance flavor and body.
- Second Crack: If you keep roasting, you will hear more pops. These are softer sounds than first crack. This is called second crack. The beans are getting darker. Oils might start to show on the beans. This means you are reaching darker roast levels.
- Dark Roast: The beans are dark brown or black. They might look oily. The taste is more bold, smoky, or chocolatey. Second crack is happening fast or is finished.
Knowing the roast levels helps you decide when to stop. It depends on how you like your coffee. Stopping during first crack gives you a light roast. Stopping between first crack and second crack gives medium roasts. Stopping during or after second crack gives dark roasts.
Stopping the Roast and Cooling
Taking the beans out at the right moment is vital. Stopping the roast is just as important as the roasting itself.
Timing is Everything
Decide what roast level you want. Watch the beans closely as they approach that stage. Listen for the cracks. Look at the color. When the beans look like you want them, take them out right away. Use your oven mitts.
Cooling Roasted Coffee Beans
You must cool the beans down fast. They keep roasting from their own heat after you take them out of the oven. This is called carry-over heat. Fast cooling stops this. It locks in the flavors you worked for.
- Method 1: Two Baking Sheets: Have another cool baking sheet ready. Quickly pour the hot beans from the roasting sheet onto the cool one. Spread them out. This helps heat leave fast.
- Method 2: Colander: Pour the hot beans into a metal colander or sieve. Shake the colander. This lets air get to the beans. You can also blow on them gently or use a fan. A fan is very helpful for fast cooling.
- Method 3: Mixing Bowl: Pour beans into a large metal or glass bowl. Stir them around quickly with a spoon. This moves them so they cool.
Keep moving the beans until they are just warm to the touch. They should not be hot. This takes a few minutes. Fast cooling is a key step for good coffee flavor.
After Roasting: Resting and Storing
Your beans are roasted and cooled! But they are not ready to brew yet.
Letting Beans Rest
Freshly roasted coffee releases gas, mainly carbon dioxide. This is called degassing. If you brew coffee right after roasting, the gas makes it hard to make a good cup. The coffee can taste flat or off.
Let your beans rest. This means storing them but not using them yet. For most roast levels, wait at least 12-24 hours. Medium and darker roasts may need longer, maybe 24-72 hours. Light roasts might be good a bit sooner. Experiment to find what you like.
Storing Roasted Coffee
Properly storing roasted coffee keeps it fresh longer. Air, light, heat, and moisture are bad for roasted coffee.
- Use an airtight container. A jar with a tight lid works. Bags with one-way valves are also good. These let gas out but no air in.
- Keep the container in a cool, dark place. A pantry or cupboard is perfect.
- Do not store coffee in the fridge or freezer for daily use. Taking it in and out causes moisture changes. For long-term storage (weeks/months), freezing in a truly airtight bag can work, but it’s debated. For home roasting, just roast smaller batches you will use in 1-2 weeks.
- Roast only what you will use in about 1-2 weeks. Coffee is best when used within this time after resting.
Storing roasted coffee correctly helps keep that fresh roasted taste you made yourself!
Dealing with Common Issues
DIY coffee roasting can have small problems. Here are a few and how to fix them.
Uneven Coffee Roast
Sometimes beans on the same tray are different colors. Some light, some dark. This is an uneven coffee roast.
- Why it happens: Beans not spread evenly. Not stirring enough. Hot spots in the oven. Too many beans on the tray.
- How to fix: Spread beans in a thin layer. Stir them more often (every 3-4 minutes). Try using a different baking sheet. If your oven has hot spots, try turning the tray halfway through. Roast smaller batches.
Beans Not Cracking
You are waiting but hear no first crack coffee.
- Why it happens: Oven not hot enough. Not enough beans (heat leaves too fast). Beans are old.
- How to fix: Use an oven thermometer to check the real temperature. Make sure the oven is fully heated. Use the recommended oven temperature for roasting coffee (400-500°F). Try roasting a slightly larger batch (still a thin layer). Make sure your green coffee beans are fresh.
Burnt Smell
If your kitchen smells burnt, you might have roasted too dark.
- Why it happens: Roasted too long. Oven too hot.
- How to fix: Watch the beans very closely at the end. Pull them out sooner next time. Check your oven temperature for roasting coffee. It might be hotter than you think. Remember, roasting happens fast after first crack.
Understanding Roast Levels
Choosing your roast level is part of the fun of home coffee roasting. Here is a simple guide.
| Roast Level | Color | Sound Timing | Taste Notes (General) |
|---|---|---|---|
| Light Roast | Light brown | Just finished 1st crack | Bright, fruity, floral, high acid |
| Medium Roast | Medium brown | Between 1st & 2nd crack | Balanced, complex, sweet |
| Medium-Dark | Darker brown | Just finished 2nd crack | Bolder, bittersweet, less acid |
| Dark Roast | Very dark | During or after 2nd crack | Smoky, burnt sugar, chocolate |
Remember, these are general ideas. Every coffee bean is different. Try roasting the same green coffee beans to different levels. See which one you like best. This is the joy of DIY coffee roasting.
Pros and Cons of Oven Roasting
Baking sheet coffee roasting in the oven is a good way to start home coffee roasting. It has good points and bad points.
Good Points (Pros)
- Simple: You use tools you have. No need to buy special gear at first.
- Low Cost: Very cheap way to start. Just need beans and maybe a sheet.
- Good for Learning: You can watch the beans change. You learn the sounds and smells.
- Small Batches: Easy to roast small amounts. Great for trying different beans or roast levels.
Bad Points (Cons)
- Unevenness: Can be hard to get an even coffee roast. Heat in ovens can vary. Beans might not all roast the same.
- Smoke and Smell: Roasting makes smoke and smells. Do it near an open window or with good air flow.
- Control: Harder to control the heat precisely than with special roasters.
- Small Batches Only: You can only roast small amounts at a time for best results. Cannot roast much coffee for friends easily.
- Monitoring: Needs you to watch and stir constantly.
Even with the cons, oven roasting is a great first step into DIY coffee roasting. It teaches you the basics.
Moving Beyond the Oven
If you love oven roasting, you might want to try other ways. Home coffee roasting can use different tools.
- Air Popcorn Popper: Some old models work great as small hot-air roasters. Cheap and fast.
- Drum Roasters: Small machines designed for home use. Give more control and evenness. Cost more money.
- Special Pans: Pans made for stovetop roasting. You shake them over heat.
The oven is a solid place to start your coffee roasting journey. It helps you learn what to look for. Then you can try other methods if you want.
Enjoying Your Roasted Coffee
You have roasted, cooled, and rested your beans. Now it is time to brew!
Grind your beans just before you brew. Use the right grind size for your brew method (drip, pour-over, espresso, etc.). Use fresh water.
Taste the coffee you made! Think about how it tastes. Was it what you wanted? Was it too light? Too dark? Next time, you can change things. Maybe a higher oven temperature for roasting coffee. Maybe stop sooner after first crack coffee. This trying and changing is a big part of home coffee roasting.
Tips for Better Oven Roasting
Here are a few extra tips to help you get a great roast.
- Preheat Longer: Give your oven extra time to heat up. This makes the temperature more steady.
- Use a Heavy Tray: A heavier baking sheet holds heat better. This can help with evenness.
- Know Your Oven: Every oven is different. Watch your first few roasts very closely. Learn how your oven acts.
- Take Notes: Write down the date, the green coffee beans used, the oven temperature for roasting coffee, the time it took, and when you heard first crack coffee and second crack. Write down notes about the taste after brewing. This helps you learn and get better.
- Roast by Sight, Sound, and Smell: Do not rely only on time. The beans will tell you when they are ready by how they look, sound, and smell.
- Practice Cooling: Get fast at cooling roasted coffee beans. It makes a real difference.
The Smell of Fresh Roast
One of the best things about home coffee roasting is the smell. As the beans roast, your kitchen fills with the amazing smell of fresh coffee. It is much better than the smell of unroasted green coffee beans! When you finish, and the beans are cooling, the smell is fantastic.
Roasting coffee in your oven is a full sensory experience. You see the color change. You hear the cracks (first crack coffee, second crack). You smell the deep coffee smells. You touch the beans when cooling. And finally, you taste the result of your DIY coffee roasting work.
Roasting Small Batches
Remember, you are doing baking sheet coffee roasting. This method is best for small amounts. Do not try to roast pounds of coffee at once. Stick to 1-2 cups of green coffee beans per tray. Roasting too much at once is a major reason for an uneven coffee roast. Small batches let you have more control. They also let you try different roasts often. You can always have super fresh coffee on hand.
Why Temperature Matters
The oven temperature for roasting coffee affects how fast the beans roast. Higher heat means faster roasting. Lower heat means slower roasting.
- Too Hot: Roasting too fast can burn the outside of the bean before the inside is ready. This can lead to burnt taste or unevenness.
- Too Cold: Roasting too slow can make the coffee taste flat or bready. The flavors do not develop well.
Finding the right temperature for your oven and your beans takes practice. Start with a common temperature like 450°F. See what happens. Make small changes next time if needed. This is part of learning DIY coffee roasting.
Safety First
Roasting coffee involves high heat. It also makes smoke. Be careful.
- Always use oven mitts when handling the hot baking sheet.
- Make sure you have good air flow. Open windows. Use a fan. Smoke can set off smoke alarms.
- Do not leave the roasting area. Things can go wrong fast.
- The beans are very hot right after roasting. Be careful when cooling roasted coffee beans.
Keep safety in mind while you enjoy your home coffee roasting project.
How Long Does it Take?
The time it takes to roast coffee in the oven varies. It depends on your oven, the temperature, how many beans you roast, and the roast level you want.
- Total time: From putting beans in to taking them out, it usually takes 10-20 minutes.
- First crack coffee: Often happens between 8-12 minutes.
- Second crack: Often happens between 12-16 minutes.
These times are just guides. Watch the beans, not just the clock. The look and sound are better guides than the timer alone.
What Kind of Green Coffee Beans to Start With?
When you are new to home coffee roasting, start with good quality green coffee beans. Many online stores sell beans specifically for home roasting.
- Try a blend first: Some places offer starter blends. These can be easier to roast evenly.
- Single origin beans: Once you feel more comfortable, try beans from one country or farm. Each has its own unique taste.
- Experiment: Do not be afraid to try different types of green coffee beans. This is part of the fun!
Make sure the green coffee beans are fresh (recently harvested and processed). Stale green beans do not roast well.
Final Thoughts on Oven Roasting
Roasting coffee in your oven might not give you the most perfect, even roast possible every single time. It is a simple, hands-on method. It is great for learning the basics. It lets you taste super fresh coffee. You learn about first crack coffee, roast levels, and the need for cooling roasted coffee beans.
It is a rewarding way to connect with your coffee. You take raw green coffee beans. You use a basic tool like a baking sheet coffee roasting tray in your oven. You make something wonderful. DIY coffee roasting is a journey. The oven is a fine place to start that trip.
Keep trying. Take notes. Soon you will be achieving perfect roasts for your taste buds right at home. Enjoy the process and the delicious coffee!
Frequently Asked Questions (FAQ)
How much coffee can I roast at once in the oven?
For best results, roast about 1/2 cup to 1 cup of green coffee beans per baking sheet. Spread them in a single layer. Roasting too many leads to an uneven coffee roast.
What temperature is best for oven roasting?
A common starting oven temperature for roasting coffee is 450°F (230°C). Some people go higher, up to 500°F (260°C). Start around 450°F and see how it works in your oven.
How long do I roast coffee in the oven?
It usually takes 10-20 minutes. First crack coffee often happens around 8-12 minutes. Watch the beans and listen for sounds. Do not just rely on time.
How do I know when first crack coffee happens?
You will hear sounds like small pops. It is softer than popcorn. This sound means the beans are starting to crack open and expand.
Why do I need to cool roasted coffee beans quickly?
Beans keep cooking after they leave the oven due to their heat. Fast cooling stops this. It helps lock in the desired roast level and flavor.
How do I store my roasted coffee?
Store cooled beans in an airtight container. Keep it in a cool, dark place. Use them within 1-2 weeks for the best flavor.
Why are some of my beans darker than others?
This is an uneven coffee roast. It can happen if beans are not spread thin, not stirred enough, or if your oven has hot spots. Stirring often helps make the roast more even.
What are roast levels?
Roast levels describe how dark coffee beans are roasted. They range from light to dark. Each level has different flavors. Light roasts are bright, dark roasts are bold.
Can I use any green coffee beans?
Buy green coffee beans sold for home roasting. They should be fresh (recently processed).
Is home coffee roasting hard?
Starting with the oven is simple DIY coffee roasting. It takes practice to get the roast just right. But the steps are easy to follow.
Does it make a lot of smoke?
Yes, roasting coffee creates smoke, especially darker roasts. Make sure you have good air flow when you roast.
Why do I need to let the beans rest before brewing?
Freshly roasted beans release gas. Resting (degassing) lets this gas escape. This makes the coffee taste better when brewed. Wait 12-72 hours depending on the roast.