
Removing an RV fridge might seem like a big job. But you can do it yourself. It takes careful steps and the right tools. This guide will show you how. We will cover everything you need to know.
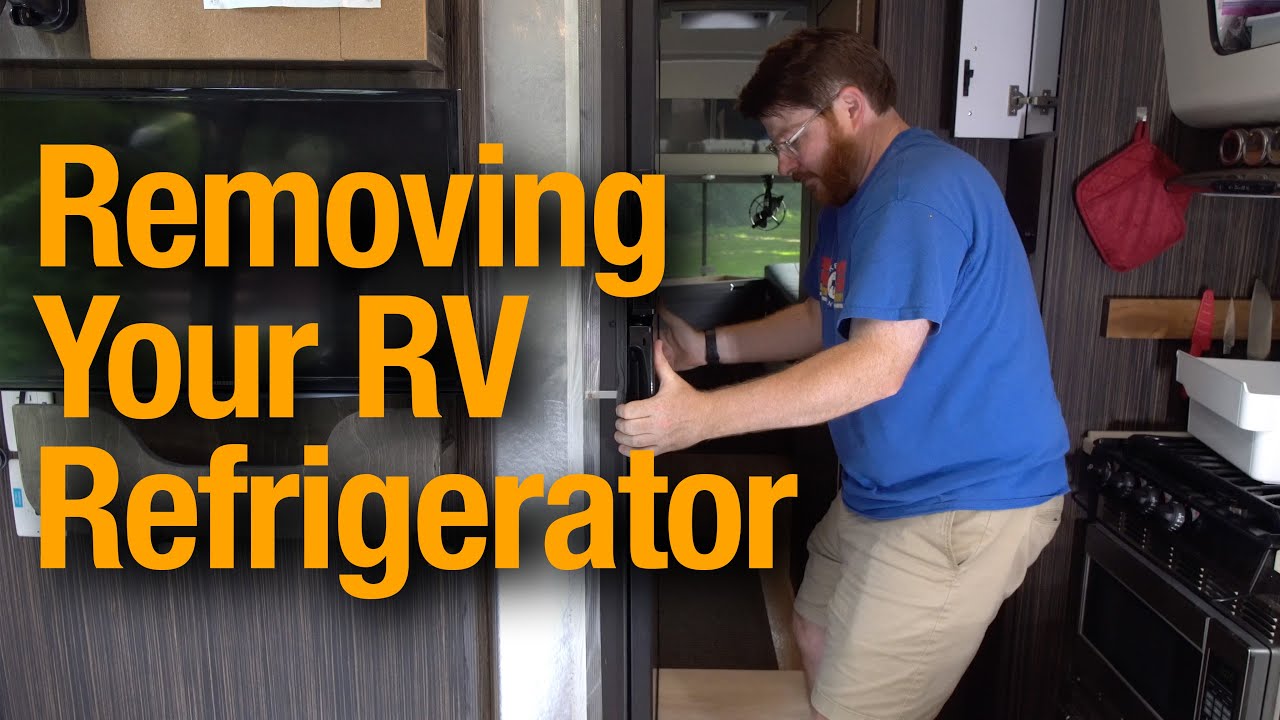
Image Source: i.ytimg.com
Why Take Out Your RV Fridge?
People take out their RV fridge for a few reasons. Maybe it stopped working. You might want to put in a new, better one. Or you might need to fix something behind or under it. No matter the reason, knowing the steps helps a lot.
Getting Ready for Work
Before you start pulling anything, you need to get ready. This is a key step. Being ready keeps you safe. It also makes the job easier.
Safety First: Tips for RV Fridge Removal
Safety is the most important part. RV fridges use gas and electricity. Both can be dangerous. Here are simple safety rules to follow.
- Turn off all power. Make sure the RV is not plugged into shore power. Turn off the main breaker for the RV’s AC power. Turn off the DC power switch or disconnect the battery. This will disconnect RV fridge power.
- Turn off the gas. RV fridges use propane. Propane is flammable. You must shut off RV gas line for fridge. Find the main propane tank valve. Turn it off completely. Some fridges also have a small valve near the fridge itself. Turn that off too if you can find it.
- Work outside or in a well-aired place. Propane can build up if there’s a leak. Good air flow helps.
- Get help. RV fridges are heavy. They are also awkward shapes. Trying to lift or pull one alone can cause injury. Ask a friend to help you.
- Lift with your legs. If you need to lift the fridge, bend your knees. Keep your back straight.
- Wear gloves. This protects your hands.
- Wear safety glasses. Protect your eyes from dust or falling things.
- Check for gas leaks after disconnecting. You can use a special leak detection spray or soapy water. Look for bubbles.
Tools Needed to Remove RV Refrigerator
You will need some basic tools for this job. Having them ready saves time.
- Screwdrivers: Both Phillips and flathead. You will need different sizes.
- Wrench set or adjustable wrench: For gas line fittings.
- Nut drivers or socket set: For nuts and bolts.
- Putty knife or pry tool: To gently loosen trim or sealed edges.
- Wire cutters/strippers: To cut and re-strip wires if needed.
- Voltage tester: To check wires are not live. Very important!
- Flashlight or headlamp: To see in tight spots.
- Tape: Electrical tape and maybe duct tape.
- Marker: To label wires. This helps when putting a fridge back.
- Moving blanket or cardboard: To protect floors and the fridge.
- Gloves: Work gloves.
- Safety glasses.
- Dolly or hand truck (optional but helpful): For moving the fridge once it’s out.
Emptying and Clearing the Space
Empty the fridge completely. Take out all food and shelves. Clean it well. This makes it lighter and cleaner to handle.
Clear the area in front of the fridge. You will need space to pull it out. Protect your floor with a blanket or cardboard.
Disconnecting Everything
This is a critical step. You must disconnect the power and gas before you do anything else.
Disconnect RV Fridge Power and Gas
First, make sure all power is off. We talked about this in the safety section. No AC power from the wall. No DC power from the battery. Use your voltage tester to check wires before you touch them.
Second, make sure the gas is off. The main tank valve must be closed.
Shut Off RV Gas Line for Fridge
Find the gas line connection at the back of the fridge. It’s usually a copper or flexible gas line. There might be a small valve right there. If so, turn it off. Even if there is a valve here, you MUST turn off the main tank valve outside too.
Use your wrench to loosen the fitting on the gas line where it connects to the fridge. Hold the fitting on the fridge side with one wrench. Use another wrench to turn the nut on the gas line. Turn slowly. You might hear a small hiss as gas leaves the line. This is normal if there was pressure left. Once loose, carefully separate the gas line.
- Important: The gas line fitting uses a special type of flare fitting. Be careful not to bend or damage the line or the fitting on the fridge.
Accessing the Back of the Fridge
Most RV fridges are installed from the inside. But the connections (power, gas, vent) are often accessed from the outside of the RV.
RV Refrigerator Access Panel Removal
Look on the outside of your RV. You will find one or two plastic or metal panels. These panels are usually held on by screws. Sometimes they have latches.
- Find the screws or latches on the access panel.
- Remove the screws or open the latches.
- Carefully pull the panel away from the RV wall.
- You will now see the back of the fridge. You will see the burner area, control board, wires, and gas line connection.
There might be a second panel higher up for the chimney vent. You might need to remove this one too. It depends on your fridge model and how it was installed.
Disconnecting Electrical Wires
Inside the access panel, you will see wires. There will be 120V AC wires (like house current) and 12V DC wires (from the battery). There will also be wires for the control board, light, and heating element.
- Verify Power is Off: Use your voltage tester again! Touch the tester to the AC wires (usually black and white or black and blue). Touch it to the DC wires (usually red and white or red and black). Make sure there is no power.
- Label Wires: This is very important for putting a new fridge in. Use tape and a marker. Label each wire clearly. For example, “12V Pos”, “12V Neg”, “AC Hot”, “AC Neutral”, “Control Board P1”, etc.
- Disconnect: Wires are usually connected with wire nuts or screw terminals. Carefully twist off wire nuts. Unscrew terminals. Keep track of any small screws.
Some wires might run through a small hole into the RV cabin to the control panel. You might need to disconnect these from the front or just pull them through from the back. Label them!
Double-Checking the Gas Line
You already loosened the main connection at the fridge. Make sure the line is free and won’t catch on anything when you pull the fridge out. If there was a small valve at the fridge, make sure it is closed.
Checking for Water Lines
Some RV fridges have ice makers. If yours does, there will be a water line connected to the back of the fridge. You need to turn off the water supply and disconnect this line.
- Find the water shut-off valve for the fridge (if you have one). It might be near the fridge or in a basement compartment. Turn it off.
- Disconnect the water line at the back of the fridge. There might be a valve or a quick-connect fitting. Have a towel ready, as some water will spill out.
Finding and Releasing the Mounts
RV fridges are held in place by screws or brackets. These mounts keep the fridge from moving while the RV is on the road.
Unfasten RV Refrigerator Mounts
The mounting screws are usually inside the RV cabinet, around the front edge of the fridge. Open the fridge door. Look around the frame inside the cabinet opening.
- Look for screws hidden under plastic caps or trim pieces. Gently pry off any caps.
- Look inside the freezer section too. Sometimes screws are hidden under ice maker parts or vents.
- Look on the sides or top of the fridge opening inside the RV.
Use the right screwdriver to remove these screws. There might be screws on the sides, top, and bottom. The number and location of screws varies by fridge model and RV maker. There are usually 4 to 8 mounting screws.
- Tip: Keep the screws in a small bag or cup so you don’t lose them.
Some fridges might have brackets on the outside, accessed through the exterior panel. Check the top and bottom areas visible from the access panel for any metal brackets screwed to the RV frame or floor. Remove these if they are present.
Securing RV Fridge for Removal
Before you remove the last mounting screws, make sure the fridge won’t fall forward. It’s heavy!
With most screws out, gently try to wiggle the fridge. See how loose it is. If it feels like it could tip, put something under the front edge for support. You can use blocks of wood or thick books. Just enough to keep it from tilting out as you remove the final screws. This step is part of securing RV fridge for removal.
Once all mounting screws and external brackets (if any) are removed, the fridge should be free to move forward.
Taking the Fridge Out
Now comes the part where you physically remove the fridge. This is where having help is really important.
Sliding RV Refrigerator Out of Cabinet
The fridge is now free from its mounts. It’s ready to slide forward.
- Make sure your floor protection (blanket or cardboard) is in place.
- Have your helper ready. One person on each side if possible.
- Get a good grip on the sides of the fridge. Be careful of sharp edges or components on the back.
- Slowly and gently pull the fridge straight out of the cabinet opening. It should slide forward.
- Pull it out about 1-2 feet (30-60 cm). This gives you better access to the rear connections if you didn’t get them all from the outside panel.
Sometimes the fridge might feel stuck. Check again for any missed screws (inside or outside). Check that the gas line, electrical wires, and water line (if any) are fully disconnected and not snagged. Be gentle. Don’t force it hard.
Pulling Out RV Fridge Completely
Once the fridge is pulled partially out, finish disconnecting anything still attached. Double-check all wires, gas line, and water line. Make sure nothing is holding it back.
Now, with your helper, carefully pull the fridge the rest of the way out of the opening.
- Grip the fridge firmly on the sides or bottom.
- Lift slightly if needed to clear the bottom edge of the cabinet opening.
- Walk backward slowly, guiding the fridge out.
- Be careful not to hit the door frames or walls of the RV.
- Lower the fridge gently onto your protective floor covering.
If you have a dolly or hand truck, carefully get the fridge onto it now. This makes moving it much easier.
RV Absorption Fridge Removal Steps Specifics
Most RV fridges are “absorption” fridges. The steps above apply well to these. They work using heat (from gas or electricity) to cool. They have a distinct chimney at the back for venting heat. When removing this type:
- Pay attention to the vent system. Sometimes parts of the vent ducting need to be detached from the top of the fridge inside the wall. This is often accessed from the top exterior access panel.
- Be aware of the boiler section at the back (near the burner). This area can be fragile. Don’t put pressure on the cooling unit tubes or boiler.
If you are removing a residential style fridge put into an RV, the steps might differ slightly, especially regarding venting (they use fans) and mounting (they might be bolted to the floor or walls differently). Always check your fridge and RV manuals if you have them.
What to Do After Removal
Once the fridge is out, take a look at the space.
- Inspect the floor and walls behind where the fridge was. Look for any damage, dirt, or signs of leaks. Clean the area well.
- Check the vent path. Make sure it is clear of debris.
- If you are putting a new fridge in, compare its size and connection locations to the old one. Make sure it will fit and connect properly.
- Cap off the end of the gas line that supplied the fridge. This prevents any accidental gas leaks. You can use a brass cap of the correct size. This is important!
- Secure or cap off any loose electrical wires.
Common Questions About Taking Out an RV Fridge
Here are answers to some questions people often ask.
How long does it take to remove an RV fridge?
It usually takes a few hours. It depends on your RV, the fridge model, and if you have help. If you are prepared and have the right tools, it will go faster.
Is it hard to remove an RV fridge?
It can be challenging, mainly because fridges are heavy and bulky. The work space can be tight. But the steps are not overly complex. Taking your time and following safety steps makes it much easier. Having a helper is key for the heavy lifting/pulling part.
Do I need a professional to remove my RV fridge?
No, not necessarily. If you are comfortable working with basic tools, gas, and electrical systems (after safely turning them off!), you can do it yourself. If you are not comfortable with gas or electrical work, or if the fridge seems unusually stuck, calling a qualified RV technician is a good idea.
Can I replace my RV absorption fridge with a residential one?
Yes, many people do this. Residential fridges use compressors like your home fridge. They cool faster and hold temp better. But they use more electricity, usually only running on 120V AC power. You will need a good inverter and battery bank to run one off-grid. The removal steps are similar, but fitting the new one and managing power needs planning.
What if I smell propane?
Stop immediately. Turn off the main propane tank valve outside. Open windows and doors to air out the RV. Do not turn on any lights or appliances. Do not use anything that could create a spark. Find the source of the smell. If you cannot find it or the smell is strong, leave the RV and call for professional help. Always check for leaks after working on gas lines.
How do I check for gas leaks?
After you disconnect and later reconnect gas lines, you must check for leaks. You can buy leak detector spray at RV stores or hardware stores. Spray it on the gas fittings. If you see bubbles forming, you have a leak. You can also mix dish soap and water in a spray bottle. Spray the soapy water on fittings. Bubbles mean a leak. If you find a leak, tighten the fitting carefully or replace the part if needed. Check again.
What should I do with the old fridge?
Check with local waste disposal or recycling centers. RV fridges contain chemicals in their cooling units that should not be released into the environment. They need special handling.
Table: Summary of Key Steps
Here is a quick look at the main steps for removal.
| Step | Action | Why It’s Important |
|---|---|---|
| 1. Prepare | Gather tools, clear space, get helper. | Saves time, makes work smoother. |
| 2. Ensure Safety | Turn off power (AC/DC), turn off gas at tank and fridge. | Prevents electric shock or fire/explosion risk. |
| 3. Empty Fridge | Remove all contents and shelves. | Makes fridge lighter, cleaner. |
| 4. Access Connections | Remove exterior access panels. | Lets you reach gas line, wires, vent. |
| 5. Disconnect Utilities | Disconnect and label electrical wires (AC/DC), gas line, water line (if any). | Allows fridge to be moved, prevents damage/leaks. |
| 6. Locate Mounts | Find all screws/brackets holding fridge in place (inside and outside). | These are what secure the fridge to the RV structure. |
| 7. Unfasten Mounts | Remove all mounting screws/brackets. | Frees the fridge from the cabinet. |
| 8. Secure Fridge | Briefly support the fridge before final unfastening. | Prevents fridge from tipping out. |
| 9. Pull Out Fridge | Carefully slide fridge forward with a helper. | Removes the appliance from the opening. |
| 10. Post-Removal Clean Up | Clean the space, cap gas line, secure wires. | Prepares for new fridge or repair, ensures safety. |
Completing the Job
Taking out an RV fridge is a job you can do. It needs patience and attention to detail. Always put safety first. Shutting off power and gas completely is the most important step. Use the right tools. Don’t rush. Get help for the heavy lifting.
By following these steps, you can successfully remove your RV refrigerator. This opens the door for repair, replacement, or upgrade. Good luck with your project!