
Making your own venison summer sausage is a rewarding project. You can use your deer meat from hunting season. Doing it at home lets you control the taste and ingredients. This guide shows you how to make homemade venison summer sausage oven style. We will cover everything you need. You will learn how to make a great oven baked summer sausage recipe. This recipe is easy to follow.
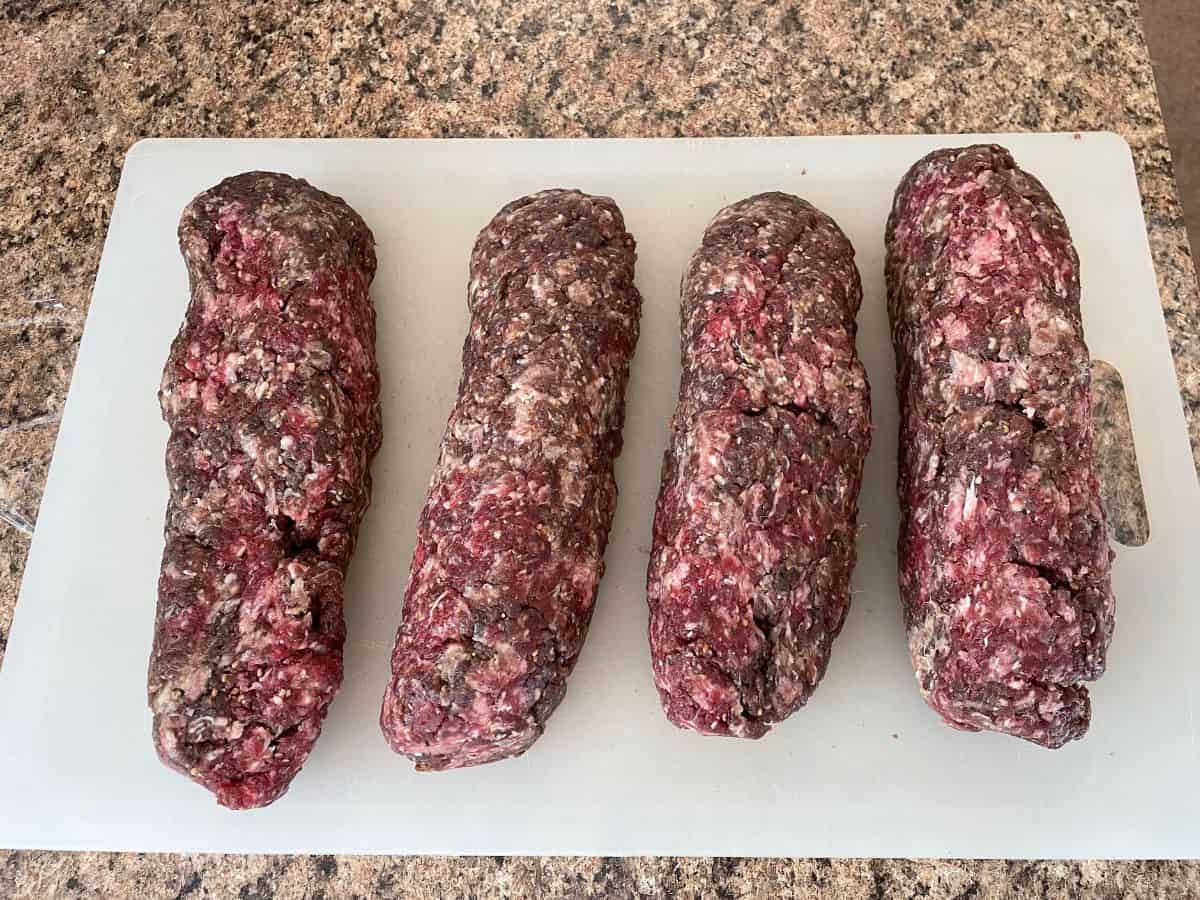
Image Source: aranchmom.com
Why Make Your Own Summer Sausage?
When you make sausage yourself, you know what goes into it. You pick the meat. You choose the spices. It can taste better than store-bought kinds. It’s also a good way to use venison meat. Making it is a fun kitchen project. It feels good to make something from scratch.
What You Need to Get Started
Let’s gather what you need. You need tools and food items. Having everything ready makes the job easier.
Tools You Will Need
- Meat Grinder: You need a way to grind the meat. Some stand mixers have grinder parts. A simple hand grinder works too. You can get electric grinders. Grinding meat for sausage needs the right tool.
- Meat Mixer: This helps mix the meat and spices well. You can use your hands, but a mixer is better for large amounts. A stand mixer with a paddle can work. Or you can get a special meat mixer. Proper mixing is key.
- Sausage Stuffer: This tool pushes the meat into the casings. It makes nice, even logs. You can use a stuffer that comes with a grinder. A stand-alone stuffer is often easier to use.
- Oven: Your regular kitchen oven is what you will use.
- Meat Thermometer: A good thermometer is a must. You need to check the inside heat of the sausage. This makes sure it is safe to eat. You need a digital thermometer. It needs a probe you can stick into the meat.
- Large Bowls: For mixing meat and soaking casings.
- Sharp Knife: For cutting meat into pieces.
- Cutting Board: A big one is best.
- Baking Sheets or Pans: To hold the sausage in the oven.
- Wire Rack: Place this on the baking sheet. It lifts the sausage off the pan. Air can get all around.
- Spray Bottle: For misting the oven later.
- Gloves: Food-safe gloves keep things clean.
Food Items You Will Need
- Venison: You need lean venison meat. Trim away silver skin and tendons. Venison processing tips say to keep the meat very cold. This helps it grind better.
- Pork Fat or Beef Fat: Venison is very lean. It needs fat added for flavor and texture. Use about 15% to 30% fat compared to the meat. Pork fat is common. Beef fat works too. Cut the fat into small pieces. Keep it very cold.
- Summer Sausage Seasoning Mix: This mix has the right spices. It gives summer sausage its classic taste. You can buy a pre-mixed summer sausage seasoning mix. Or you can make your own blend. Common spices are mustard seed, black pepper, garlic powder, onion powder, and paprika. Sugar is often included too.
- Curing Salt: This is super important. You need a special salt mix. It has sodium nitrite in it. It helps keep your sausage safe from bad germs. It also gives summer sausage its pink color and tangy flavor. Use the right kind. It is often called Pink Salt, Prague Powder #1, or Instacure #1. Curing salt for sausage is not regular table salt. Use only the amount the recipe or seasoning mix package tells you. Too much can be harmful.
- Liquid: You need a little liquid. Cold water, ice water, or something like beer or red wine. This helps the spices mix in and the sausage bind.
- Binders (Optional): Some people add non-fat dry milk or soy protein. This helps the sausage hold together. It can also make it juicier. Use only a little if you choose to add it.
- Sausage Casings: These hold the meat mixture. You need special casings for summer sausage. Sausage casing types for summer sausage are usually non-edible fibrous casings. These look like tubes. They come in different sizes. A common size is 2 to 3 inches wide. You must soak these in warm water before you use them.
Getting the Meat Ready
This is the first step. It is very important for good sausage.
Choosing the Right Meat Pieces
Use venison that is clean and free of silver skin. Silver skin and tendons do not grind well. They stay chewy. Use meat from the hind legs or shoulders. Front legs work too. Just make sure all the tough stuff is gone.
Cutting the Meat Small
Cut the venison into cubes. Make them about 1-inch size. Do the same for the pork or beef fat. Small pieces feed into the grinder easily.
Keeping Meat Very Cold
This might be the most important tip for grinding. Meat must be very cold. Almost frozen is best. Put the meat cubes and fat cubes on separate trays. Put them in the freezer for 30-60 minutes. The outside should be firm. The inside should still be a bit soft. Cold meat grinds cleanly. Warm meat smears and clogs the grinder. Keep your grinder parts in the freezer too if you can. This helps keep the meat cold as it grinds.
Grinding the Meat
Now use your grinder. Attach the right size plate. For summer sausage, people often grind twice.
First Grind
Use a medium grinding plate. Push the cold meat cubes through the grinder. Do the fat separately. Keep the ground meat and fat in separate bowls. Place the bowls over ice baths. This keeps the meat cold.
Second Grind (Optional but Recommended)
Chill the ground meat and fat again. Put them back in the freezer for 20-30 minutes. Now, mix the ground venison and ground fat together in a bowl. Pass this mix through a finer grinding plate. This gives a smoother texture. Some people only grind once. It is up to you how fine you want the texture.
Mixing the Sausage
This step adds the flavor and makes the sausage stick together.
Adding Spices and Salt
Put the cold, ground meat and fat mix into your mixer. Add the summer sausage seasoning mix. Add the curing salt for sausage. Add any optional binders now.
Adding Liquid
Pour in the cold liquid. Start with a little amount. You can always add more. The liquid helps spread the spices. It helps the proteins in the meat mix well.
Mixing Until Sticky
Mix everything together very well. If using a stand mixer, mix on medium speed. If mixing by hand, use your hands. Mix for several minutes. The mixture should change. It will go from looking like ground meat to looking more like a sticky paste. It should be very tacky. When you pull some meat, it should feel sticky and hold together. This mixing develops the “bind.” Good bind means your sausage will not crumble when you slice it. Keep the meat cold while mixing. If using hands, your hands will get cold!
Stuffing the Sausage
Putting the meat mix into the casings.
Preparing Casings
If using fibrous casings, soak them first. Read the casing package directions. Usually, you soak them in warm water for 30 minutes or more. This makes them soft and flexible. This makes them easier to fill. Sausage casing types like fibrous ones are strong. They hold the meat shape well during cooking.
Filling the Stuffer
Load the mixed meat into your sausage stuffer. Pack it down tight. Get rid of any air pockets. Air pockets can cause problems when cooking.
Stuffing the Casings
Slide a soaked casing onto the stuffer tube. Tie a knot tightly at the end of the casing. Now, gently turn the stuffer handle (or use the motor). The meat will push into the casing. Fill the casings firmly. Do not stuff them too tight or they might burst. Do not stuff them too loose or they will be floppy. Fill them evenly. Twist or tie off the sausage links at the length you want. Leave a little room at the end to tie off the other side. Tie a tight knot or use sausage clips.
Resting the Sausage (Curing)
This is a key step after stuffing.
Why Rest?
The curing salt for sausage needs time to work. It helps develop the flavor. It also makes the sausage safe. Resting the sausage in a cold place lets the salt and spices move through all the meat. This is called curing.
How to Rest
Hang the stuffed sausage logs. Or lay them on a rack in a pan. Put them in the refrigerator. Let them rest for 12 to 24 hours. This cold rest is important for safety and taste.
Cooking the Sausage in the Oven
This is the main event for homemade venison summer sausage oven style. Cooking summer sausage in the oven uses low heat for a long time. This is like slow cooking.
Setting Up the Oven
Preheat your oven to a low temperature. A good starting point is 180°F (82°C). You want the oven hot enough to cook slowly, but not so hot it cooks the outside too fast. Put a pan of hot water on the bottom rack of your oven. This makes humidity. Humidity helps the sausage cook evenly. It helps keep the casing moist.
Preparing Sausage for Cooking
Place the rested sausage logs on a wire rack. Put the rack on a baking sheet. This lets air flow around the sausage. The baking sheet catches any drips.
The Cooking Process
Put the baking sheet with the sausage into the preheated oven. Insert a probe thermometer into the center of the thickest sausage log. Make sure the probe is in the meat, not touching the casing or the pan. Close the oven door.
Cook the sausage slowly. You are waiting for the inside temperature to reach a safe point. The oven temperature might need to be adjusted. If the sausage is taking too long, you can raise the oven temperature a little, maybe to 200°F (93°C). If the outside is drying out too fast, you might lower it slightly. The goal is slow cooking.
Checking the Internal Temperature
This is the most critical part of cooking. You must reach a safe internal temperature for fully cooked sausage. For summer sausage, the safe temperature is 160°F (71°C). Check the thermometer often, especially as the sausage gets warmer. Cook until the center of the sausage reaches 160°F (71°C).
Oven Cooking Times
Oven cooking times for summer sausage vary greatly. It depends on the thickness of your sausage logs. It depends on your oven. It depends on the starting temperature of the sausage. Thin logs (2 inches wide) might take 3-4 hours. Thicker logs (3 inches wide) could take 4-6 hours or even longer. The thermometer tells you when it’s done. Do not rely only on time. Always check the internal temperature for fully cooked sausage.
Example Cooking Schedule (Adjust as Needed)
- Start oven at 180°F (82°C). Water pan in oven.
- Put sausage in oven on rack over pan. Insert thermometer.
- Cook for 2 hours. Check temperature.
- Increase oven temp to 200°F (93°C) if needed. Mist sausage with water spray bottle if casings look dry.
- Check temperature every 30-60 minutes.
- Continue cooking until thermometer reads 160°F (71°C) in the center of the thickest sausage.
Cooling the Sausage
Once the sausage reaches 160°F (71°C), it is done cooking. Now you need to cool it down fast.
Why Cool Fast?
Quick cooling helps stop harmful bacteria from growing. It also helps set the sausage texture.
How to Cool
Take the sausage out of the oven. You can put it into an ice bath. Fill a sink or a large container with ice and water. Place the hot sausage into the ice bath. Let it stay there until the internal temperature drops below 40°F (4°C). This might take 30-60 minutes.
If you do not have space for an ice bath, cool it as quickly as possible in a cold place. But an ice bath is the safest and best way for cooling quickly.
Letting it Rest Again (Blooming)
After cooling, some people hang the sausage at room temperature for a few hours. This is called blooming. The surface dries a bit. The color can get darker. It can improve the look and feel of the casing. This step is optional. If you do bloom, do it in a clean, cool place. 1-3 hours is usually enough.
Storing Your Homemade Sausage
Now you have made your sausage! You need to store it right. Proper storing homemade sausage keeps it fresh and safe.
Refrigeration
After cooling and blooming, your summer sausage is ready to eat. You can keep uncut logs in the refrigerator. Wrap them well in plastic wrap. They can last for several weeks in the fridge. Once you cut into a log, it is best to eat it within 1-2 weeks.
Freezing
For longer storage, freezing is a good option. Cut the sausage into smaller pieces or leave as whole logs. Wrap tightly in plastic wrap. Then put into freezer bags or use a vacuum sealer. Vacuum sealing is best for preventing freezer burn. Frozen summer sausage can last for many months, maybe up to a year. Thaw it in the refrigerator before eating.
Understanding Safety Steps
Making sausage is safe if you follow key rules.
Curing Salt is a Must
Do not skip the curing salt for sausage. It is there for safety. It stops certain very bad bacteria that can grow in meat cooked at low temperatures. Use the amount given in the recipe or on the seasoning mix bag. Using too much is bad. Using too little means it might not work right.
Cook to the Right Temperature
Always cook to 160°F (71°C). This kills harmful germs. Use a reliable thermometer to check the inside of the sausage. Do not guess.
Keep Things Clean and Cold
Work with clean tools and clean hands. Keep the meat very cold at all times before cooking. This slows down any germ growth.
Troubleshooting Common Problems
Sometimes things do not go perfectly.
Sausage Too Dry
This can happen if you used too little fat. Or if you cooked it too long or at too high a temperature. Make sure you add enough fat (15-30%). Cook slowly to 160°F (71°C) and stop. The humidity pan in the oven helps too.
Sausage Crumbles When Sliced
This usually means the meat was not mixed enough. You did not develop a good “bind.” Mix the meat longer next time. It needs to be very sticky. Using a binder can also help.
Casings Look Bad or Burst
Stuffed too tight? Or oven temp too high? Soak casings well. Stuff firmly but not like rocks. Cook at a low temp slowly. Use the water pan for humidity.
Trying Variations
Once you make a basic batch, you can try new things.
- Add Cheese: Add high-temp cheese cubes to the meat mix before stuffing. High-temp cheese does not melt completely during cooking.
- Add Peppers: Add dried jalapeños or other peppers for a spicy kick.
- Change Seasoning: Try different spice mixes. Add extra garlic, more pepper, or other flavors you like.
Table: Quick Look at the Process
| Step | Key Action | Why? | Notes |
|---|---|---|---|
| 1. Prep Meat | Cut meat/fat, KEEP COLD | Grinds better, safer | Trim silver skin |
| 2. Grind Meat | Grind meat/fat (maybe twice) | Makes small pieces | Use cold grinder parts |
| 3. Mix | Add seasoning, curing salt, liquid; MIX WELL | Flavor, safety, makes meat sticky (bind) | Mix until very sticky |
| 4. Stuff | Fill casings evenly | Gives shape | Soak casings, avoid air pockets |
| 5. Rest/Cure | Chill in fridge 12-24 hours | Curing salt works, flavor develops | Important safety step |
| 6. Cook (Oven) | Cook low temp (180-200°F) with water pan | Cooks slowly, safely | Oven cooking times for summer sausage vary; use thermometer |
| 7. Check Temp | Cook until inside is 160°F (71°C) | Internal temperature for fully cooked sausage (safe) | Use a probe thermometer |
| 8. Cool | Cool fast, ideally in ice bath | Stops germ growth, sets texture | Get temp below 40°F quickly |
| 9. Store | Fridge (weeks) or Freezer (months) | Storing homemade sausage properly keeps it fresh/safe | Wrap well, vacuum seal for freezing |
Frequently Asked Questions
Here are some common questions people ask about making summer sausage in the oven.
Can I make this without curing salt?
No. For safety reasons, especially with low-temperature cooking methods like oven cooking for many hours, curing salt is needed. It protects against a very dangerous type of bacteria.
How long does homemade summer sausage last?
If kept in the refrigerator, wrapped well, it usually lasts 3-4 weeks before being cut. Once cut, use it within 1-2 weeks. In the freezer, properly wrapped, it can last for 6-12 months.
What kind of fat should I use?
Pork fat (like pork butt or trimmings) is common and adds good flavor. Beef fat can also be used. Use fat that is fresh and clean.
My sausage logs are different sizes. How do I know when they are done?
Always check the internal temperature for fully cooked sausage in the thickest part of the largest log. When that one reaches 160°F, the smaller ones are also done or might even be a little hotter, which is fine.
Do I have to use casings?
You could form the meat into logs without casings. However, the casing helps hold the shape and makes cooking more even. It also gives summer sausage its traditional look. If you don’t use casings, the cooking times might change slightly, and the outside will be different.
Can I use a smoker instead of an oven?
Yes, many people smoke summer sausage. The oven method is simpler for beginners and works well. Smoking adds extra flavor. The process is similar, but you use a smoker at low temps instead of the oven. You still need curing salt and must reach 160°F inside.
My oven doesn’t go as low as 180°F. What can I do?
Some ovens do not hold low temperatures well. Try setting your oven to the lowest setting it has, maybe 200°F or 225°F (93°C or 107°C). Use the water pan for humidity. Keep a close eye on the sausage temperature. It might cook faster. Getting to 160°F is the most important part, regardless of oven temp.
How do I know if my seasoning mix has curing salt?
Read the package ingredients carefully. It should list sodium nitrite (often as part of “curing blend” or similar). If you buy a summer sausage seasoning mix, it often comes with a packet of curing salt, or the mix already has it included. If you mix your own spices, you must buy curing salt separately and add the correct amount based on the total meat weight.
What are fibrous casings made of?
Fibrous casings are made from plant cellulose fibers. They are strong and not meant to be eaten. You peel them off the sausage before slicing.
Making your own venison summer sausage in the oven is a rewarding skill. It takes some time and steps, but none are overly hard. Follow the safety rules. Use the right ingredients. Cook to the correct temperature. Soon you will enjoy delicious homemade venison summer sausage oven style. Enjoy the process!