
Yes, you can make air dry clay dry faster without using an oven. Air dry clay hardens as water evaporates from it, and several methods can help speed up air dry clay drying by promoting faster evaporation. While patience is often the best approach for durable pieces, there are fast drying air dry clay techniques that can significantly accelerate air dry clay drying when you need to dry air dry clay quickly.
Let’s explore effective non-oven clay drying methods.
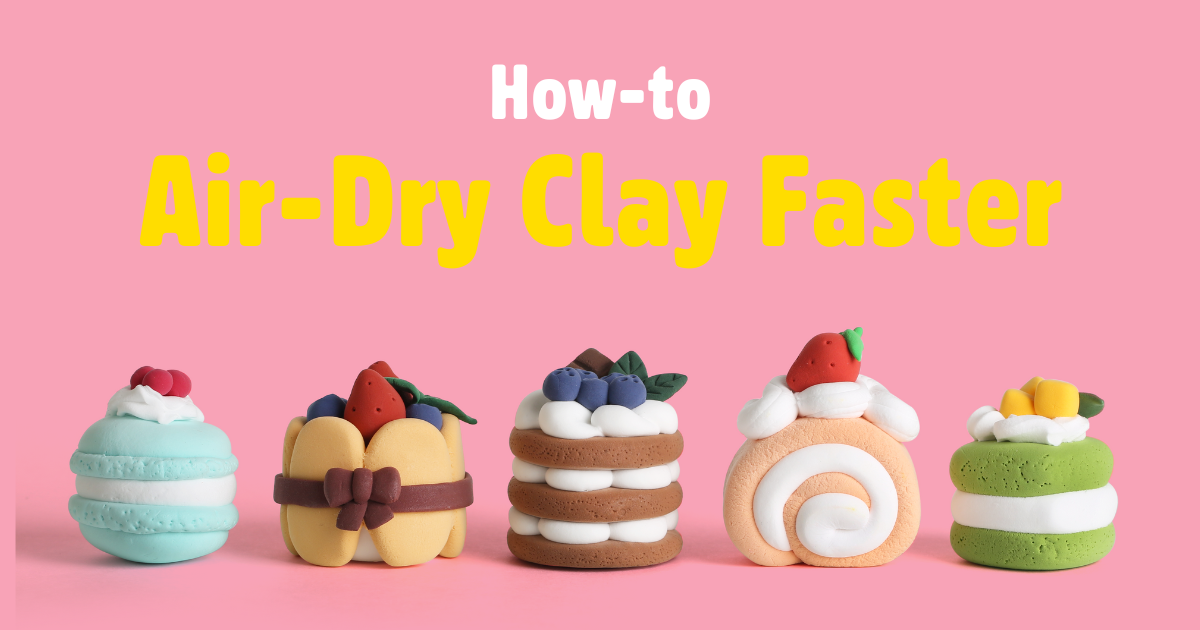
Image Source: claymoo.com
Grasping Air Dry Clay Drying
Clay dries because water leaves it. As water goes away, the clay gets hard. This is evaporation. How fast this happens depends on several things. These are the environmental factors clay drying relies on.
Key Elements in Drying
Many things change how fast clay dries. Knowing these helps you dry your clay faster.
Air Moving Around
Air moving over the clay helps take water away. Still air means water stays near the clay, slowing drying. More air movement speeds it up.
Water in the Air (Humidity)
If the air has a lot of water in it (high humidity), it’s hard for water to leave the clay. Dry air can take more water, making clay dry faster.
How Warm It Is
Warmer air can hold more water. Warm air also makes water turn into vapor faster. But too much heat can hurt the clay.
How Thick Your Piece Is
Thin clay dries much faster than thick clay. Water has less distance to travel to get out. Thick parts hold water longer.
What Kind of Clay
Some air dry clays have things in them that make them dry quicker. Some are made for schools, some for artists. They can be different.
Simple Ways to Speed Up Drying
You don’t need a special machine to dry clay faster. Simple things around you can help. These are tips to dry clay faster.
Use Air Movement
Getting air to move over your clay is one of the best ways to speed things up.
Using fan to dry clay
A simple fan is a great tool. It makes air move. Point the fan near your clay piece.
- How to use a fan right:
- Don’t point it right at the clay, especially at first. This can dry one side too fast and cause cracks.
- Point it so the air blows around the clay piece. An oscillating fan that moves back and forth is even better. It dries all sides slowly and evenly.
- Keep the fan on a low or medium setting. You want gentle air movement, not a strong wind.
- Place the fan a little distance away, not right next to the clay.
Using a fan helps the moist air around the clay move away. It brings in dryer air. This lets more water leave the clay piece. It’s a simple way to dry air dry clay quickly.
Put Clay on Something Raised
Don’t leave your clay piece flat on a solid table or board for the whole time. The bottom will not get air and will stay wet.
- What to use:
- A wire rack (like a cooling rack for baking).
- A piece of screen or mesh.
- Blocks or cups to lift the piece up.
Putting your clay on a raised surface lets air get to the bottom. This helps the whole piece dry more evenly. It prevents the bottom from staying wet for a long time.
Make Sure Air Goes All Around
If your clay piece is big or has hidden parts, make sure air can reach everywhere.
- Place pieces apart from each other.
- If a piece has a ‘back’ that won’t be seen, maybe prop it up so air gets there too.
Good airflow around the whole piece is key to accelerate air dry clay drying.
Lower Water in the Air
Drying happens best when the air is dry.
Choose a Dry Spot
Some rooms in your house are drier than others. Basements can be damp. Bathrooms are humid. Pick a room that feels dry.
- A living room or bedroom away from windows (that might get condensation) can be good spots.
- Avoid drying clay outside if it’s raining or very humid.
Use a Dehumidifier
If you have a dehumidifier, you can run it in the room where your clay is drying. A dehumidifier takes water out of the air. This makes the air much drier.
- Place the dehumidifier in the room.
- Close the door and windows.
- Let it run.
Drier air pulls water from the clay faster. This is a very effective way to reduce air dry clay drying time.
Add a Little Warmth (Be Careful!)
Warmth helps water turn into vapor faster. But too much heat is bad for air dry clay. It can cause cracks.
Near a Gentle Heat Source
You can put your clay piece near something warm, but not hot.
- Near a radiator: Place it near, not directly on, a warm radiator in winter. The heat from the radiator warms the air around the clay gently.
- Sunny spot: A sunny windowsill can work, but be careful. Direct sun can heat up one side very fast. This can cause cracking. If using a sunny spot, watch the clay and rotate it often.
The goal is gentle warmth, not high heat.
Hair dryer on air dry clay
Using a hair dryer is a common thought for fast drying. You can use one, but you must be very, very careful. This is one of the risky fast drying air dry clay techniques.
- How to use a hair dryer safely:
- Use the LOWEST heat setting. Cool air is actually better than hot air because hot air dries the surface too fast.
- Use the LOWEST speed setting. You want gentle airflow.
- Keep the dryer far away. Don’t point it right at the clay from close up. Hold it at least 12-18 inches away.
- Keep the dryer moving CONSTANTLY. Never hold it still on one spot. Move it all over the piece slowly.
- Dry ALL sides evenly. Don’t just dry the top. Turn the piece and dry the sides and bottom too.
Using a hair dryer can dry air dry clay quickly, but it’s the fastest way to cause cracks if not done right. It’s best for helping small, thin areas dry or for the final stages, not for drying a thick piece from wet.
Get the Piece Ready for Drying
How you make your clay piece affects how fast it dries.
Make It Thin
Thicker clay takes much longer to dry. Water has to travel further to escape.
- For faster drying, make pieces as thin as you need them to be.
- Think about the design. Can you make walls thinner? Can you make bases not so thick?
Making your piece thin is a natural way to reduce air dry clay drying time.
Hollow Out Thick Parts
If you have a design that needs thick parts, you can hollow them out.
- Make the shape look thick on the outside.
- Then, carefully scoop out clay from the inside. Leave walls about 1/2 inch to 1 inch thick (depending on size and strength needed).
- Seal any holes you made to hollow it out very well.
Hollowing out means there’s less clay mass holding water. This helps speed up air dry clay drying from the inside too.
Make Thickness Even
Try to make your clay piece the same thickness all over. If one part is thick and another is thin, the thin part will dry first.
- The thin part shrinks as it dries.
- The thick part is still wet and not shrinking.
- This uneven drying can cause cracks where the thin and thick parts meet.
Even thickness means the whole piece dries and shrinks at the same rate. This helps prevent drying cracks. It’s a good tip to dry clay faster and better.
Putting Methods Together for Fast Drying
You can use a mix of these methods. This helps accelerate air dry clay drying most effectively.
A Plan for Faster Drying
Here is a way to use several non-oven clay drying methods at once.
- Start with a well-made piece: Make it as thin as possible, hollow out thick parts, and aim for even thickness.
- Choose the right spot: Find a room that is warm and has low humidity. Avoid damp places.
- Put it on a raised surface: Place the clay piece on a wire rack or screen so air can get to the bottom.
- Add gentle airflow: Set up an oscillating fan some distance away. Let it blow air around the piece, not directly on it.
- Consider gentle warmth: If it’s cold, place the piece near a gentle heat source like a radiator (not on it). Or use a dehumidifier which often makes the air slightly warmer and much drier.
- Watch and turn: Check your piece often. As it starts to harden, gently turn it or flip it over (if safe to do so) to make sure all sides are drying evenly.
- Use a hair dryer only with care: If you need to speed up the final stage, or target a specific stubborn wet spot, use a hair dryer on the lowest heat/speed setting, far away, moving constantly.
Using these steps together will help speed up air dry clay drying much faster than just leaving it alone.
Risks of Drying Too Fast
Trying to dry clay too fast is the main reason for cracks.
- Surface dries, inside stays wet: The outside gets hard and shrinks. The inside is still wet and full of water. As the water from the inside tries to get out, it pushes on the hard outside shell. This causes cracks.
- Uneven drying: If one side dries much faster than another (like in direct sun or with a direct fan), the uneven shrinking pulls the piece apart.
Slow, even drying is always best for strong, crack-free pieces. The methods here help accelerate air dry clay drying but should still be gentle.
When is Speed Important?
Sometimes you just need your clay to dry faster.
- Project deadlines: You might need a piece ready to paint or finish by a certain time.
- Adding layers: If you need to add more clay on top of a dry layer, speeding up the first layer helps you move forward.
- Testing ideas: If you’re just trying something out, you might not care as much about a perfect, crack-free finish and just want to see it hard.
- Small, simple pieces: Very thin, small items like beads or thin ornaments can handle faster drying better than large sculptures.
For important or large pieces, it’s better to be patient. A piece that takes 24-72 hours to dry naturally will likely be stronger than one forced dry in a few hours.
What Not to Do
Some things people try to dry clay faster actually hurt it or don’t work. Avoid these.
Using an Oven (High Heat)
Air dry clay is not made to be fired like pottery clay. Putting it in a kitchen oven, especially at high temperatures, will likely:
- Burn the clay.
- Cause severe cracking.
- Release bad smells or fumes (depending on the clay).
- Might not even make it harder the way you want it.
Stick to non-oven clay drying methods.
Putting it in the Fridge or Freezer
Cold does not make water evaporate faster. It makes it evaporate slower. Putting clay in a fridge or freezer will just make it cold and maybe a little firmer due to the cold, but it won’t help it dry and harden. It might even damage the clay structure.
Drying in a Wet or Cold Place
Avoid damp basements, bathrooms, or cold garages. High humidity and low temperatures slow down evaporation. These environmental factors clay drying doesn’t like will make your clay take much longer.
Moving it While Very Wet
When clay is very wet, it is soft and easy to bend or break. Let it firm up a little before moving or turning it, especially if it’s a complex shape.
How Long Does it Normally Take?
Without trying to speed things up, how long does air dry clay take?
This changes based on:
- Thickness: A thin leaf shape might dry in a few hours. A thick sculpture base could take many days.
- Humidity: In a very dry climate, it dries faster. In a very wet climate, it takes longer.
- Airflow: On a still desk, it’s slow. By an open window, it’s faster.
Generally, small to medium pieces (up to 1/2 inch thick) take about 24-72 hours to become fully hard. Thicker pieces take longer. Always check the center or the thickest part to see if it’s truly dry. It will feel hard all the way through and often be lighter in color.
Using fast drying air dry clay techniques can often cut this time down significantly, sometimes by half or more for thinner pieces, depending on the methods used.
More on Environmental factors clay drying
Let’s look deeper at how the world around your clay affects it.
Temperature Effects
Warm air helps water leave the clay. Water molecules move faster when warm. This means more evaporation. But, as we said, too much heat is bad. Gentle warmth is good.
- Ideal range: Room temperature to slightly warm is best. Think 70-80°F (21-27°C). Much hotter or colder can be problematic.
Humidity Effects
Humidity is the amount of water vapor in the air.
- High humidity: The air is already full of water. It can’t take much more from your clay. Drying is slow.
- Low humidity: The air is ‘thirsty’ for water. It easily pulls water from your clay. Drying is fast.
Living in a dry place helps clay dry faster naturally. If you live in a humid place, using a dehumidifier or putting your clay in a smaller room with a fan can create a better drying environment. These are key environmental factors clay drying speed depends on.
Air Movement Effects
Still air around your clay gets moist as water leaves the clay. This creates a small bubble of humid air right at the clay’s surface. This bubble slows down further drying.
Moving air blows this moist bubble away. It brings in fresh, drier air. This allows evaporation to continue quickly.
- A gentle breeze or fan is like removing that wet blanket from your clay.
Detailed Steps for Faster Drying (Recap)
Here’s a summary focusing on action.
Step 1: Prepare Your Clay Piece
- Make sure your piece is not too thick.
- Hollow out any parts that are thicker than about one inch.
- Try to make the thickness the same all over the piece. This is the first step to reduce air dry clay drying time.
Step 2: Find the Right Drying Spot
- Choose a room or area that is warm and dry.
- Avoid basements, garages, or bathrooms if they are damp.
- A place with some natural air movement is good. These environmental factors clay drying rely on make a big difference.
Step 3: Set Up for Airflow
- Place your clay piece on a wire rack, mesh, or blocks. This lifts it up so air gets underneath.
- Make sure pieces are not touching each other if you have more than one.
Step 4: Add Air Movement
- Set up a fan.
- Point the fan so it blows air around the piece, not directly on it.
- Use a low or medium setting.
- An oscillating fan is best for even drying. Using a fan is a great tip to dry clay faster.
Step 5: Add Gentle Warmth (Optional, Use Care)
- If the room is cool, place the piece near a warm radiator (not on it).
- Or, use a dehumidifier in the room. This helps with both humidity and adds slight warmth.
Step 6: Check and Rotate
- Look at your piece every few hours.
- As it starts to harden, gently turn or flip it if you can do so safely. This helps all sides dry evenly. Uneven drying causes cracks.
Step 7: Careful Use of Hair Dryer (For Finishing)
- Only use a hair dryer on the lowest heat (or cool) and lowest speed setting.
- Keep it far away (12-18 inches or more).
- Move it constantly over the whole piece.
- Use this mainly for thin areas or to help the very last bits dry. It is one of the high-risk fast drying air dry clay techniques.
Following these steps helps speed up air dry clay drying without the risks of an oven.
Comparing Methods: Pros and Cons
Let’s look at the different non-oven clay drying methods side-by-side.
| Method | Pros | Cons | Risk of Cracking | Speed Increase |
|---|---|---|---|---|
| General Airflow (Open) | Simple, free, low risk | Can be slow in humid/still air | Low | Minor |
| Raised Surface | Simple, free, prevents sticky bottom | Doesn’t directly speed up top/sides | Low | Minor |
| Using a Fan | Good speed increase, easy to control | Direct blast can cause cracks, needs electricity | Medium (if direct) | Moderate |
| Low Humidity Room | Good speed increase | Requires the right environment | Low | Moderate |
| Dehumidifier | Very effective, also adds gentle warmth | Requires the machine, uses electricity | Low | High |
| Gentle Warmth (Radiator) | Simple, free gentle warmth | Can be uneven, need to monitor distance | Low | Minor/Moderate |
| Sunny Window | Simple, free | Very high risk of uneven drying and cracks | High | Moderate |
| Hair Dryer (Careful) | Very fast for small/thin areas | Very high risk of cracking if not careful | Very High | Very High |
| Making Thin Pieces | Most effective natural method | Requires planning during creation | Low | Very High |
| Hollowing Out | Helps thick pieces dry evenly | Requires planning during creation | Low | High |
This table helps show why using a combination of methods, like a fan on a raised surface in a dry room, is often the best approach for speed up air dry clay drying while keeping the risk low.
Frequently Asked Questions
How do I know when my air dry clay is completely dry?
It will feel hard all over. It might also change color, usually becoming lighter and uniform. The thickest part is the last to dry. If it still feels cool or damp to the touch in the center or thickest spot, it’s not fully dry.
Can I paint air dry clay before it’s fully dry?
It’s best to wait until it’s completely dry. Painting too soon traps moisture inside, preventing it from drying fully. This can lead to the piece becoming soft again later or even developing mold.
Does the type of air dry clay matter for drying time?
Yes, different brands and types can dry at slightly different rates. Some are designed to be faster drying. However, the methods mentioned here will help dry air dry clay quickly regardless of the specific type.
What should I do if my clay piece starts to crack while drying?
Cracking usually means it’s drying too fast or unevenly.
* If the cracks are small and the clay is still somewhat soft, you can try to smooth them over with a little slip (clay mixed with water) or damp fingers.
* If the piece is already hard and cracked, you can fill the cracks with more air dry clay slip or filler specifically made for air dry clay once it’s fully dry.
* Next time, try slowing down the drying process slightly, ensuring even airflow, and turning the piece often.
Is it possible to re-wet air dry clay that has dried too much or cracked?
Once air dry clay is fully hardened, it’s difficult to fully re-wet it back to a usable clay state like kiln-fired clay can be reclaimed. You can sometimes soften small dried bits by soaking, but a fully hardened piece is usually not recyclable back into fresh clay. This is why managing the drying process is important.
Using the right non-oven clay drying methods helps you get your projects finished faster while trying to avoid common problems like cracking. By controlling environmental factors clay drying relies on and using gentle techniques, you can speed up air dry clay drying successfully.