
So, you want to know how to cook ham in a Dutch oven? It’s easier than you think! Cooking ham in a Dutch oven makes the meat tender and juicy. It’s a great way to make a holiday meal or a big dinner for your family. A Dutch oven holds in heat and moisture, helping the ham stay moist while it cooks. We will walk through the easy steps to make a tasty Dutch oven ham recipe. This guide helps you make a wonderful Baked ham in Dutch oven.
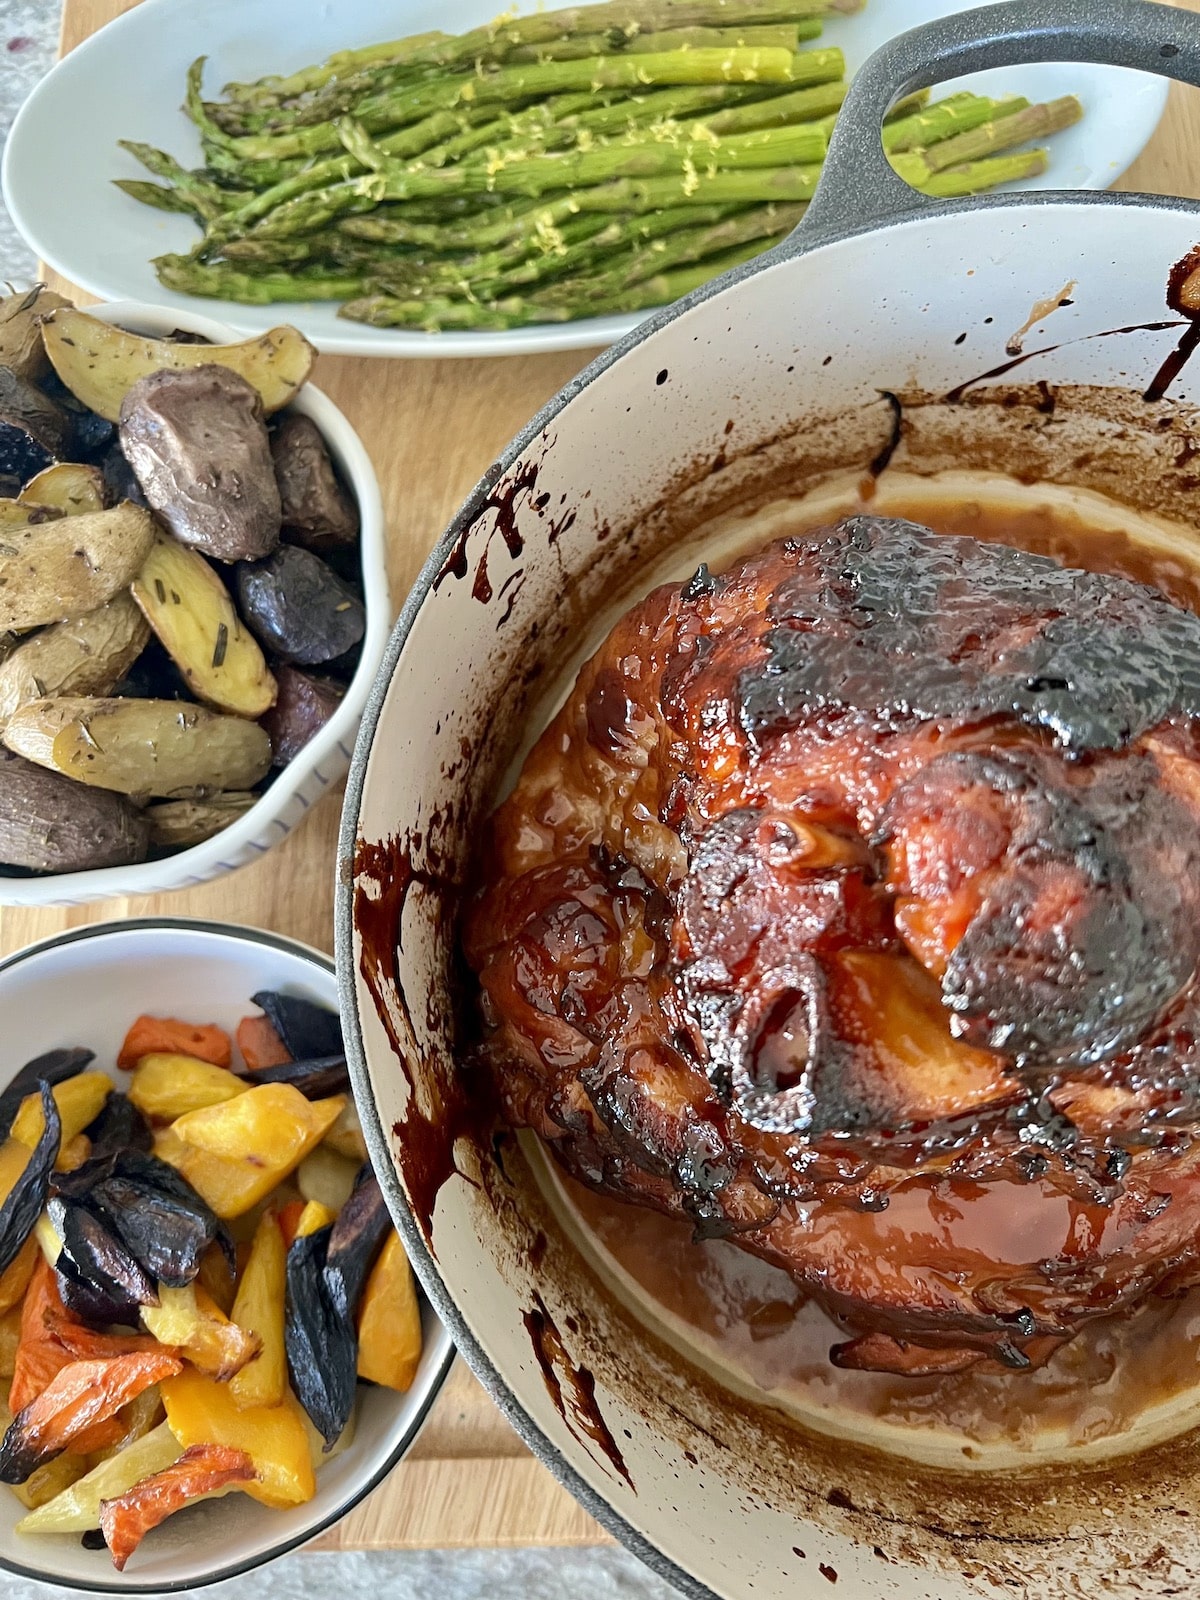
Image Source: mangiawithmichele.com
Why Cook Ham in a Dutch Oven?
Why pick a Dutch oven for your ham? It’s a pot with a tight lid. This lid is key. It traps steam and juices inside the pot. This keeps the ham from drying out. The pot also cooks food evenly. It gets hot all over, giving you a nice, cooked ham. Using a Dutch oven is perfect for large cuts of meat, like a ham. It’s a simple way to get juicy, flavorful results.
Choosing Your Ham
There are different kinds of ham. Most hams sold in stores are already cooked. This is called precooked ham. You just need to heat it up. Some hams are fresh or raw. These need to be cooked all the way through. For this guide, we focus on heating precooked ham cooking instructions. This is what most people buy.
You can get bone-in ham or boneless ham. A bone-in ham Dutch oven often has more flavor. The bone helps keep it moist too. Boneless ham is easier to slice. Both work well in a Dutch oven. Think about the size of your ham. Make sure it fits inside your Dutch oven with the lid closed!
Spiral ham is a common type. This ham is already sliced. This makes serving easy. Cooking spiral ham in Dutch oven is very simple because it’s usually precooked. The slices let your glaze get into the meat.
Selecting the Right Pot
What is the Best Dutch oven for ham? It needs to be big enough. A 5.5-quart to 7-quart Dutch oven is usually good for a ham up to about 8 pounds. If your ham is bigger, you need a bigger pot. Make sure your Dutch oven is oven-safe. Most are made of cast iron, often with an enamel coating. Enamel coating makes it easier to clean.
The pot should have a heavy, tight-fitting lid. This is what keeps the moisture in. A good Dutch oven holds heat well. This helps the ham cook evenly and stay warm.
Getting Ready: Simple Steps
Cooking ham in your Dutch oven is simple. Here are the basic steps:
- Get your ham ready.
- Put it in the Dutch oven.
- Add some liquid.
- Cover it and bake it.
- Add a glaze near the end.
- Check if it’s done.
- Let it rest before cutting.
Let’s look at each step closely.
Step 1: Prepare the Ham
Take your ham out of the fridge. Let it sit on the counter for about 30 to 60 minutes. This brings its temperature up a bit. This helps it cook more evenly.
Remove all the packaging from the ham. If it has a plastic piece covering the bone, take that off. Some hams have a hard rind or skin. You can score this with a knife. Scoring means making shallow cuts in a criss-cross pattern. This helps the glaze stick later. If it’s a spiral ham, it’s already cut, so you don’t need to score it.
Step 2: Place Ham in Dutch Oven
Carefully put the ham inside your Dutch oven. If it’s a bone-in ham, place it cut-side down if possible. This helps keep the juices in. If it’s too big to sit flat like that, just put it in however it fits best. A spiral ham might sit upright.
Make sure the lid fits well over the ham. The lid needs to sit down fully on the pot. If the ham is too tall, you might need a bigger Dutch oven.
Step 3: Add Some Liquid
Adding liquid to the bottom of the Dutch oven is important. This liquid turns into steam as the ham cooks. The steam helps keep the ham moist and juicy. It also prevents the bottom from drying out.
What liquid should you use? Water is fine. You can also use chicken broth, apple cider, apple juice, or even ginger ale. About half a cup to a cup of liquid is usually enough for a medium ham. Pour the liquid into the bottom of the pot, around the ham. Do not pour it over the ham unless your recipe says to.
Step 4: Cover and Bake
Put the lid tightly on the Dutch oven. Place the covered pot in your preheated oven. What temperature? For precooked ham cooking instructions, a low to medium temperature works best. Around 325°F (160°C) is common. This slow heat gently warms the ham without drying it out.
How Long to Cook Ham in Dutch Oven
Figuring out How long to cook ham in Dutch oven depends mostly on its weight. Remember, most store-bought hams are already cooked. You are just heating it up.
A good rule of thumb for precooked ham is to cook it for about 10 to 15 minutes per pound at 325°F (160°C).
Here is a simple table to help you estimate cooking time:
| Ham Weight (Pounds) | Est. Cooking Time at 325°F (Minutes) | Notes |
|---|---|---|
| 3 lbs | 30 – 45 minutes | Smaller hams heat faster |
| 5 lbs | 50 – 75 minutes | Average ham size |
| 7 lbs | 70 – 105 minutes | Larger hams need more time |
| 10 lbs | 100 – 150 minutes | Very large hams take longer |
- Note: These times are estimates. Always use a thermometer to check doneness. We will cover this next.
- Bone-in ham Dutch oven: A ham with a bone might take a tiny bit longer, maybe closer to 15 minutes per pound.
- Cooking spiral ham in Dutch oven: Spiral hams often cook a bit faster because the slices let heat in. They might be closer to 10-12 minutes per pound.
Cook the ham covered for most of this time. This keeps it moist.
Step 5: Make and Add a Glaze
A glaze adds great flavor and a nice look to your ham. You add the glaze near the end of cooking. This gives it time to get sticky and yummy.
What are common Ham glaze ingredients? Many glazes use sweet things. Brown sugar, honey, maple syrup are popular choices. They often have some liquid mixed in, like juice (pineapple, orange, apple), soda (cola, ginger ale), or broth. Spices like mustard (dry or Dijon), cloves, cinnamon, or ginger are also common. A splash of vinegar or soy sauce can add depth.
Here is a simple ham glaze idea:
- 1 cup brown sugar
- 1/2 cup pineapple juice (or orange juice, or water)
- 2 tablespoons Dijon mustard
- 1 teaspoon ground cloves (optional)
Mix all the glaze ingredients in a small pot. Heat it on the stove over medium heat. Stir until the sugar dissolves. Let it simmer for a few minutes until it thickens a little. It should be like a thin syrup.
Step 6: Glaze the Ham
About 20-30 minutes before the ham is expected to be done (based on the cooking time table), take the Dutch oven out of the oven. Be careful, it’s hot!
Carefully take the lid off the Dutch oven. The ham will look shiny from the steam. Now, put the glaze all over the ham. If you have a spiral ham, try to get the glaze between the slices. Use a brush or a spoon to spread the glaze.
You have two options for the rest of the cooking time:
- Leave the lid off: This lets the glaze get thicker and a bit caramelized. This is good if you want a sticky crust.
- Put the lid back on loosely or remove it: This keeps the ham very moist but the glaze might not get as sticky. Removing the lid completely for the last 20-30 minutes is a popular way to get that nice sticky glaze.
Put the Dutch oven back in the oven without the lid for the last part of the cooking time.
Step 7: Check Internal Temperature
This is the most important step to know if your ham is done. You need to check the Internal temperature for cooked ham. For precooked ham, you are heating it to a safe temperature for serving. The United States Department of Agriculture (USDA) says to heat precooked ham to 145°F (63°C). However, many chefs suggest 140°F (60°C) for best texture, as it will rise a few degrees as it rests. Let’s aim for 140°F in the thickest part.
Use a meat thermometer. Push the thermometer into the thickest part of the ham. Make sure you do not touch the bone if it is a bone-in ham. The bone will give you a different reading. The tip of the thermometer should be in the center of the thickest meat.
When the thermometer reads 140°F (60°C), your Baked ham in Dutch oven is ready to come out. If it is not at 140°F yet, put it back in the oven for more time. Check it again every 10-15 minutes.
If you are cooking a fresh (uncooked) ham, the safe Internal temperature for cooked ham is 145°F (63°C) with a 3-minute rest time after cooking. But again, most hams are precooked.
Step 8: Rest the Ham
Once the ham reaches the right temperature, take the Dutch oven out of the oven. Transfer the ham to a cutting board. You can tent it loosely with foil. Let the ham rest for 15 to 20 minutes before you slice it.
Why rest it? Resting lets the juices inside the ham settle back into the meat. If you cut it too soon, the juices will run out. This makes the ham less moist. Giving it time to rest keeps it juicy and tender.
The temperature of the ham will also go up a few degrees while it rests.
Carving and Serving
After resting, slice the ham. For a bone-in ham, cut around the bone first. Then slice against the grain of the meat. For a spiral ham, the slices are already made. You might just need to cut around the bone if there is one.
Serve the ham warm. You can pour some of the juices from the bottom of the Dutch oven over the slices. Or, you can pour any leftover glaze over it.
Making the Perfect Glazed Ham Dutch Oven
Creating a wonderful Glazed ham Dutch oven is all about timing and taste.
- Timing the Glaze: Add the glaze when the ham is about 20-30 minutes from being done. This is key. If you add it too early, it might burn. If you add it too late, it won’t get sticky and flavorful.
- Getting the Glaze Sticky: Removing the lid for the last part of the cooking time helps the glaze thicken up nicely. The heat of the oven reduces the liquid in the glaze, making it thicker. Sugar in the glaze will caramelize slightly, giving it a nice color and deeper flavor.
- Types of Glazes: Don’t be afraid to try different glazes. Besides the simple brown sugar glaze, you could use:
- Maple-Dijon Glaze: Maple syrup, Dijon mustard, a little apple cider vinegar.
- Honey-Mustard Glaze: Honey, yellow mustard, brown sugar.
- Pineapple Glaze: Crushed pineapple with juice, brown sugar, a little cornstarch to thicken.
- Cola Glaze: Cola soda, brown sugar, mustard.
The glaze is a chance to make your Dutch oven ham recipe unique and special.
Handling Bone-In Ham Dutch Oven
Cooking a Bone-in ham Dutch oven is very similar to cooking a boneless one. The main difference is the bone.
- Fit: Make sure the bone doesn’t stop the lid from closing completely.
- Placement: Try to place the flat cut side down. This helps keep moisture in.
- Temperature Check: When checking the Internal temperature for cooked ham, be sure the thermometer tip does not touch the bone. Push it into the thickest part of the meat, but away from the bone.
- Cooking Time: As noted before, it might need a little extra time per pound compared to boneless or spiral ham. Stick to the 10-15 minutes per pound rule, aiming for the higher end if needed, but always check the temperature.
- Carving: Carving a bone-in ham takes a little more skill. You’ll need to cut the large sections of meat away from the bone before slicing.
The bone adds flavor to the ham as it cooks. Plus, you can use the bone later to make ham stock or soup!
Tips for Success with Your Dutch Oven Ham
- Don’t Overcook: Heating precooked ham too long will make it dry. Use that thermometer!
- Keep it Covered: Keep the lid on the Dutch oven for most of the cooking time. This locks in moisture. Only take it off for the last 20-30 minutes when adding the glaze.
- Let it Rest: Resting is not just an option, it’s needed for a juicy ham. Don’t skip this step.
- Consider the Pan: If your ham is very large and just barely fits, it might touch the sides and bottom too much. You could put a wire rack in the bottom of the Dutch oven first. This lifts the ham slightly and helps heat circulate. Add liquid below the rack.
- Use the Juices: The liquid in the bottom of the Dutch oven after cooking is full of flavor. You can pour it over the sliced ham or use it as a base for gravy.
Grasping Different Ham Types
Let’s take a closer look at the types of ham you might cook in your Dutch oven. This helps you know what to expect and how to cook it.
- Precooked Ham: This is the most common type. It’s already smoked or cured and fully cooked. You just heat it to a safe serving temperature (140°F or 145°F). These are often labeled “Cook Before Eating” but check the package. Most large hams in the meat section are precooked.
- Fresh Ham: This is raw, uncured pork from the leg. It looks like a large pork roast. It needs to be cooked like any raw meat, to an internal temperature for cooked ham of 145°F (63°C) with a 3-minute rest. This guide focuses on precooked ham, but you could cook a fresh ham in a Dutch oven, it would just take much, much longer (like 20-25 minutes per pound or more) and you might want to sear it first.
- Spiral-Cut Ham: This is a precooked ham that has been machine-sliced in a spiral pattern around the bone. They are easy to serve. Cooking spiral ham in Dutch oven requires care not to dry it out because the slices expose more surface area. Keeping the lid on is very important.
- City Ham vs. Country Ham:
- City Ham: This is the most common type in stores. It’s cured in brine (salt water) and usually smoked. It’s typically sold precooked. This is what this Dutch oven ham recipe is for.
- Country Ham: This ham is dry-cured and aged for a long time. It’s very salty and often requires soaking before cooking. It’s usually not precooked and takes longer to cook. This is not the type of ham typically cooked with this simple Dutch oven method.
For a straightforward and simple Baked ham in Dutch oven, a precooked city ham (bone-in or boneless, spiral or not) is your best choice.
Interpreting Cooking Times
The times given (10-15 minutes per pound) are guides. Your oven might cook hotter or cooler. The starting temperature of your ham makes a difference. A colder ham takes longer. The shape and thickness of the ham matter too.
That’s why relying on the Internal temperature for cooked ham is so important. The thermometer tells you exactly what is happening inside the meat, much better than just guessing based on time. Always use a meat thermometer to be sure.
Let’s re-emphasize:
* Check the ham’s internal temperature in the thickest part.
* Avoid touching the bone.
* For precooked ham, aim for 140°F (60°C) before resting.
* For fresh ham, aim for 145°F (63°C).
Knowing the right temperature is the best way to avoid dry ham.
Cooking Spiral Ham in Dutch Oven Details
Because Cooking spiral ham in Dutch oven is so popular, let’s talk a bit more about it. Spiral hams are prone to drying out because of the cuts.
- Moisture is Key: Keep the lid on tight during cooking. Using the liquid in the bottom is essential.
- Glazing: The spiral cuts are perfect for letting the glaze get deep into the ham. Brush or spoon the glaze generously, making sure it gets between the slices.
- Shorter Time: Be ready for it to cook a little faster than a solid bone-in ham. Start checking the temperature a bit earlier than the calculated time suggests.
- Handling: Spiral hams can sometimes fall apart a bit. Be gentle when putting it in the pot and when moving it to glaze and rest.
A Glazed ham Dutch oven using a spiral cut is very visually appealing and easy to serve.
Troubleshooting Common Issues
- Ham is Dry:
- Did you overcook it? Check the temperature next time and take it out at 140°F.
- Did you cook it uncovered for too long? Keep the lid on except for the last 20-30 minutes.
- Did you add liquid to the pot? Always add some liquid to create steam.
- Did you let it rest? Resting is vital for moisture.
- Glaze Won’t Stick or is Too Thin:
- Did you add it too early or too late? Add it only for the last 20-30 minutes.
- Did you remove the lid after glazing? Taking the lid off helps the glaze thicken.
- Is your glaze recipe too thin? Next time, simmer the glaze ingredients longer on the stove to reduce the liquid. Or add a thickener like a teaspoon of cornstarch mixed with a tablespoon of cold water, stir it into the simmering glaze, and cook for another minute.
- Ham Doesn’t Fit in the Dutch Oven:
- You need a bigger Dutch oven or a smaller ham! If it’s only slightly too tall, sometimes trimming a bit off the bottom or top can help, but usually, a bigger pot is the best answer.
- Bottom of Ham Seems Dry:
- Ensure you added enough liquid (at least 1/2 cup, maybe more for a large ham).
- Consider using a small rack in the bottom of the Dutch oven to lift the ham slightly out of the liquid, allowing steam to surround it better while preventing the bottom from sitting directly on the hot surface.
These simple fixes can help you make a perfect Baked ham in Dutch oven every time.
Storing Leftover Ham
Leftover ham is great for sandwiches, soups, omelets, or just eating cold. Store leftover ham in airtight containers or wrapped tightly in foil or plastic wrap. Put it in the refrigerator within two hours of cooking. It will stay good for 3 to 4 days.
For longer storage, you can freeze cooked ham. Wrap pieces tightly in plastic wrap, then foil, or put in freezer bags. Frozen ham is best used within 1 to 2 months. Thaw frozen ham in the refrigerator before reheating.
Final Thoughts on Your Dutch Oven Ham
Cooking ham in a Dutch oven is a simple and effective way to get a moist and tasty result. Whether you are making a Bone-in ham Dutch oven or Cooking spiral ham in Dutch oven, the method is largely the same: put it in the pot, add liquid, cover, and bake until the right Internal temperature for cooked ham is reached. Adding a delicious Glazed ham Dutch oven finish just makes it even better.
This Dutch oven ham recipe using a Dutch oven takes the guesswork out of keeping the ham moist. The pot does the work for you. With simple steps and a focus on checking the temperature, you can make a wonderful ham that your family and friends will love. Enjoy your delicious creation!
Frequently Asked Questions
h4: Do I need to add liquid to the Dutch oven?
Yes, adding about 1/2 to 1 cup of liquid (like water, broth, or juice) to the bottom of the Dutch oven is very helpful. It creates steam that keeps the ham moist while it heats up.
h4: Should I cover the ham while it cooks?
Yes, keep the Dutch oven covered for most of the cooking time. This traps moisture. You only take the lid off for the last 20-30 minutes when you add the glaze to help it thicken and brown.
h4: How do I know when my ham is done?
Use a meat thermometer. For precooked ham (most store hams), it is done when the Internal temperature for cooked ham reaches 140°F (60°C) in the thickest part, away from the bone.
h4: Can I cook a fresh, uncooked ham this way?
This guide is mainly for precooked hams. You could cook a fresh ham in a Dutch oven, but it takes much longer (around 20-25 minutes per pound) and needs to reach an internal temperature of 145°F (63°C).
h4: When should I add the glaze?
Add the glaze during the last 20 to 30 minutes of cooking time. This gives it time to warm up, get sticky, and flavor the ham without burning.
h4: What if my ham is too tall for the Dutch oven lid?
You need a larger Dutch oven or a smaller ham. The lid must close tightly to keep the steam inside.
h4: How long should I let the ham rest?
Let the ham rest for 15 to 20 minutes after taking it out of the oven before slicing. This keeps the juices in the meat, making it more tender and juicy.
h4: Can I use a spiral-cut ham in a Dutch oven?
Yes, Cooking spiral ham in Dutch oven works great. Be extra careful to keep it covered and use liquid to prevent it from drying out because of the cuts. It might cook slightly faster.
h4: What temperature should the oven be?
For heating a precooked ham, a common oven temperature is 325°F (160°C).
h4: What are good Ham glaze ingredients?
Popular glaze ingredients include brown sugar, honey, maple syrup, mustard (Dijon or yellow), fruit juices (pineapple, orange), soda (cola, ginger ale), cloves, and cinnamon.