
What is speaker polarity? Why do speakers have positive and negative parts? Can I use a simple tool like a multimeter to check this? Yes, you can easily check speaker polarity using a multimeter or even a small battery. Every speaker has a positive (+) and a negative (-) terminal. Connecting them the right way is very important for good sound. This guide will show you how to do a speaker polarity test yourself. We will use a multimeter and also show you a simple speaker battery test polarity method. Knowing the correct speaker positive negative identification helps with speaker phasing test when you have more than one speaker. It is a basic part of any audio system speaker test. We will cover using multimeter on speakers to check their health and wiring.
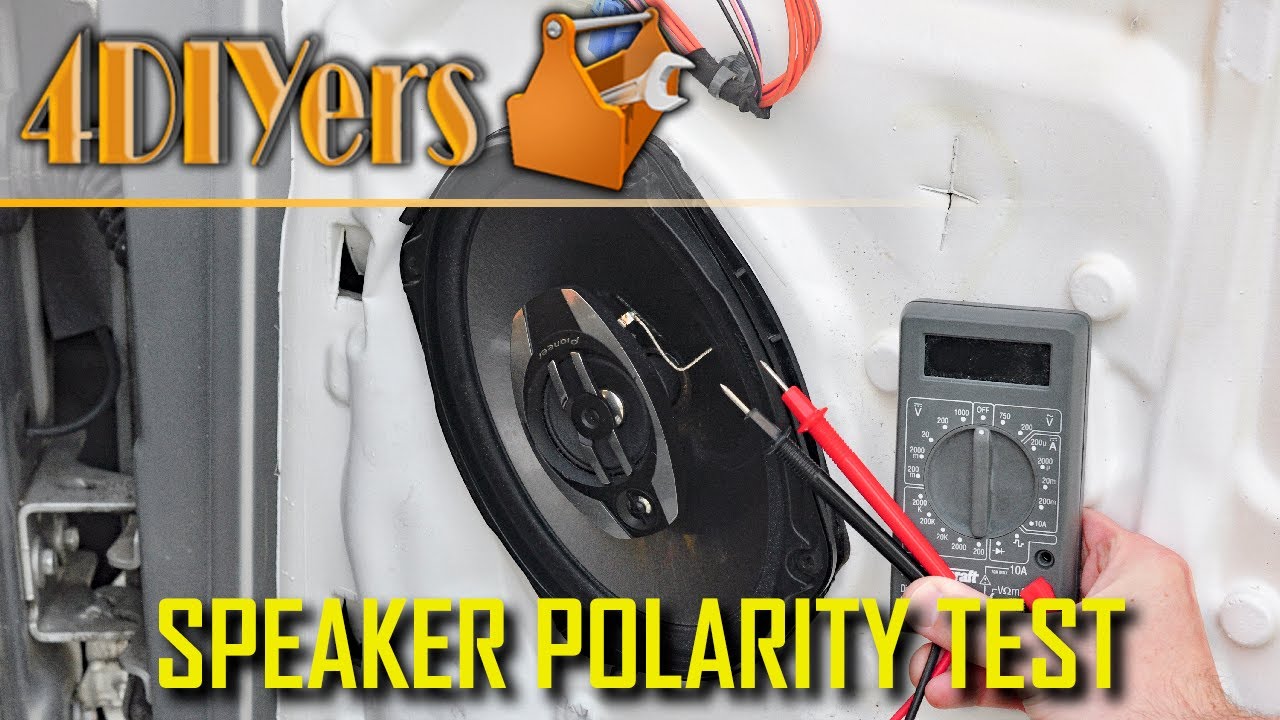
Image Source: i.ytimg.com
Grasping Speaker Polarity
Think of electricity flowing like water in pipes. It needs a path to follow. Speakers work using electricity. A coil of wire inside the speaker gets power. This coil is in a magnetic field. When power flows, the coil moves. This moves the speaker cone. The cone pushes air. Pushing air makes sound waves.
Polarity is just the direction of the electricity flow. It matters because it controls how the cone moves. Power flowing one way makes the cone move out. Power flowing the other way makes the cone move in.
Every speaker wire and terminal is marked. Usually, one is red (+) and the other is black (-) or marked with a stripe. This tells you which is which. This marking shows the speaker’s correct polarity.
Knowing Why Polarity Is Key
Why care if the cone moves out or in? It seems small, but it makes a big difference in how your audio system sounds. Especially when you have more than one speaker playing the same sound.
- Better Bass: When speakers are connected correctly (same polarity), their cones move in the same direction at the same time for the same sound signals. For a bass note, both cones push out together. This makes the bass strong and full.
- Clearer Sound: If speakers are wired with mixed polarity, their cones move opposite each other. When one cone pushes out, the other pulls in for the same signal. They cancel each other out. This is called phase cancellation. It makes the sound thin. You lose bass. The sound feels weak and wrong. This is what a speaker phasing test checks for in a system.
- Proper Imaging: Correct polarity helps create a good soundstage. This is where the sound seems to come from specific places in the room. Wrong polarity can mess this up.
Checking polarity is a key part of troubleshooting speaker connections if your system sounds off. It’s often one of the first things to check after looking at the speaker wiring diagram.
Tools You Will Need
Doing a DIY speaker polarity check is simple. You don’t need fancy tools.
Here is what you will likely need:
- The speaker(s) you want to check.
- A digital multimeter (DMM). An inexpensive one is fine. It needs settings for resistance (Ohms Ω) and maybe low DC voltage (V=).
- Maybe a small 1.5V AA or AAA battery. This is for the speaker battery test polarity method.
- Short test leads or wires. Sometimes the multimeter leads are too short or stiff. Small flexible wires with clips or bare ends can help connect to speaker terminals.
- Optional: Small clips or alligator clips. These help hold wires to the speaker terminals.
- Optional: Marker or tape. To re-mark terminals if they are not clear.
Prep Your Speaker
Before you use your multimeter on speakers, make sure the speaker is safe to test.
- Disconnect the speaker: Make sure the speaker is not connected to any amplifier or audio source. It should be fully disconnected.
- Find the terminals: Look at the back of the speaker. You will see two connection points. These are the terminals. They are usually posts you screw down on, or clips you push.
- Look for markings: Check closely for + and – markings. Sometimes they are red (+) and black (-). Sometimes they are just symbols or words next to the terminals. Note which terminal is which if it’s marked. This is speaker positive negative identification.
- Clean the terminals: Make sure the metal parts of the terminals are clean. Dust or dirt can stop the multimeter leads from making good contact.
Using Your Multimeter
Now we will learn how using multimeter on speakers works. A multimeter is a very helpful tool. It can measure different things about electricity. For speakers, we often use it to check resistance (Ohms) and sometimes voltage.
Multimeter Basics for Speakers
Your digital multimeter will have a dial in the middle. This dial lets you choose what you want to measure. It will also have places to plug in test leads. Usually, there is a black lead and a red lead.
- The black lead usually plugs into the port marked “COM” (common).
- The red lead plugs into the port for voltage (V), resistance (Ω), and sometimes milliamps (mA). This port might be labeled “VΩmA”.
To test a speaker, you will connect the red and black leads to the speaker terminals.
Checking Speaker Impedance (Speaker Impedance Check Multimeter)
Before checking polarity, you can use the multimeter to check the speaker’s resistance. This is close to its impedance. Impedance is like the speaker’s electrical “size” or how much it resists the flow of electricity from the amplifier. Speakers usually have impedance ratings like 4 Ohm, 8 Ohm, or 16 Ohm.
How to Check Impedance (Resistance):
- Set your multimeter: Turn the dial to the Ohms (Ω) setting. Choose a range that covers low numbers, like 200 Ohms.
- Connect the leads: Touch the red lead to one speaker terminal. Touch the black lead to the other terminal. It does not matter which color goes to which terminal for this test.
- Read the number: Look at the multimeter screen. It will show a number in Ohms.
- Interpret the number: The number you see will be lower than the speaker’s stated impedance. This is normal. A working 8 Ohm speaker might measure 5-7 Ohms DC resistance. A working 4 Ohm speaker might measure 2.5-3.5 Ohms. If the meter shows a very high number (like “OL” or a very large Ohm value), the speaker coil might be broken. If it shows close to 0, there might be a short circuit.
This speaker impedance check multimeter step tells you if the speaker coil is okay. It is not a polarity test, but it’s a good check to do first.
Checking Polarity with the Multimeter (Speaker Polarity Test)
This is the main part: using the multimeter for speaker positive negative identification. There are a couple of ways, but one is quite simple using a DC voltage setting. The multimeter will send a tiny bit of power out. When this power hits the speaker coil, it will make the cone move. By seeing how the cone moves, we can figure out the polarity.
Important Note: This test makes the cone move just a little bit. You need to watch closely. You might need good light. For smaller speakers, it’s easier to see. For large woofers, it can be harder.
How to Do the Multimeter Polarity Test (DC Voltage Method):
- Set your multimeter: Turn the dial to measure DC Voltage (V= or DCV). Choose a low range, like 2V or 20V DC. Start with the lowest range (like 2V) if your meter has it.
- Prepare the leads: Make sure your red lead is in the VΩmA port and the black lead is in the COM port.
- Connect the leads briefly: Touch the red multimeter lead to one speaker terminal. Touch the black multimeter lead to the other terminal. Watch the speaker cone very carefully as you connect the leads.
- Watch the cone:
- If the speaker cone moves outward (pushes away from the speaker frame), it means the terminal you touched with the red multimeter lead is the positive (+) terminal of the speaker. The terminal touched by the black lead is the negative (-).
- If the speaker cone moves inward (pulls towards the speaker frame), it means the terminal you touched with the red multimeter lead is the negative (-) terminal of the speaker. The terminal touched by the black lead is the positive (+).
- Disconnect: Immediately lift the leads off the terminals once you see the cone movement. You don’t need to keep them connected.
- Repeat if unsure: If you did not see the movement clearly, try again. You can also switch the leads. If connecting the red lead to terminal A and the black to terminal B made the cone move in, switching (red to B, black to A) should make the cone move out. When connecting the red lead makes the cone move OUT, that red lead is on the positive terminal.
This DIY speaker polarity check with a multimeter is effective once you learn to spot the tiny cone movement. It’s a reliable speaker polarity test.
The Simple Battery Polarity Test (Speaker Battery Test Polarity)
Many people find using a small battery even easier for speaker positive negative identification because the cone movement is often more noticeable. This method uses the same idea as the multimeter test: send a little DC power to the speaker and see how the cone moves.
Why a Battery Works
A small 1.5V battery (like AA, AAA, C, or D) provides a direct current (DC) voltage. Speakers are AC (alternating current) devices for playing music, but they will react to DC. Connecting the positive end of the battery to the positive terminal of the speaker and the negative end of the battery to the negative terminal of the speaker will cause the cone to move in one direction (outward). Connecting the battery the wrong way around will make the cone move in the opposite direction (inward).
Doing the Battery Test
This is a very common and simple speaker battery test polarity method.
- Get a small battery: A 1.5V battery is best. Don’t use a 9V battery or a car battery! Too much power can damage the speaker. A 1.5V AA or AAA works perfectly.
- Identify battery terminals: Batteries have a clear positive (+) and negative (-) end. The positive end usually has a bump.
- Prepare short wires (optional but helpful): It’s easiest if you have two short pieces of wire. Connect one wire to the positive (+) end of the battery. Connect the other wire to the negative (-) end of the battery. Tape can help hold them.
- Connect wires to speaker terminals briefly: Touch the wire from the positive (+) end of the battery to one speaker terminal. Touch the wire from the negative (-) end of the battery to the other speaker terminal.
- Watch the cone:
- If the speaker cone moves outward (away from the speaker frame), it means the terminal you touched with the wire from the positive (+) end of the battery is the positive (+) terminal of the speaker. The terminal touched by the negative wire is the negative (-). This is the correct speaker positive negative identification.
- If the speaker cone moves inward (towards the speaker frame), it means you connected the battery the wrong way around for the speaker’s internal polarity. The terminal you touched with the wire from the positive (+) end of the battery is the negative (-) terminal of the speaker. The terminal touched by the negative wire is the positive (+).
- Disconnect immediately: Just touch the wires for a second or two to see the movement. You do not need to leave them connected.
- Mark the terminals: Once you know which speaker terminal is positive and which is negative, mark them clearly if they were not already marked. Use a red marker or tape for positive, and a black marker or tape for negative.
This speaker battery test polarity method is quick and often easier to see the cone movement than the multimeter method for beginners. It’s a great DIY speaker polarity check.
Comparing Multimeter and Battery Tests
Both the multimeter DC voltage method and the battery method are good ways to check speaker polarity.
| Feature | Multimeter Test (DC Volts) | Battery Test (1.5V) |
|---|---|---|
| Tools Needed | Digital Multimeter | Small 1.5V Battery (AA, AAA) |
| Ease of Cone View | Can be subtle, requires close watch | Often more noticeable movement |
| Safety Risk | Very low, meter limits current | Very low (with 1.5V battery) |
| Additional Checks | Can also check impedance, voltage, continuity | Only checks polarity by cone movement |
| Complexity | Need to set meter correctly, interpret movement | Very simple, connect battery and watch movement |
| Requires Power | Meter needs battery power | Battery provides power |
| Best For | Tech-savvy users, checking multiple things | Beginners, quick check, clearest cone movement |
For a simple speaker polarity test, the battery method is arguably the easiest for seeing the result (cone movement). However, if you already have a multimeter and know how to use it, the multimeter method also works well and lets you do the speaker impedance check multimeter test too. Both are valid DIY speaker polarity check methods.
Checking Polarity in a System (Audio System Speaker Test)
Once you know the polarity of your individual speakers, you need to connect them correctly to your amplifier or receiver. This is where the speaker wiring diagram for your audio system comes in handy. All speakers in a stereo pair or surround sound system should be connected with the same polarity. Positive speaker terminal to positive amplifier terminal, and negative speaker terminal to negative amplifier terminal.
Following the Wires (Speaker Wiring Diagram)
Speaker wire usually has a way to tell the two conductors apart. One wire might be copper, the other silver. One might have a stripe, a rib, or text printed on it. These markings help you follow which wire is which from the amplifier end to the speaker end.
- Typically, the marked wire or the wire with text is used for the positive (+) connection. The plain wire is used for the negative (-).
- Your amplifier or receiver will have marked speaker terminals (often red for positive, black for negative).
- Connect the positive (+) terminal of the speaker (the one you identified with your multimeter or battery) to the positive (+) terminal on the amplifier. Use the wire you have designated as positive.
- Connect the negative (-) terminal of the speaker to the negative (-) terminal on the amplifier, using the negative wire.
Follow the speaker wiring diagram provided with your audio system or speakers. This diagram shows how everything should connect. Making sure all speakers are wired + to + and – to – is crucial for a proper audio system speaker test.
Handling Multiple Speakers (Speaker Phasing Test)
If you have two or more speakers playing the same sound, they need to be in phase. This means their cones should move together for the same part of the sound wave. Incorrect polarity is the most common cause of speakers being out of phase.
If one speaker is wired correctly (+ to + and – to -) but another speaker playing the same sound is wired incorrectly (+ to – and – to +), they will be out of phase. When one cone moves out, the other moves in. This leads to the sound problems we talked about (weak bass, poor clarity).
After checking the polarity of each speaker and connecting them according to the speaker wiring diagram, you can do a simple listening test. Play some music with strong bass. If the bass sounds weak or seems to disappear in certain spots, it might be a sign that one speaker’s polarity is reversed compared to the others. This is an informal speaker phasing test. You would then re-check the wiring for each speaker in that pair or system.
What If It’s Wrong? (Troubleshooting Speaker Connections)
You’ve done the speaker polarity test. You found that a speaker wasn’t marked, or you suspect it was wired wrong. What do you do?
- Re-verify Polarity: Use your multimeter or battery test again to be absolutely sure which terminal on the speaker is positive (+) and which is negative (-).
- Mark the Speaker: Use a permanent marker or tape to clearly mark the terminals on the speaker itself (+ and -). Red for positive is standard.
- Check the Wire: Look at the speaker wire connected to that speaker. Does it have a stripe, rib, or text? Decide which wire will be your positive wire going forward and which will be negative. A common practice is to use the wire with markings for positive.
- Mark the Wire: At both ends of the wire (the speaker end and the amplifier end), mark the wire you’ve chosen for positive. Tape or a marker works.
- Correct the Connection: Reconnect the wire to the speaker, making sure your positive wire goes to the positive terminal and the negative wire goes to the negative terminal.
- Correct the Amplifier Connection: Go to your amplifier or receiver. Make sure the positive wire (the one you marked) connects to the red (+) terminal for that speaker’s channel. Make sure the negative wire connects to the black (-) terminal.
Doing this for all speakers in your system ensures they are all in phase, correcting any troubleshooting speaker connections issues related to polarity.
Common Issues and Fixes
When doing a DIY speaker polarity check or troubleshooting speaker connections, you might run into small problems.
No Reading on Multimeter During Impedance Check
- Check Meter Setting: Is the dial set to Ohms (Ω)? Is the range appropriate (e.g., 200Ω)?
- Check Leads: Are the leads plugged into the correct ports (COM and VΩmA)? Are they pushed in firmly?
- Check Contact: Are the lead tips making good contact with the bare metal of the speaker terminals?
- Check Speaker: The speaker coil might be broken (open circuit). If the meter shows “OL” (Over Limit) or a very high number, this is likely the problem.
Inconsistent Results During Polarity Test
- Watch Closely: Are you watching the cone right as you connect the leads? The movement is brief.
- Enough Light: Is there enough light to see the cone movement clearly? Use a flashlight if needed.
- Small Movement: For large, stiff cones, the movement can be very small. Try testing a smaller speaker first to see what the movement looks like.
- Battery Check: If you can’t see the movement with the multimeter, try the battery test method. The movement is often more obvious.
Identifying Marked Wires
- Speaker wire often has one side marked. This could be a colored stripe embedded in the insulation, a raised rib you can feel, or printing (text/arrows) on the insulation.
- If one wire is bare copper color and the other is silver/tin colored, the copper is traditionally used for positive.
- If wires are identical and unmarked, you must create your own marking system. Choose one wire at the speaker end, mark it, and follow it back to the amplifier end to mark it the same way. This creates your own speaker wiring diagram.
Putting It All Together: Connecting Speakers Correctly
After you have checked and marked the polarity for all your speakers, connecting them correctly is the final step for good sound.
- Plan Your Wires: Lay out your speaker wires. Make sure they are long enough. Identify which conductor on each wire pair will be positive and which will be negative (e.g., marked wire = positive, plain wire = negative).
- Prepare Wire Ends: Strip a small amount of insulation (about 1/2 inch) from the ends of each wire, at both the speaker end and the amplifier end. Twist the fine wire strands together neatly.
- Connect to Speakers: Connect the positive (+) wire to the positive (+) terminal on the speaker. Connect the negative (-) wire to the negative (-) terminal on the speaker. Make sure the connection is tight and no stray wire strands are touching the other terminal or anything metal.
- Connect to Amplifier: Connect the positive (+) wire from that speaker to the red (+) terminal for that speaker’s channel on your amplifier or receiver. Connect the negative (-) wire to the black (-) terminal.
- Repeat for All Speakers: Do this for every speaker in your system. Ensure consistency: positive speaker terminal always connects to the amplifier’s red terminal using your designated positive wire.
- Final Check: Double-check all connections. Make sure no bare wires are touching across terminals on the speaker or the amp. This can cause short circuits and damage your equipment.
- Test the Sound: Turn on your audio system. Play some music. Listen carefully. The bass should be strong, and the sound should be clear. If something sounds “off,” go back and re-check the polarity and connections for each speaker. This simple audio system speaker test by listening can confirm your work.
By following these steps, you can confidently perform a speaker polarity test, ensure correct speaker positive negative identification, and properly manage your speaker wiring diagram for the best sound quality from your audio system. This DIY speaker polarity check prevents common issues related to speaker phasing test and makes troubleshooting speaker connections much easier.
Frequently Asked Questions (FAQ)
Q: Can incorrect polarity damage my speakers or amplifier?
A: Usually, no. Incorrect polarity is not an electrical problem, it’s an acoustic one. It affects sound quality, not typically the electronics. However, short-circuiting the wires (bare positive and negative wires touching) can damage your amplifier. Always be careful when stripping and connecting wires.
Q: My speaker terminals are not marked. How can I be sure?
A: That’s exactly why you need to do a speaker polarity test using a multimeter or the battery method described in this guide. Once you find out which is which, mark them clearly yourself.
Q: Does polarity matter for just one speaker?
A: If you only ever listen to one speaker by itself, polarity doesn’t affect the sound quality. The cone will just move out or in depending on the signal. Polarity becomes critical when you use two or more speakers together playing the same sounds, as they need to move in sync (in phase) for good sound reproduction.
Q: What if my multimeter doesn’t have a low DC voltage range?
A: The battery test is a very reliable alternative. Just use a 1.5V AA or AAA battery and watch the cone movement when you briefly connect it. Positive of battery to positive of speaker makes the cone move outwards.
Q: I used the battery test and the cone moved in. What does that mean?
A: It means that for the speaker’s internal wiring, the terminal you connected the positive (+) end of the battery to is actually the speaker’s negative (-) terminal. And the terminal connected to the negative (-) end of the battery is the speaker’s positive (+) terminal. Mark them correctly based on this finding.
Q: Should I check polarity every time I connect a speaker?
A: It’s wise to check if the speaker terminals are not clearly marked, or if you are using old speaker wire where the wire markings are not obvious or consistent. If everything is clearly labeled + and – on both the speaker and amplifier, and your wire has clear positive/negative indicators you trust, you usually don’t need to re-test the speaker’s inherent polarity. Just ensure your wiring follows the positive-to-positive and negative-to-negative rule.
Q: What is speaker phasing test and how is it different from polarity?
A: Polarity is about the electrical + and – of a speaker’s terminals. Phase is about how speaker cones move in time with each other. Incorrect polarity is the most common cause of speakers being out of phase when they are playing the same signal. Checking and correcting polarity ensures your speakers are wired to be in phase. You can also have phase issues caused by speaker placement or room acoustics, but wiring polarity is the easiest to fix.