
Cooking venison backstrap in the oven is a great way to make a tender and tasty meal. How long do you cook venison backstrap in oven? The time changes based on how thick the meat is and how you like it cooked. For a medium-rare finish, which many people like, it often takes around 15-25 minutes at an oven temperature for venison backstrap of 325°F to 350°F. What is the internal temperature for medium rare venison? You want the inside of the meat to reach 130°F to 135°F using a meat thermometer. How to not overcook venison? Always use a meat thermometer and take the meat out of the oven when it’s just a few degrees below your target temperature. The heat left in the meat will finish the cooking.
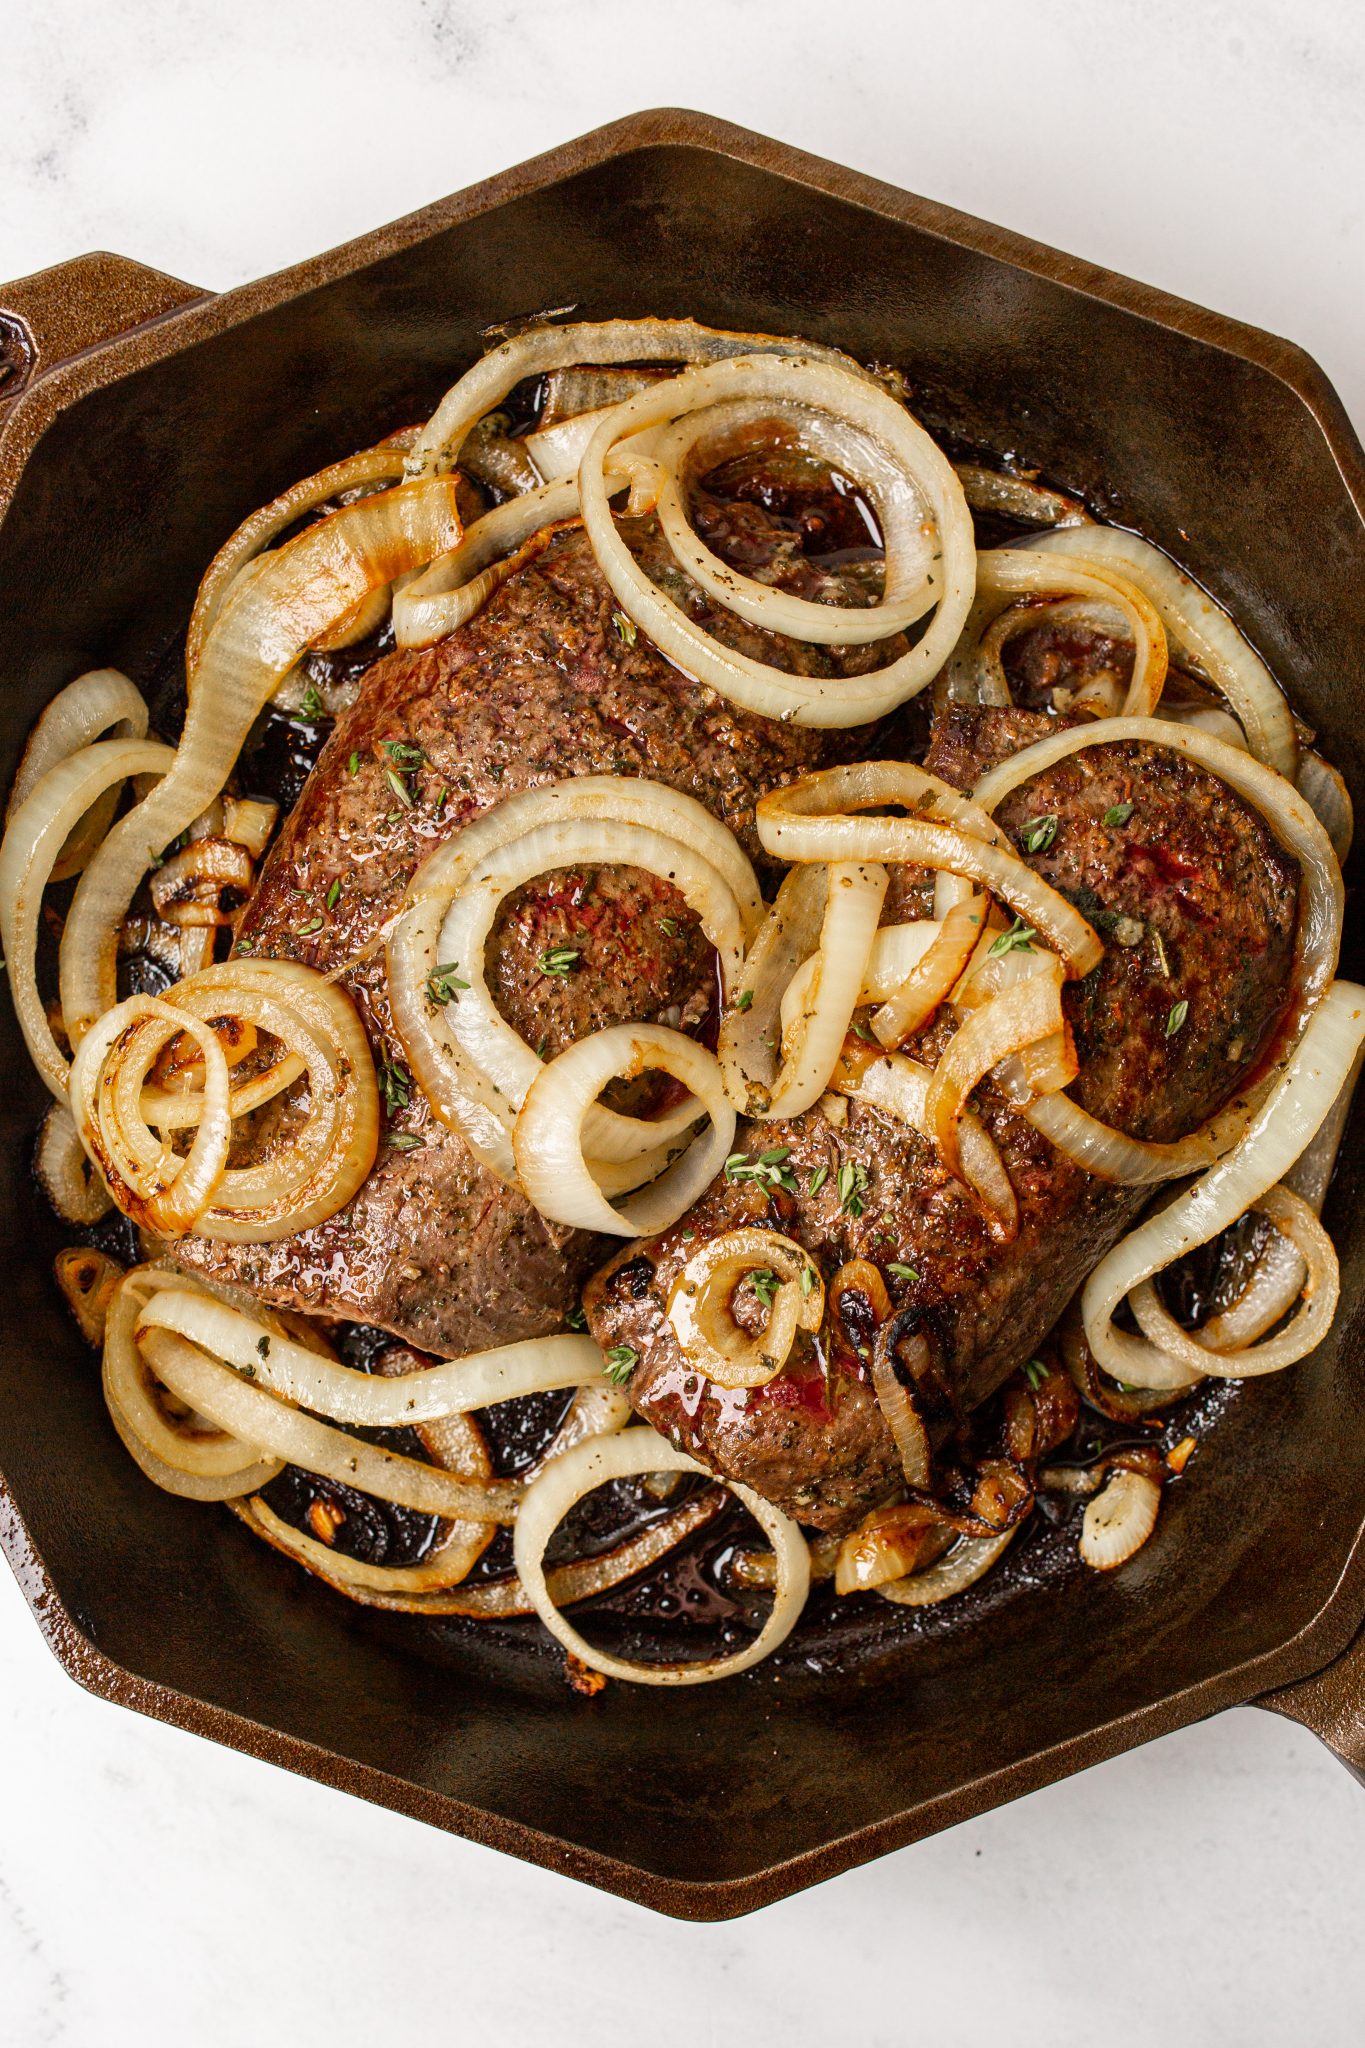
Image Source: castironrecipes.com
Why Cook Venison Backstrap in the Oven?
Cooking deer backstrap in oven offers many good points. It is an easy way to cook this nice cut of meat. The oven gives even heat all around. This helps the meat cook the same amount inside and out. This is different from cooking it only on a stove top or grill. Those can burn the outside before the inside is done.
Using the oven is less messy than frying on the stove. You put the meat in the oven and let it cook. This lets you do other things while dinner is being made. It’s also a good way to cook larger pieces of backstrap.
The oven method is gentle. This helps keep the venison moist and tender. Venison is lean, meaning it has little fat. Lean meats can dry out fast. The oven’s steady heat helps stop this from happening.
You can also use different cooking styles in the oven. You can bake it slow and low. Or you can use a higher heat for faster cooking. Some people like to sear venison backstrap before baking. This makes a nice brown crust on the outside. It adds flavor and locks in juices. Other people use the reverse sear method. We will talk about these ways later.
Overall, oven cooking is reliable and simple. It makes it easier to get the right venison cooking times and temperatures. This helps you make a dish everyone will love.
Grasping Venison Backstrap
Let’s talk about venison backstrap itself. What is it? It’s a long, lean muscle that runs along the deer’s spine. It’s also called the loin or venison loin. Think of it like the ribeye or strip steak on a cow, but much leaner.
Because it does little work, this muscle is very tender. It has a fine texture. It also has a mild, slightly sweet taste. People who hunt deer often see the backstrap as the best part.
Being lean means it has less fat than beef or pork. This is good for health, but it makes cooking tricky. There is no fat to protect the meat from drying out. So, timing and temperature are key. You want to cook it just enough to be safe and tender, but not so much that it becomes tough and dry.
The size of the backstrap can be different. It depends on the size of the deer. A young deer will have smaller backstraps. A large, older deer will have bigger ones. The thickness of the backstrap is what matters most for cooking time. A thick piece needs more time than a thin one.
Cooking venison backstrap in oven needs care. If you get it right, it is truly special. It does not need lots of fancy things. Good seasoning and correct cooking are enough.
Key Factors for Perfect Cooking
Many things change how long venison backstrap cooks in the oven. Knowing these things helps you get it right.
- Thickness of the Meat: This is the biggest factor. A piece that is 2 inches thick will take much longer than a piece that is 1 inch thick. Always measure the thickest part of the backstrap.
- Oven Temperature: The heat you use matters. A higher temperature cooks faster. A lower temperature cooks slower and can be more gentle. We will look at common temperatures soon.
- Desired Doneness: How do you like your meat? Medium-rare? Medium? This changes the target internal temperature. Medium-rare needs less cooking time than medium or well-done. Most people agree venison is best medium-rare or medium at most. Cooking it more makes it tough.
- Starting Temperature of the Meat: Meat cooks more evenly if it’s not ice cold when it goes in the oven. Let it sit at room temperature for 30-60 minutes before cooking.
- Your Specific Oven: Not all ovens heat the same. Some run hotter or colder than the setting. It is a good idea to use an oven thermometer to check the real temperature inside your oven.
- Using a Meat Thermometer: This is the most important tool. Guessing the time is not good enough for lean venison. A thermometer tells you the inside temperature of the meat. This is the only sure way to know when it is done just right.
- Resting Time: After cooking, the meat needs to rest. This lets the juices settle back into the meat. If you cut it too soon, the juices run out, and the meat dries.
Getting these factors right helps you master cooking deer backstrap in oven. Pay attention to the meat itself, not just the clock.
Oven Temperature for Venison Backstrap
What is a good oven temperature for venison backstrap? There are a few choices, each with its own reasons.
- Lower Temperature (Around 275°F to 300°F): This is often used for the reverse sear method. Cooking at a low heat first cooks the inside gently and evenly. This helps stop the outside from cooking too fast. It takes longer but gives you more control.
- Medium Temperature (Around 325°F to 350°F): This is a common temperature for direct baking. It cooks the meat at a steady pace. It’s a good middle ground for getting a tender result without taking too long.
- Higher Temperature (Around 375°F to 400°F): Some people use a higher heat for faster cooking. However, this needs more careful watching. It’s easier to overcook the outside before the inside reaches the right temperature. If you sear venison backstrap before baking at a high heat, you might use a slightly lower finish temperature in the oven.
For a standard bake venison backstrap recipe, 325°F or 350°F is often a good starting point. But remember to adjust based on the meat’s thickness and your oven. Using a meat thermometer is key, no matter the temperature. The cooking time will be different for each temperature setting.
Knowing the oven temperature for venison backstrap is just one piece. You also need to know what temperature the meat should be inside.
Internal Temperature for Medium Rare Venison
Knowing the right internal temperature is key to cooking venison backstrap. This is how you know when it has reached the perfect doneness. Remember, venison is best served medium-rare or medium. Cooking it past medium will likely make it dry and tough.
Here are the target internal temperatures:
- Rare: 120°F – 125°F
- Medium Rare: 130°F – 135°F
- Medium: 140°F – 145°F
- Medium Well: 150°F – 155°F (Getting risky for venison)
- Well Done: 160°F+ (Avoid this for venison backstrap!)
For the most tender and moist result, aim for internal temperature for medium rare venison, which is 130°F to 135°F.
It is very important to take the meat out of the oven a few degrees before it reaches the final target temperature. Why? Because of something called “carry-over cooking.” After you take the meat out, the heat inside keeps cooking it for a few minutes. The temperature can rise another 5-10 degrees Fahrenheit.
So, if you want medium-rare (130°F-135°F), take it out when the thermometer reads about 125°F-130°F. If you want medium (140°F-145°F), take it out around 135°F-140°F.
Use a good meat thermometer. An instant-read digital thermometer is best. Put the thermometer into the thickest part of the meat, but not touching bone or fat (if any). This gives you the most correct reading. Checking the temperature lets you follow venison cooking times and temperatures closely and helps you learn how to not overcook venison.
Preparing the Venison
Before you cook, you need to get the backstrap ready. Proper prep helps make the cooking better.
- Thaw the Meat: If your backstrap is frozen, thaw it safely. The best way is in the refrigerator. A thick backstrap might take a day or two to thaw completely. Do not thaw it at room temperature or in hot water. This can grow bad germs.
- Bring to Room Temperature: Once thawed, take the backstrap out of the fridge about 30-60 minutes before you plan to cook. Let it sit on the counter. Meat cooks more evenly when it starts closer to room temperature.
- Trim the Meat: Venison backstrap often has a thin, silver-white layer on it. This is called silver skin. It does not cook away and can be tough. Use a sharp knife to carefully cut this silver skin off. Slide the knife under the silver skin, tilt the blade up slightly, and slice it away from the meat. Also, trim off any large pieces of fat, though backstrap usually has very little.
- Pat It Dry: Use paper towels to pat the surface of the backstrap very dry. A dry surface is important if you plan to sear it. Wet meat will steam instead of browning and forming a crust. Even if not searing, drying helps get a nicer outer texture.
- Seasoning: Now it’s time to season! Salt is the most important seasoning. It brings out the meat’s flavor. Put salt on all sides just before cooking. If you salt too early (like hours before), it can draw moisture out of the meat. Use black pepper too. You can also add other herbs and spices you like. Garlic powder, onion powder, paprika, or a mix of dried herbs like thyme or rosemary work well. Rub the seasoning all over the meat.
Your venison backstrap is now ready for cooking. The next step depends on if you want to sear it or not.
Searing vs. No Searing
Should you sear venison backstrap before baking? This is a choice many cooks make. Searing means cooking the outside of the meat fast at high heat. This makes a brown crust. This crust adds lots of flavor through a process called the Maillard reaction.
Pros of Searing:
- Adds deep, complex flavor to the outside.
- Creates a nice texture contrast with the tender inside.
- Can give the meat a more pleasing look.
Cons of Searing:
- Adds an extra step and more time.
- Can make a mess on your stove top (splatter).
- Needs high heat, which can smoke up your kitchen if you’re not careful.
If you choose to sear venison backstrap before baking, you will do it on the stove top in a hot pan with a little oil, or maybe on a hot grill. You cook it for just a minute or two on each side, just until it’s nicely browned. You are not trying to cook the inside, only the outside. After searing, you move the backstrap to the oven to finish cooking.
If you decide not to sear, you simply put the raw, seasoned backstrap directly into the oven. This is simpler and less messy. The outside will still brown slightly in the oven, but you won’t get the same deep crust or intense seared flavor.
The choice is yours. Searing often gives a better flavor and texture, but skipping it is faster and easier. Both methods can result in perfectly cooked, tender venison if you manage the oven time and temperature correctly.
Bake Venison Backstrap Recipe (Direct Bake)
This is a simple bake venison backstrap recipe. It assumes you are not searing first, or maybe just a very light sear.
What you need:
- Venison backstrap (about 1-2 pounds)
- Salt
- Black pepper
- Other seasonings you like (garlic powder, herbs, etc.)
- A little oil (like olive or canola)
- Oven-safe pan or baking sheet
- Meat thermometer
Steps:
- Get Ready: Take the backstrap out of the fridge. Trim off silver skin and pat dry. Let it sit for 30-60 minutes. Heat your oven to 325°F or 350°F.
- Season: Rub the meat with a little oil. This helps the seasoning stick and can help with browning. Season generously with salt, pepper, and any other spices. Make sure all sides are covered.
- Place in Pan: Put the seasoned backstrap on an oven-safe pan or baking sheet. You can use a wire rack on the pan if you have one. This helps air move around the meat for more even cooking.
- Cook in Oven: Place the pan in the preheated oven.
- Check Temperature: Start checking the internal temperature with your meat thermometer sooner than you think you need to. For a backstrap that is 1.5 to 2 inches thick at 350°F, this might be around 15-20 minutes. For a thinner piece or lower temp, it could be less or more.
- Aim for Target: Remember to take the meat out a few degrees below your final target. For medium-rare (130°F-135°F), pull it out around 125°F-130°F. Check the thickest part.
- Rest: This step is a must! When the backstrap hits the pull temperature, take it out of the oven right away. Put it on a cutting board. Cover it loosely with foil. Let it rest for 10-15 minutes. This is the resting time for venison loin. Do not cut it yet!
- Slice and Serve: After resting, slice the backstrap against the grain. The slices should be across the lines of the muscle. This makes the meat more tender to chew. Serve right away.
This method gives you a simple way for cooking deer backstrap in oven. It’s a classic way to get a nice result.
Reverse Sear Venison Backstrap
The reverse sear venison backstrap method flips the steps. Instead of searing first, you cook the meat slowly in the oven at a low temperature. Then, you sear it quickly at the end. Many cooks feel this is the best way to get a perfect, even cook from edge to edge.
What you need:
- Venison backstrap (about 1-2 pounds)
- Salt, pepper, other seasonings
- Oil (for searing, needs a high smoke point like canola or grapeseed)
- Oven-safe pan or baking sheet with a wire rack
- Meat thermometer
- Heavy pan (like cast iron) for searing
Steps:
- Get Ready: Take the backstrap out of the fridge. Trim silver skin, pat dry. Let it sit for 30-60 minutes. Heat your oven to a low temperature, around 250°F to 300°F. Using a wire rack over a baking sheet is very important for reverse searing. It lets the hot air cook the meat evenly on all sides.
- Season: Season the meat generously with salt, pepper, and other spices.
- Low and Slow in Oven: Place the seasoned backstrap on the wire rack in the pan. Put it in the low-heat oven.
- Cook to Internal Temp: Cook the meat slowly until the internal temperature is about 10-15 degrees below your final target doneness. For medium-rare (130°F-135°F), you would cook it in the low oven until it reaches about 115°F-120°F. This slow cooking can take 45 minutes to over an hour, depending on thickness and oven temp. Use your meat thermometer often as it gets close to the target temp.
- Rest (Briefly): Take the backstrap out of the oven. Let it rest on the wire rack for about 10 minutes while you get the searing pan ready. This brief rest is part of the process.
- Heat Pan: Heat a heavy pan (cast iron is great) on the stove top over high heat. Add a small amount of oil with a high smoke point. Get the pan and oil very hot until it just starts to smoke lightly.
- Sear: Carefully place the backstrap in the hot pan. Sear each side for 60-90 seconds, maybe slightly longer, until a nice brown crust forms. Use tongs to sear the ends too if possible.
- Rest: After searing, put the backstrap back on the cutting board. Let it rest, covered loosely with foil, for another 5-10 minutes. The main resting happened after the oven cook, but a short rest after searing helps.
- Slice and Serve: Slice against the grain and enjoy the perfectly even pink inside and crispy crust!
The reverse sear method takes more steps and time, but it often gives the best result for medium rare venison cooking time. It makes it easier to control the internal temperature perfectly.
Venison Cooking Times and Temperatures
Getting the right venison cooking times and temperatures is a mix of using a clock and using a thermometer. The thermometer is more reliable, but time gives you an idea of when to start checking. These times are estimates. Always check with a thermometer.
Here’s a rough guide for a backstrap about 1.5 to 2 inches thick:
| Oven Temperature | Target Doneness | Pull Temperature (out of oven) | Approximate Cooking Time | Final Internal Temperature (after rest) |
|---|---|---|---|---|
| Direct Bake | ||||
| 350°F | Medium Rare | 125°F – 130°F | 15 – 25 minutes | 130°F – 135°F |
| 350°F | Medium | 135°F – 140°F | 20 – 30 minutes | 140°F – 145°F |
| 325°F | Medium Rare | 125°F – 130°F | 20 – 35 minutes | 130°F – 135°F |
| 325°F | Medium | 135°F – 140°F | 25 – 40 minutes | 140°F – 145°F |
| Reverse Sear | ||||
| 275°F | Medium Rare | 115°F – 120°F | 45 – 75 minutes | 130°F – 135°F |
| 275°F | Medium | 125°F – 130°F | 55 – 90 minutes | 140°F – 145°F |
Note: These times are just guides! Your actual cooking time will vary based on the exact thickness of your backstrap, your oven, and if you seared first (for direct bake).
For medium rare venison cooking time, especially with direct bake at 350°F, expect it to be fairly quick, maybe 15-25 minutes. If your backstrap is thinner than 1.5 inches, it will cook even faster. If it’s thicker than 2 inches, it will take longer.
Always use the meat thermometer to be sure. Cooking by time alone for venison backstrap is risky.
How to Not Overcook Venison
Overcooking is the biggest mistake people make with venison backstrap. Since it is so lean, it dries out and becomes tough very fast once it goes past medium doneness. Here are the best ways how to not overcook venison:
- Use a Meat Thermometer: This is number one. Do not guess. Take the meat out when it reaches the correct pull temperature (a few degrees below your target).
- Start Checking Early: Do not wait until the estimated cooking time is up to check the temperature. Start checking 5-10 minutes before you think it will be done. For thin pieces, start checking even earlier.
- Cook by Temperature, Not Time: Use the cooking time tables as a rough guide, but rely on the thermometer reading to tell you when the meat is truly ready to come out.
- Use the Right Oven Temperature: Cooking at a very high temperature makes it harder to control the doneness. The outside can cook too fast. Using a medium or lower temperature gives you more time to check and react.
- Let the Meat Rest: Resting is part of the cooking process (carry-over cooking) and is vital for moisture. If you skip resting, the juices run out when you cut, leaving the meat drier. Resting lets the juices spread back through the meat.
- Don’t Over-Rest: While resting is key, don’t let it sit for too long, especially if you prefer warmer meat. 10-15 minutes is usually enough for a backstrap.
- Trim Silver Skin: While not directly about cooking time, removing silver skin makes the final result more tender. Tough silver skin can make the meat seem tougher even if it’s cooked perfectly.
- Slice Against the Grain: This makes each bite more tender. If you slice with the grain, the muscle fibers are long and hard to chew.
By following these steps, you greatly lower the risk of overcooking your venison backstrap. You will get tender, juicy results every time. Venison cooking times and temperatures are important, but the internal temperature is king.
Resting Time for Venison Loin
We talked about resting time for venison loin, but let’s look closer. It’s a step you must not skip!
When meat cooks, the muscle fibers tighten up. This pushes the juices to the center of the meat. If you cut the meat right when it comes out of the hot oven, those juices will run out onto the cutting board. This leaves the meat itself dry and less flavorful.
Resting the meat lets the muscle fibers relax as the temperature cools slightly. This allows the juices that were pushed to the center to spread back out through the entire piece of meat. The result is meat that is much juicier and more tender.
How long should you rest venison loin? For a backstrap, 10 to 15 minutes is usually enough. For thicker roasts, it might be 15-20 minutes or even longer. But for a typical backstrap, 10-15 minutes is the sweet spot.
How to Rest:
- Take the meat out of the oven when it hits the right pull temperature.
- Put it on a clean cutting board.
- Tent it loosely with aluminum foil. “Tent” means put the foil over it so there is space between the foil and the meat. This keeps heat in but allows some air flow, which stops the outside from getting soggy. Don’t wrap it tightly.
- Let it sit for the full resting time. Do not cut it!
- Collect any juices that gather on the cutting board during resting. You can pour them over the sliced meat later.
While the meat rests, its internal temperature will rise a bit (carry-over cooking). This is why you pull it out a few degrees early. The resting time for venison loin is just as important as the cooking time in the oven.
Putting It All Together
So, how do you get perfectly cooked venison backstrap in the oven? Let’s quickly recap the steps:
- Prep: Thaw (if frozen), trim silver skin, pat dry, let sit at room temp for 30-60 mins.
- Season: Rub with oil, season generously with salt, pepper, and desired spices.
- Choose Method: Decide if you will direct bake or reverse sear.
- Preheat Oven: Set oven to 325-350°F for direct bake, or 250-300°F for reverse sear.
- Cook: Place seasoned backstrap on a pan, ideally with a rack. Cook in the preheated oven.
- Monitor: Use a meat thermometer often as it gets close to doneness.
- Pull: Take the backstrap out when it reaches the correct pull temperature (a few degrees below target doneness). Target internal temperature for medium rare venison is 130-135°F, so pull around 125-130°F.
- Rest: Put the cooked backstrap on a cutting board, tent loosely with foil. Let it rest for 10-15 minutes (resting time for venison loin).
- Slice: Slice against the grain.
- Serve: Enjoy your tender, juicy venison.
This guide covers the essential venison cooking times and temperatures and how to not overcook venison. Whether you try a simple bake venison backstrap recipe or the reverse sear venison backstrap method, following these steps will help you cook deer backstrap in oven like a pro.
Troubleshooting Common Issues
Even with good steps, sometimes things go wrong. Here are a few common issues and how to fix them or avoid them next time:
- Issue: Meat is Dry
- Reason: Most likely overcooked.
- Fix/Avoid: Always use a meat thermometer! Take the meat out at the correct pull temperature. Ensure it rests fully before slicing. Next time, check the temperature earlier and more often.
- Issue: Meat is Tough
- Reason: Can be overcooked, or silver skin wasn’t removed, or sliced with the grain.
- Fix/Avoid: Check doneness with a thermometer. Make sure to trim all silver skin before cooking. Always slice against the grain when serving.
- Issue: Outside is Burning, Inside is Raw
- Reason: Oven temperature is too high, or the backstrap is too thick for a very high heat method.
- Fix/Avoid: Use a meat thermometer to check internal temperature. Try a lower oven temperature (like 325°F or even reverse searing at 275°F). If searing first, make sure the pan is hot but not smoking too much, and sear only briefly to get color, not cook deep into the meat.
- Issue: Meat Cooked Unevenly
- Reason: Backstrap might not be uniform in thickness, oven has hot spots, or meat wasn’t allowed to come near room temp before cooking.
- Fix/Avoid: If the backstrap is much thicker on one end, you can fold the thinner end under and tie it with string to make it more even. Use an oven thermometer to check your oven’s temp and hot spots. Let meat sit out before cooking. Using a wire rack can help hot air circulate evenly.
Practice makes perfect. Don’t be afraid to try again. Each time you cook venison backstrap in oven, you learn more about your oven and the meat.
Serving Ideas
Once your perfectly cooked venison backstrap is sliced, what do you serve it with? Its simple, clean flavor goes well with many things.
- Classic Sides: Mashed potatoes, roasted root vegetables (carrots, parsnips), green beans, asparagus.
- Sauces: A red wine reduction sauce, mushroom sauce, or a simple pan sauce made from the juices left in the pan (if you seared). A berry sauce (like cranberry or currant) also pairs well with venison’s flavor.
- Grains: Wild rice pilaf, quinoa, or couscous.
- Salads: A simple green salad with a light dressing.
Keep the sides from being too strong so the venison flavor can shine through.
Conclusion
Cooking venison backstrap in the oven is a rewarding process. It lets you turn a prize piece of meat into a wonderful meal. The key steps are simple: prepare the meat right, control the oven temperature for venison backstrap, use a meat thermometer to reach the correct internal temperature for medium rare venison, allow for carry-over cooking by taking it out early, and always give it enough resting time for venison loin.
Whether you use a simple bake venison backstrap recipe or try the reverse sear venison backstrap method, focusing on these points will teach you how to not overcook venison and help you master venison cooking times and temperatures. Say goodbye to dry, tough deer backstrap. Hello to tender, juicy, perfectly cooked venison from your oven!
Frequently Asked Questions (FAQ)
Q: Can I cook venison backstrap from frozen in the oven?
A: It is best to thaw venison backstrap fully before cooking in the oven. Cooking from frozen makes it hard to get the inside cooked correctly before the outside is overdone. Thaw it safely in the refrigerator.
Q: Do I have to sear venison backstrap before baking?
A: No, you do not have to sear venison backstrap before baking. Searing adds flavor and crust, but you can bake it directly without searing. Both methods can give good results if done right. The reverse sear method sears at the end, not the start.
Q: What if my backstrap is much thinner or thicker than average?
A: Adjust the cooking time. A thinner backstrap will cook much faster. A thicker one will take longer. Always rely on your meat thermometer to know when it’s done, not just the time. Start checking the temperature earlier for thin pieces.
Q: How long should I let venison backstrap rest?
A: Rest venison backstrap for 10-15 minutes after taking it out of the oven. Tent it loosely with foil. This is the resting time for venison loin and is very important for juicy meat.
Q: Is medium-rare venison safe to eat?
A: Venison from a healthy, wild deer or farm-raised source is generally safe to eat at medium-rare doneness if handled properly. The main concern for wild game is often parasites or bacteria on the surface of the meat. Cooking the outside to a safe temperature (which searing helps with) while keeping the inside medium-rare is usually fine. If you have concerns, cook it to medium (140-145°F internal). Avoid eating truly rare wild game.
Q: Can I use this method for other venison cuts?
A: This method is best for tender cuts like backstrap or tenderloin. Tougher cuts like roasts from the leg or shoulder need different cooking methods, like slow cooking or braising, to become tender.
Q: My venison tastes gamey. How can I fix that?
A: The taste can depend on the deer’s diet and how the meat was handled after the hunt. Proper bleeding, quick cooling, and good butchering help. Some people soak the meat in buttermilk or saltwater before cooking, which can help reduce gamey flavor for some cuts. However, backstrap usually has a mild flavor already if handled well. Proper cooking (not overcooking) also makes a big difference; overcooked venison can seem more gamey.