
Yes, you absolutely can cook an egg in a microwave oven, achieving a result that’s fast and easy, though different from traditional stovetop frying. This microwave fried egg method is perfect when you’re short on time and want a quick breakfast or snack. Learning how to cook an egg in microwave is simple, and this guide will walk you through the process. We’ll cover the essential microwave egg frying technique, provide a basic fried egg microwave recipe, and give clear microwave fried egg instructions so you can quickly enjoy a microwave egg for breakfast or anytime you need it. We’ll also discuss key details like microwave egg cooking time and the importance of using a cooking eggs in microwave safe dish.
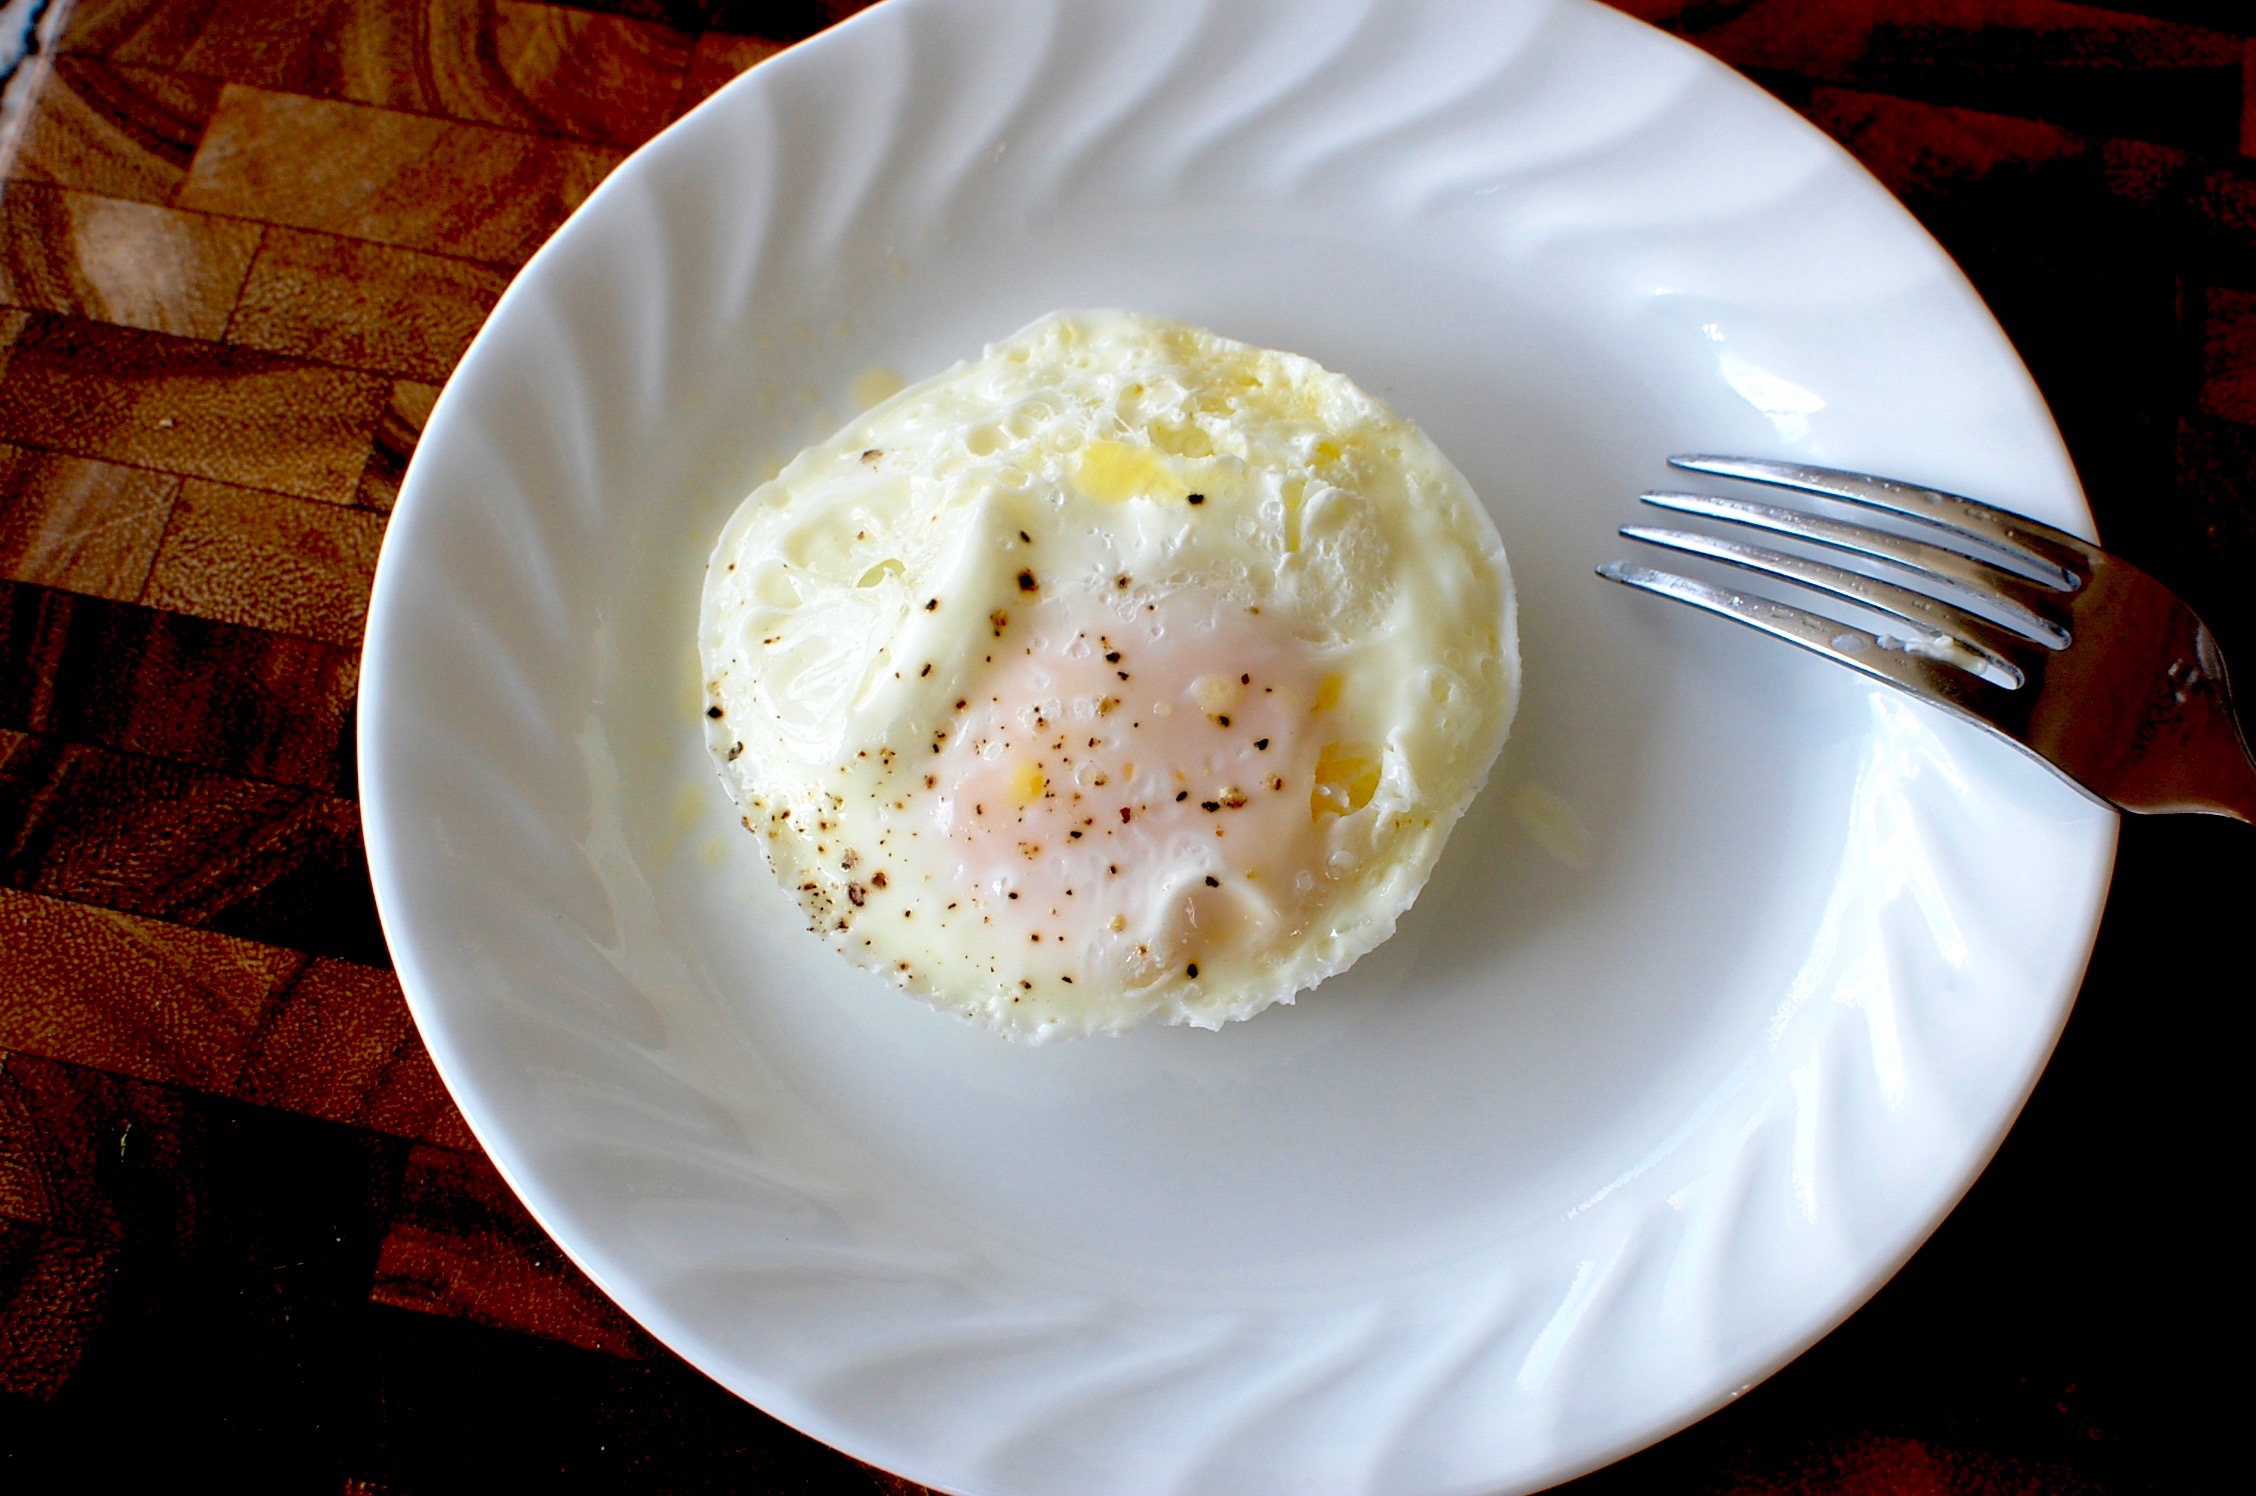
Image Source: www.the350degreeoven.com
Why Try the Microwave Egg Method?
When time is short, the microwave is your friend. Cooking an egg in the microwave is much faster than heating a pan on the stove. It also means less mess. No greasy splatters to clean up afterward! If you need a quick topping for toast or a sandwich, the microwave fried egg method is hard to beat for speed and simple cleanup. It’s a convenient way to get protein fast.
Grasping Microwave Safety with Eggs
This is the most important part. Cooking eggs in a microwave needs care. Raw eggs can build up steam inside when microwaved. This steam can cause the egg to burst. This is messy and can be dangerous.
Why Eggs Can Pop in the Microwave
An egg has a yolk and a white. The yolk is held inside a thin membrane. When the egg cooks, water inside turns to steam. If this steam cannot escape, pressure builds up. The yolk membrane can trap this steam. When the pressure gets too high, the membrane breaks. This causes the egg to explode. It can happen inside the microwave or even after you take it out.
How to Prevent Popping
The key step is simple: break the yolk before cooking. You can do this with a fork or a toothpick. Just make a few small holes in the yolk membrane. This lets the steam escape safely as the egg cooks. Never microwave a whole, raw egg without piercing the yolk. This simple step makes the microwave egg frying technique safe to use.
What You Need for a Microwave Egg
Getting ready is easy. You only need a few things.
Necessary Items
- An egg (fresh is best)
- A small dish that is safe for the microwave. This is key for cooking eggs in microwave safe dish. Glass or ceramic bowls or ramekins work well. Small plates or saucers can also work, but a bowl helps hold the egg’s shape.
- A fork or toothpick (for safety!)
- A lid or microwave-safe plastic wrap (optional, but helps cook evenly and keeps microwave clean)
- A little bit of butter or oil (optional, for taste and to prevent sticking)
- Salt and pepper (to taste)
Choosing Your Dish
Not all dishes are safe for the microwave. Metal is never safe. Some plastics are not safe and can melt or release harmful chemicals. Always check the bottom of the dish for a “microwave safe” symbol. Glass and most ceramic dishes are fine. A small ramekin is a great size for one egg. It helps the egg cook in a nice round shape, like a fried egg.
Your Microwave Fried Egg Instructions
Here is the simple, step-by-step guide. Follow these microwave fried egg instructions closely for the best result. This is your basic fried egg microwave recipe.
Step 1: Get Your Dish Ready
Choose your microwave safe dish. A small bowl or ramekin is best. Put a tiny bit of butter or oil in the dish. Swirl it around to coat the bottom and sides. This helps the egg not stick. It also adds a little flavor, like frying. You only need a very small amount.
Step 2: Add the Egg
Carefully crack the egg into the prepared dish. Try to keep the yolk whole if you want a runny yolk. Don’t worry if the yolk breaks if you want a firm one.
Step 3: Pierce the Yolk
This step is very important for safety. Take a fork or a toothpick. Gently poke the top of the egg yolk in two or three places. Just enough to break the surface membrane. Do not stir the egg. Just make small holes in the yellow part. This lets steam escape during cooking. It stops the egg from exploding.
Step 4: Cover the Dish (Optional but Recommended)
You can cover the dish lightly. Use microwave-safe plastic wrap. Pull one corner back to leave a vent for steam. Or use a microwave-safe lid meant for venting. Covering helps the egg cook more evenly. It also stops any small splatters from making your microwave dirty. If you don’t cover it, that’s okay, but watch for splatters.
Step 5: Microwave the Egg
This is where you cook the egg in microwave oven. Microwave egg cooking time depends on your microwave’s power and how you like your egg. Start with a short time. For one egg in a typical 1000-watt microwave, start with 30 seconds.
Put the dish in the microwave. Close the door. Set the timer for 30 seconds. Press start.
Step 6: Check and Cook More if Needed
When the time is up, carefully take the dish out. It will be hot. The egg white should look mostly set around the edges. The yolk might still be liquid.
If you want the white more set or the yolk firmer, put it back in the microwave. Add time in very short bursts. Use 10-second steps. Check the egg after each 10 seconds.
- For a runny yolk: Stop when the white is set but the yolk is still bright yellow and liquid.
- For a soft yolk: Stop when the white is fully set and the top of the yolk is just starting to look less shiny. It will firm up more as it rests.
- For a firm yolk: Keep cooking in 10-second bursts until the yolk looks mostly solid.
Stop cooking when the egg looks almost how you want it. It will keep cooking a little after you take it out. This is called “carryover cooking.”
Step 7: Let it Rest
Once cooked, take the dish out of the microwave. Let the egg sit in the hot dish for about 30 to 60 seconds. This carryover cooking finishes setting the egg. It also makes it easier to lift out.
Step 8: Season and Serve
Carefully remove the egg from the dish. You might need a small spatula or spoon. Place it on your plate. Add salt, pepper, or other seasonings you like. Your microwave egg for breakfast or any meal is ready!
Here is a quick look at typical microwave egg cooking time ranges:
| Desired Yolk | Typical Time (1000W Microwave, 1 Egg) | Check after… | Add time in… |
|---|---|---|---|
| Runny | 30-45 seconds | 30 seconds | 10 second steps |
| Soft | 45-60 seconds | 45 seconds | 10 second steps |
| Firm | 60-80 seconds | 60 seconds | 10 second steps |
Note: Microwave power varies. Always start with the lower time and add more as needed.
Changing Your Microwave Egg Frying Technique
You can make your microwave egg taste even better. Here are some ideas for your fried egg microwave recipe.
Adding Flavor
- Butter/Oil: Using butter or oil in the dish before adding the egg adds a “fried” flavor missing from just cooking plain.
- Salt and Pepper: Add these after cooking for best taste.
- Cheese: Sprinkle a little shredded cheese over the egg before microwaving. Cheddar or Monterey Jack work well.
- Herbs: Add dried herbs like chives or parsley to the dish before cooking.
- Spices: A pinch of paprika or red pepper flakes can add a kick.
Adjusting for Different Yolks
The microwave egg frying technique is all about managing the cooking time.
- More Runny: Check sooner and stop when the white is set but the yolk is still very loose.
- More Firm: Continue microwaving in short 10-second bursts until the yolk is as solid as you like. Watch carefully so it doesn’t get rubbery.
Using Different Power Levels
Most microwave egg frying technique guides use high power. But you can also use lower power settings. Cooking at 50% or 70% power takes longer. But it cooks the egg more gently and evenly. This might help avoid rubbery whites. If using lower power, increase the total cooking time. For example, an egg at 50% power might take 1.5 to 2 minutes. You still need to check it often.
What if Things Go Wrong? Troubleshooting Common Issues
Even with simple microwave fried egg instructions, you might have problems. Here’s what to do.
The Egg Popped!
This means the steam did not escape. You likely did not pierce the yolk enough, or at all. Clean your microwave carefully. Next time, make sure you poke the yolk well with a fork or toothpick before cooking. Making three or four small holes is usually enough.
The Egg is Rubbery
This usually means you cooked it too long. Eggs cook very fast in the microwave. Overcooking makes the proteins tighten too much, making the egg hard and rubbery. Next time, reduce the cooking time. Use shorter 10-second bursts at the end. Stop when the egg is almost done, as it will finish cooking as it rests. Cooking at a slightly lower power level can also help prevent rubberiness.
The Yolk is Still Raw, but the White is Done
This can happen if your microwave heats unevenly. The white cooks faster because it has more water. Make sure the yolk was fully covered by the white when you cracked it. Piercing the yolk helps it cook more evenly. You can also try covering the dish to help the heat spread around. Cooking at a slightly lower power setting for a longer time might also help the yolk catch up.
The Egg Stuck to the Dish
You didn’t use enough butter or oil, or you didn’t coat the dish well. Or you didn’t let it rest long enough. Make sure you grease the dish thoroughly before cracking the egg. Using a non-stick cooking spray works well too. Letting the egg rest for a minute after cooking helps it release from the dish more easily.
Is It Really “Frying”?
It’s important to know that cooking eggs in microwave oven using this method is not true frying. Frying happens in hot fat on a stove. This method uses microwave energy to heat the water inside the egg. It’s more like steaming or baking the egg in its own moisture.
However, the goal is to get a similar shape and sometimes texture (if you use a little fat). The title uses “Fry” because people often search for how to cook an egg like a fried one in the microwave. While technically not frying, it gives you a quick, cooked egg that you can use like a fried one. Think of it as a “fried-style” microwave egg.
Comparing Microwave to Stovetop Eggs
Let’s look at how the microwave method stacks up against cooking an egg in a pan.
| Feature | Microwave Method | Stovetop Frying |
|---|---|---|
| Speed | Very Fast (under 2 minutes total) | Faster than boiling, but takes longer than microwave |
| Mess | Very Low (contained in dish) | Can splatter grease |
| Texture | Can be slightly rubbery if overcooked, more steamed | Crispier edges possible, softer texture achievable |
| Taste | Less rich unless fat is added | Richer flavor from cooking in fat |
| Control | Can be harder to get perfect yolk, rapid cooking | More control over heat and cooking speed |
| Clean-up | Easy, just one small dish | Pan needs washing, potential stove clean-up |
| Safety Concern | Popping if yolk not pierced | Hot oil splashes |
The microwave method wins on speed and ease of cleanup. Stovetop frying often gives a better texture and flavor. Both have safety steps to follow. The microwave fried egg method is best when speed is your top need.
Ideas for Using Your Microwave Egg
Once you’ve mastered the microwave egg frying technique, how can you use your quick egg?
- On Toast: Place it on a piece of buttered toast.
- In a Sandwich: Add it to a breakfast sandwich or a burger.
- On an English Muffin: A classic simple meal.
- On Top of Grains: Add protein to a bowl of rice or quinoa.
- As a Snack: Eat it plain with salt and pepper.
It’s a very flexible food!
Getting a Handle On Different Dish Sizes
The size and shape of your cooking eggs in microwave safe dish matters.
- Small Ramekin: Gives a nice round shape, good for fitting on a muffin.
- Small Plate/Saucer: Egg spreads out thinner, cooks faster. Might not hold shape as well. Make sure edges are raised slightly so butter/oil doesn’t run off.
- Larger Bowl: Egg spreads more. Can make it harder to get a distinct yolk/white shape like a fried egg.
For a “fried-like” shape, a small, shallow dish like a ramekin or a small, curved plate works best.
Ensuring Success Every Time
To get a good result with your microwave fried egg instructions:
- Always Pierce the Yolk: This is number one for safety.
- Use a Microwave Safe Dish: Never metal!
- Grease the Dish: A little bit helps prevent sticking.
- Start with Short Time: 30 seconds is a good start for one egg.
- Cook in Short Bursts: Add 10 seconds at a time after the first check.
- Let it Rest: This finishes cooking and makes it easier to remove.
- Know Your Microwave: All microwaves are different. You’ll learn the best time for yours after a few tries.
Mastering the microwave egg cooking time for your specific microwave is key. Pay attention to how the egg looks and how long it took. Note it down if needed.
Interpreting How Microwave Power Affects Cooking
Microwave ovens come in different power levels, measured in watts. Higher wattage means more cooking power and faster cooking.
- Higher Wattage (e.g., 1000-1200W): Eggs cook very quickly. You’ll use shorter times. Be extra careful not to overcook.
- Lower Wattage (e.g., 700-900W): Eggs take longer to cook. You might need to add more time to the initial step and subsequent bursts. The longer cooking time might sometimes lead to a more evenly cooked egg, but still watch for rubberiness.
Always adjust the microwave egg cooking time based on your oven’s power. The times given (like 30 seconds) are usually based on a 1000W microwave. If yours is lower, you’ll need more time. If it’s higher, you might need less. Start low and add time. This is the safest way to learn your microwave’s power.
More Details on the Microwave Egg Frying Technique
Let’s break down the technique a bit more. The goal is to cook the white fully while getting the yolk to your liking.
When you start cooking, the white around the edges will turn solid first. Then the white in the middle will cook. The yolk heats up too. Piercing the yolk is vital because the yolk cooks from the inside out, and that trapped steam pressure is highest there.
Covering the dish creates a small steam environment inside. This helps the top of the egg cook at the same time as the bottom. Without a cover, the top might cook slower or dry out. But make sure there is a vent, or pressure can build up under the cover, even with the yolk pierced. A small gap is enough.
Checking the egg every 10 seconds after the first minute is crucial. This lets you see exactly how fast it’s cooking and stop at the perfect point for your desired yolk. Don’t guess the time. Look at the egg! The look of the white changing from clear to opaque tells you it’s setting. The yolk’s color and shine tell you about its firmness. A bright, shiny yellow yolk is likely still runny. As it cooks, it will become duller and more solid looking.
Remember, this microwave egg frying technique is about speed and ease. It won’t replicate the slightly crispy edge you get from frying in a hot pan. But it gives you a quickly cooked egg with a set white and controllable yolk firmness. It’s a fantastic skill for quick meals, especially a speedy microwave egg for breakfast.
Advanced Tips for Your Microwave Egg
Want to make your microwave egg even better?
- Add Water/Milk: Some people add a teaspoon of water or milk to the dish before cooking. This creates more steam. This can make the egg more tender and help it cook evenly, almost like poaching inside the microwave. Just add the liquid before the egg.
- Cook Egg Whites Only: If you only want the white, you can cook just the egg white. Crack an egg and let the white separate into the greased microwave safe dish. You do NOT need to pierce anything if there is no yolk. Microwave the white for 45-75 seconds, checking often, until solid.
- Making Multiple Eggs: It’s often best to cook one egg at a time. Cooking two or more eggs at once makes the cooking time much longer. It also makes it harder to cook them evenly. One egg dishes like ramekins fit easily in most microwaves, allowing space for the microwave energy to reach the egg evenly. If you cook multiple eggs, use separate dishes or space them far apart on a large plate. You will need to increase the total microwave egg cooking time.
Experimentation is part of the fun! Try different times and power levels to find what works best in your microwave and for your taste. The simple fried egg microwave recipe can be adapted easily.
Getting the Timing Right
Let’s look closer at microwave egg cooking time. The time needed can vary greatly.
- Microwave Wattage: As discussed, this is the biggest factor.
- Number of Eggs: One egg is fastest. More eggs take much longer.
- Dish Size/Shape: A wider, flatter dish means the egg spreads more and cooks faster. A deep, narrow dish makes the egg thicker, taking longer.
- Starting Temperature of Egg: An egg straight from the fridge will take slightly longer than one at room temperature.
Always remember the “start low and add time” rule. For your first try with a single egg in a 1000W microwave, 30 seconds is a safe start. Then add 10 seconds. Look. Add 10 seconds. Look. Keep going until it’s almost done. Let it rest. This prevents rubbery, overcooked eggs and avoids uncooked yolks. This careful approach to microwave egg cooking time is key to success.
Frequently Asked Questions (FAQ)
Here are answers to common questions about using the microwave fried egg method.
Q: Can I really get a runny yolk?
A: Yes, you can! Stop microwaving as soon as the egg white is set and the yolk is still visibly liquid and bright yellow. Remember it will cook a little more as it rests. This requires careful timing and checking often.
Q: What is the best dish for cooking eggs in microwave oven?
A: A small, microwave-safe ceramic or glass ramekin (about 4-5 ounces) or a small, shallow bowl works very well. They give the egg a nice shape.
Q: Do I have to use butter or oil?
A: No, you don’t have to. The egg will still cook. But using a little butter or oil helps prevent sticking and gives the egg a better flavor and texture, closer to a traditional fried egg.
Q: My microwave is lower wattage. How long will it take?
A: It will take longer than a higher-wattage microwave. For a 700W microwave, you might start with 45-60 seconds and add 15-second bursts. Always check the egg as you go.
Q: Can I add toppings like bacon bits or vegetables before cooking?
A: Small amounts of already-cooked toppings are fine. For example, a sprinkle of cheese or cooked bacon bits. Raw vegetables might not cook through in the short time the egg takes. It’s usually better to add cooked toppings after the egg is done.
Q: Is a microwave egg as healthy as a stovetop egg?
A: Yes, the nutritional value of the egg itself doesn’t change based on how it’s cooked in the microwave versus on the stove (assuming you don’t add a lot of extra fat either way).
Q: My egg exploded even after piercing the yolk! Why?
A: This is rare if the yolk is properly pierced. Ensure you made several distinct holes in the yolk membrane. Sometimes if the microwave power is too high or the cooking time is too long without checking, steam pressure can still build up rapidly. Try reducing the power level or checking the egg even sooner.
Q: Can I cook more than one egg at once?
A: You can, but it’s much harder to cook them evenly. It’s usually recommended to cook one egg at a time for the best and most consistent results using the microwave fried egg method. If you cook two, place them in separate dishes or well apart on a large plate, and increase the cooking time significantly, checking each egg individually if possible.
Q: What is the best way to remove the cooked egg from the dish?
A: Letting it rest for 30-60 seconds helps it release. Then, use a small, flexible spatula or spoon to gently loosen the edges and slide it out.
Q: Can I make scrambled eggs in the microwave instead?
A: Yes, making scrambled eggs is also very easy in the microwave. You crack the egg into the dish, add a splash of milk or water, salt and pepper, whisk it, and microwave in 30-second bursts, stirring between each burst, until set. This is a different method than making a ‘fried-like’ egg.
Conclusion
Cooking an egg in the microwave oven is a genuinely fast and easy way to get a cooked egg. While it’s not true frying, the microwave fried egg method gives you a quick, protein-rich food perfect for busy mornings or quick meals. By following these simple microwave fried egg instructions, paying close attention to safety (piercing the yolk!), and learning your microwave’s timing, you can enjoy a convenient microwave egg for breakfast or whenever you need it. With a little practice, you’ll master the microwave egg frying technique and cooking eggs in microwave safe dish will become second nature. It’s a handy skill for anyone who needs a quick, no-fuss meal.