
Can you dry pineapple in your oven? Yes, you absolutely can! Is it easy to dehydrate pineapple in the oven? Yes, it is very simple to do. Drying fruit like pineapple in your oven is a great way to make a tasty snack at home. You use a low heat to take the water out of the fruit. This makes it chewy or crisp. It saves the fruit for later too. Making homemade dried pineapple is fun and simple.
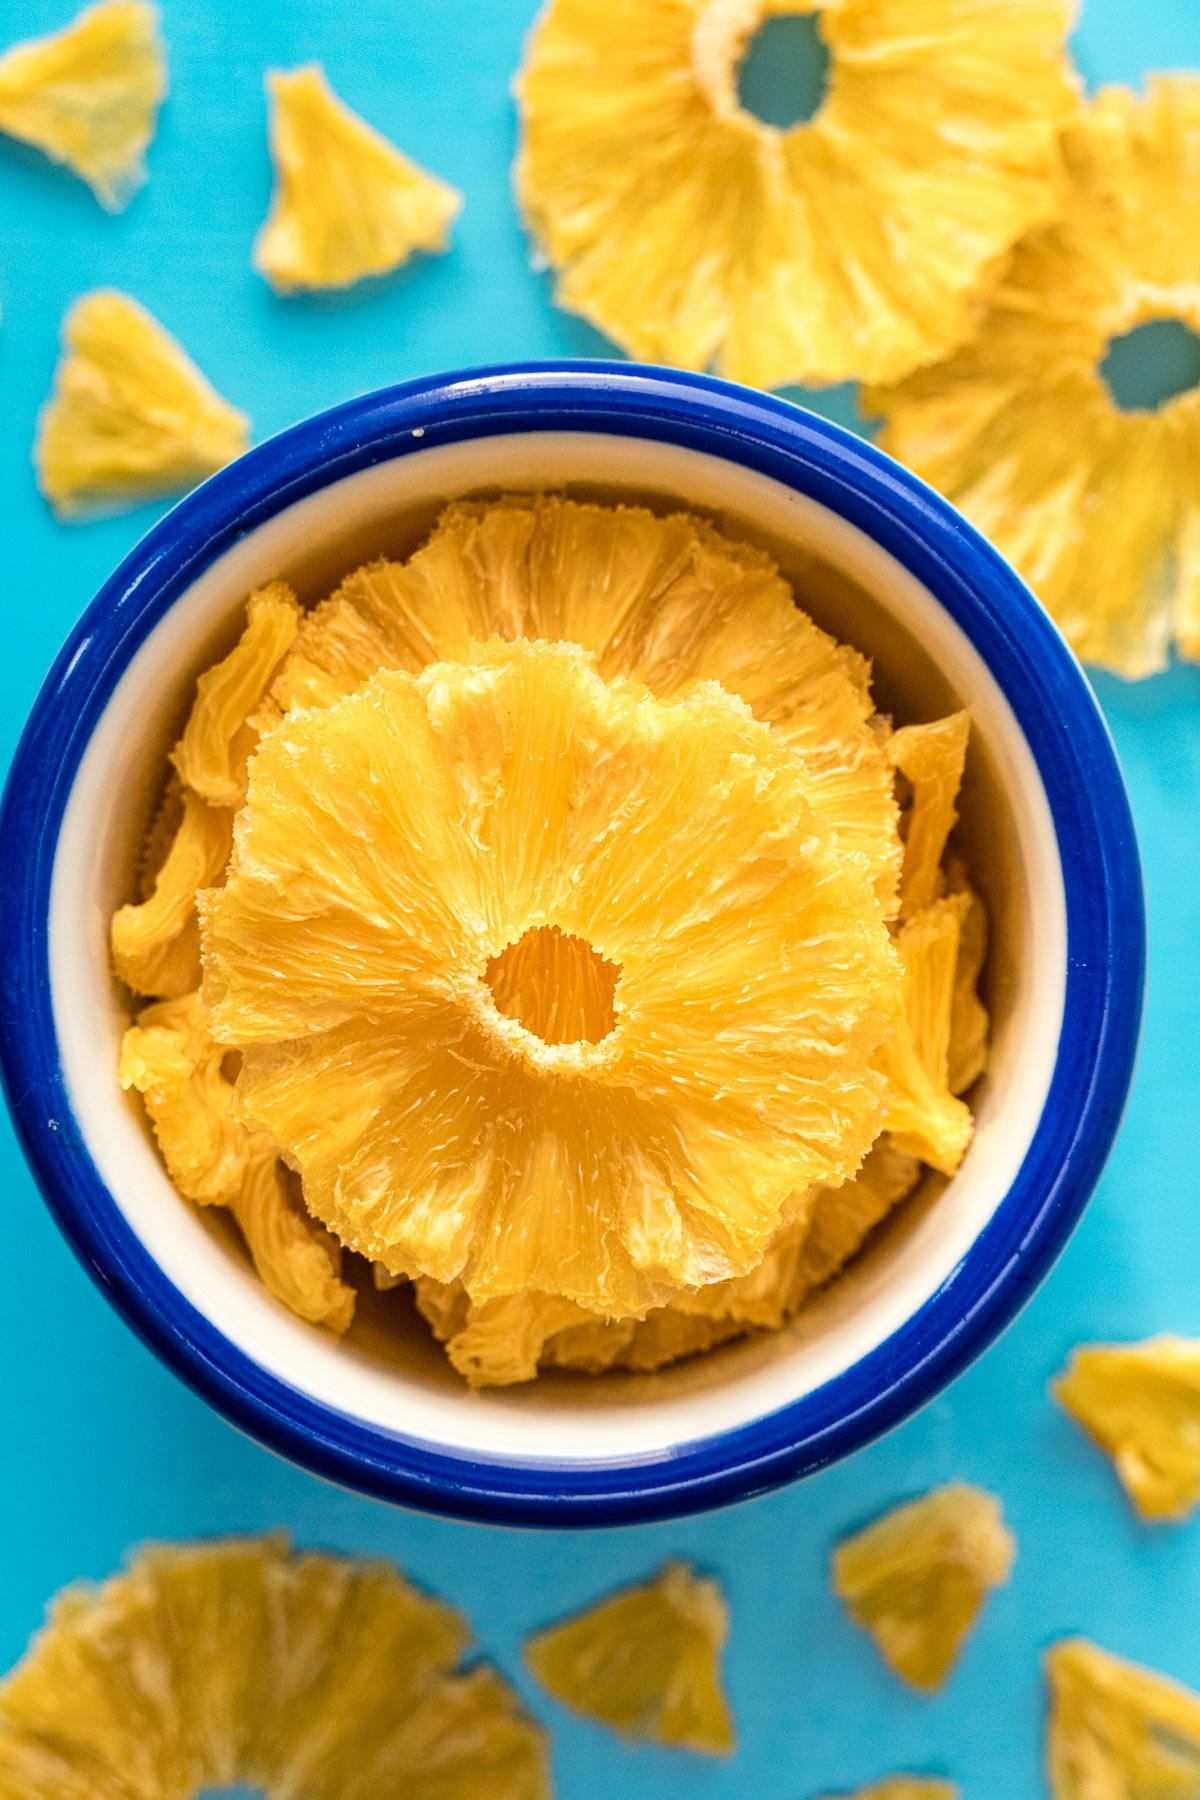
Image Source: www.freshoffthegrid.com
Getting Ready to Dry Pineapple
Drying fruit takes water out of it. This makes the fruit last a long time. Pineapple is sweet and has a bright taste. When you dry it, the flavor gets stronger. It becomes a chewy treat. Or you can make it crispy like oven baked pineapple chips. It is a healthy snack. You do not need to add sugar or other things. This is a big plus. Making your own dried pineapple lets you know exactly what is in it.
Dried fruit is good for many things. You can eat it by itself. Add it to trail mix. Put it on top of yogurt or cereal. Use it in baking. It is easy to take with you. It does not need a fridge. This makes it perfect for trips or snacks at school or work.
Learning how to dry fruit in your oven is a useful skill. You can use your oven for other fruits too. Apples, bananas, and mangoes dry well in the oven. But let’s focus on pineapple for now. Drying pineapple is a good first step into the world of oven dried fruit. It is forgiving and tasty.
Choosing the Best Pineapple
Picking a good pineapple is key. A good pineapple makes good dried pineapple. Look for one that feels heavy for its size. This means it is juicy. Check the bottom of the pineapple. It should smell sweet. Not sour or like it is fermenting. Look at the outside color. It should have some yellow color. But it is okay if it is still mostly green. Green pineapples will still ripen. A fully golden pineapple is ripe and sweet.
Gently squeeze the pineapple. It should give a little. But not too much. It should not be too hard. A soft pineapple might be bad inside. Look at the leaves on top. They should be green and fresh looking. You should be able to pull one leaf easily from the center. If you can, the pineapple is ripe.
Sometimes you find pineapples on sale. If you buy too many, drying them is a great way to save them. You can dry a pineapple that is slightly past its prime for eating fresh. As long as it is not rotten, it will dry fine. Just make sure to cut away any bad spots.
Preparing Pineapple for Drying
This is a very important step. Getting the pineapple ready takes the most time. But it is not hard. You need a good knife. A cutting board. Maybe a tool to take out the core.
First, wash the pineapple. Wash the outside well under cool water. Dry it with a cloth.
Next, cut off the top and bottom. Use a sharp knife. Cut about half an inch off the top. Cut about half an inch off the bottom. Cut straight across.
Now, stand the pineapple up on its flat bottom. The skin is tough. You need to cut it off. Follow the curve of the pineapple. Slice downwards. Cut off the skin in strips. Try to get just the skin. Leave as much fruit as you can.
After you cut off the skin, you will see little brown dots. These are the “eyes”. You need to take these out. They are hard. They do not taste good when dried. The eyes grow in rows on the pineapple. You can see them in diagonal lines.
There are two ways to remove the eyes. You can cut them out one by one with a small knife or a vegetable peeler. Or you can cut shallow “V” shapes along the rows of eyes. This takes out a strip of eyes at once. This way is faster if you can see the rows clearly. Don’t cut too deep.
Once the skin and eyes are off, you have the main fruit body. Now you need to cut the pineapple into slices. This is for making dried pineapple slices. You can cut rings or half-rings. Cut across the pineapple. How thick should the slices be? This is key for oven drying fruit.
Slice the pineapple about 1/4 inch thick. Maybe a little thinner if you want very crispy oven baked pineapple chips. If you cut them too thick, they take a very long time to dry. If you cut them too thin, they might burn easily. About 1/4 inch is a good thickness for most people. It makes a nice chewy homemade dried pineapple.
As you slice, you will see the core in the middle. The core is hard and fibrous. You need to remove it. For rings, you can use a round cookie cutter or a small knife. Just cut out the center part of each ring. If you cut half-rings or chunks, you can just slice around the core area. The core is lighter in color and harder than the fruit flesh. Discard the core.
So, to recap preparing pineapple for drying:
* Wash the pineapple.
* Cut off the top and bottom.
* Cut off the skin.
* Remove the eyes.
* Slice the fruit about 1/4 inch thick.
* Remove the core from each slice.
You now have your dried pineapple slices ready to go into the oven. Some people like to soak the slices in lemon juice or a little sugar water. This is not needed for pineapple. Pineapple is already acidic and sweet. But you can do it if you like. Lemon juice can help keep fruit color bright, but pineapple holds its color well.
What You Need to Dry Pineapple
You do not need fancy tools for oven drying fruit. You likely have everything already.
- A fresh pineapple.
- A sharp knife.
- A cutting board.
- A tool to remove the core (optional, knife works too).
- Baking sheets.
- Parchment paper or silicone baking mats. This stops the pineapple from sticking.
- Your oven. It needs to go down to a low temperature.
- Maybe oven mitts.
- A wooden spoon or oven-safe object to prop the oven door open.
That is it! Very simple list.
Setting Up Your Oven for Drying
Drying fruit in the oven needs a low heat. This is called low temperature oven drying. You are not baking the fruit. You are just taking the water out slowly. High heat will cook or burn the fruit. That is not what we want.
What is the right dehydrating fruit in oven temperature? You want a temperature between 135°F and 175°F (about 57°C to 80°C). This range is key. Lower temperatures take longer. Higher temperatures are faster but risk burning. Many ovens cannot go as low as 135°F. Most ovens can go down to 170°F or 175°F. This is usually okay. Check your oven’s lowest setting. If it is around 170°F, use that. If it can go lower, like 150°F, even better.
You also need good air flow in the oven. The water needs to escape. If the oven door is closed tight, the water stays inside. This just steams the fruit. Not dry it. You need to prop the oven door open a little bit. A wooden spoon works well. Put it in the oven door so it stays open an inch or two. This lets the moist air out.
So, set your oven to the lowest setting, ideally between 135°F and 175°F. Get your baking sheets ready. Cover them with parchment paper or silicone mats. Arrange the pineapple slices on the sheets in a single layer. Do not let them touch or overlap. Air needs to flow around each slice.
The Oven Drying Process
Now it is time to dry the pineapple. Put the baking sheets with the pineapple slices into the preheated oven. Remember the low temperature oven drying setting you chose. Remember to prop the oven door open with a wooden spoon or similar item.
The drying process takes a long time. This is normal for oven dried fruit. It is not a quick job. It can take anywhere from 4 hours to 12 hours or even longer. This depends on several things:
* The thickness of your slices. Thinner slices dry faster.
* How much water is in the pineapple. Some pineapples are juicier.
* Your oven’s exact temperature.
* How humid the air is in your kitchen.
* How well the air moves in your oven.
So, “how long to dehydrate pineapple” is not a fixed number. It is a range. You need to check on it as it dries.
Put the sheets in the oven. Check the pineapple after 3 or 4 hours. The slices will start to look less bright and feel drier on the surface. They will shrink.
You might need to rotate the baking sheets. Some ovens are hotter in certain spots. Moving the sheets around helps the pineapple dry evenly. You can switch the top sheet with the bottom sheet. Turn the sheets around. Do this every couple of hours.
Flipping the pineapple slices can also help. After maybe 4-6 hours, you can flip each slice over. This helps the other side dry too. Be gentle. They will still be soft.
Keep drying the pineapple. Check it every hour or two after the first few hours. Feel the slices. They will get drier and drier.
How Long Does it Take? Checking for Readiness
As mentioned, figuring out how long to dehydrate pineapple takes time and checking. Most sources say it takes between 4 and 12 hours at a temperature between 135°F and 175°F. Let’s break this down more.
- At 135°F (57°C): This low heat is perfect for drying. It keeps more of the good stuff in the fruit. It takes longer, maybe 8-12+ hours for chewy dried pineapple slices. If you want them super crispy oven baked pineapple chips, it could take even longer.
- At 150°F (65°C): A good middle ground. It might take 6-10 hours.
- At 175°F (80°C): This is the highest end of the low temperature range. It is faster, maybe 4-8 hours. But watch carefully. The risk of burning is higher.
How do you know when your homemade dried pineapple is ready? It is ready when it is no longer wet or sticky. The texture depends on what you want.
- For chewy dried pineapple slices (like pineapple jerky): The slices should be bendy. They should not break when you bend them. But they should not feel wet or squishy in the middle. If you tear a piece, you should not see wet spots inside. It should feel rubbery and dry.
- For crispy oven baked pineapple chips: The slices should be brittle. They should snap easily when you bend them. They will be thinner and lighter than the chewy kind. They might look more transparent.
Check a few slices from different parts of the baking sheets. Take a slice out and let it cool for a minute. Warm fruit feels softer than cool dried fruit. Bend it or try to snap it.
If some slices are done but others are not, you can take the done ones off the sheet. Put the sheet back in the oven with the others. This is okay to do.
Do not rush this step. If the pineapple is not dry enough, it will mold later when you store it. It needs to be dry all the way through.
Let’s think about a typical batch of 1/4 inch thick slices at 170°F.
* After 4 hours: Probably still quite soft, shrinking.
* After 6 hours: Starting to feel drier, edges might be getting firmer.
* After 8 hours: Bending well, not wet inside. Might be done for chewy.
* After 10-12 hours: Might be getting crispy or very chewy.
So, check often after the first few hours. This is the best way to know how long to dehydrate pineapple in your specific oven.
Cooling Down Dried Pineapple
Once the pineapple slices are dried to your liking, take them out of the oven. Turn the oven off. Remove the wooden spoon from the door. Leave the pineapple slices on the baking sheets. Let them cool completely.
This cooling step is important. As the fruit cools, it gets firmer. It also helps you check if it is really dry enough. Sometimes, fruit feels dry when warm but gets sticky as it cools.
Let the pineapple cool on the sheets for at least 30 to 60 minutes. Make sure it is fully cooled before you try to store it.
If, after cooling, you find some pieces are still a little soft or sticky (and you wanted chewy), you can put them back in the oven for another hour or two. If they are too soft for chewy (feels wet inside), they need more time. If they are too crispy (and you wanted chewy), well, you got pineapple chips! You can’t put water back in easily.
Storing Dried Pineapple
Proper storage is key for homemade dried pineapple. If you store it wrong, it can get moldy or hard.
Make sure the dried pineapple is totally cool before you store it. Put the dried pineapple slices in airtight containers. Glass jars with tight lids are great. Plastic containers with good seals work too. Zipper-top bags designed for food storage are also an option. Squeeze out as much air as possible if using bags.
Label the containers. Write down what is inside and the date you dried it. This helps you know how old it is.
Store the containers in a cool, dark, and dry place. A pantry cupboard is good. Avoid places with heat or moisture, like near the stove or sink.
How long will oven dried fruit last? If you dried it properly and store it right, homemade dried pineapple can last for several months. Some people say up to a year or more. But the quality is best in the first few months. Over time, the color might darken a bit, and the texture could change slightly.
Before putting all the pineapple into long-term storage, you can do a quick test. Put the dried pineapple in a sealed container for a day. Check it the next day. If you see any moisture droplets inside the container, the pineapple is not dry enough. You need to put it back in the oven to dry more. This is a good way to prevent mold.
So, for storing dried pineapple:
* Make sure it is completely cool.
* Use airtight containers.
* Store in a cool, dark, dry place.
* Check for moisture after 24 hours in the container.
Different Styles: Chewy vs. Crispy
You can make different types of homemade dried pineapple. It depends on how long you dry it and how thick you cut it.
- Chewy Dried Pineapple Slices (Pineapple Jerky): These are the most common type. They are great for snacking. Cut slices about 1/4 inch thick. Dry until they are flexible but no longer wet in the middle. They feel rubbery. This is like pineapple jerky.
- Crispy Oven Baked Pineapple Chips: These are thin and light. They snap like a chip. Cut slices thinner, maybe 1/8 inch thick. Dry for a longer time until they are brittle. These are great for a crunchy snack or garnish.
You control the texture by the slice thickness and the drying time. Experiment to see what you like best!
Ways to Use Dried Pineapple
You now have a stash of delicious homemade dried pineapple. How can you use it?
- Snacking: Eat it straight from the jar! It’s a satisfying, sweet treat.
- Trail Mix: Add dried pineapple slices to your own mix of nuts, seeds, and other dried fruits.
- Breakfast Topping: Chop it up and sprinkle on oatmeal, cereal, or yogurt.
- Baking: Add chopped dried pineapple to muffins, cakes, or cookies. Soak it in a little juice first if you want it softer in the bake.
- Salads: A little bit of chopped dried pineapple can add a sweet chewiness to green salads or fruit salads.
- Cooking: Use it in savory dishes that pair well with sweet fruit, like some chicken or pork recipes.
Having oven dried fruit ready means you always have a healthy option nearby.
Solving Drying Problems
Sometimes things do not go perfectly when dehydrating fruit in oven temperature. Here are a few common issues and how to fix them.
- Pineapple is not drying:
- Is your oven temperature too low? It needs to be at least 135°F.
- Is the oven door propped open? You need airflow for moisture to leave.
- Are the slices too thick? Thicker slices take much longer.
- Is the humidity in your kitchen very high? This can slow drying.
- Are the slices overlapping on the tray? They need space around them.
- Fix: Turn up the heat slightly (stay below 175°F). Check the door prop. Cut thinner slices next time. Make sure slices are in a single layer. Give it more time.
- Pineapple is burning or getting hard edges but soft centers:
- Is the oven temperature too high? It should not be over 175°F.
- Is your oven not correct on the temperature? Some ovens run hot.
- Are some slices much thinner than others?
- Are you checking it often enough?
- Fix: Lower the temperature. Check your oven’s real temperature with an oven thermometer. Try to cut slices evenly. Check more often and remove slices that are done.
- Pineapple is sticky after cooling:
- It is not dry enough. This is the most common issue with homemade dried pineapple, especially chewy types.
- Fix: Put the slices back in the oven for another 1-3 hours at the low temperature. Check again after cooling. You need to dry it until it is not sticky after it cools. If you store sticky fruit, it will grow mold.
Don’t worry if your first batch isn’t perfect. It takes a little practice to get the feel for your oven and the right drying time.
Why Homemade is Best
Making homemade dried pineapple is worth the effort.
- Control: You control everything. No added sugars, preservatives, or fake colors. It’s just pure fruit.
- Taste: Homemade often tastes better. The flavor is fresh and true to the fruit.
- Cost: Drying fruit you bought on sale can save money compared to buying expensive store-bought dried fruit.
- Satisfaction: It feels good to make your own healthy snacks.
Oven dried fruit is a simple pleasure. Dehydrating fruit in oven temperature is easy once you try it.
Comparing Oven Drying to a Dehydrator
An oven works for drying fruit. A special machine called a dehydrator is made just for this. How do they compare?
- Oven: Most people have one. No extra machine to buy or store. Can dry a good amount at once on baking sheets. But uses more energy than a dehydrator. Need to prop the door open. Can sometimes be harder to get a super low, steady temperature.
- Dehydrator: Uses less energy. Designed for air flow and low heat. Dries more evenly. Can stack many trays. Takes up counter or storage space. Costs money to buy.
Both methods work well for making dried pineapple slices. The oven is great if you are just starting or don’t dry fruit often. It is a simple way to make oven dried fruit. If you plan to dry a lot of fruit often, a dehydrator might be a good choice later.
But for now, using your oven is easy and effective! You can make great pineapple jerky or oven baked pineapple chips right at home.
Quick Steps for Drying Pineapple in the Oven
Here is a simple list of the steps:
- Get a ripe pineapple.
- Wash it.
- Cut off the top and bottom.
- Cut off the skin.
- Remove the eyes.
- Slice about 1/4 inch thick.
- Remove the core from slices. These are your dried pineapple slices to be.
- Preheat oven to 135°F – 175°F (low temperature oven drying).
- Cover baking sheets with parchment paper.
- Place pineapple slices in a single layer. No touching.
- Put sheets in the oven. Prop the door open a little (for airflow).
- Dry for 4-12 hours. Dehydrating fruit in oven temperature takes time. How long to dehydrate pineapple depends on thickness and heat.
- Check every few hours. Rotate sheets. Flip slices if you want.
- Slices are done when no longer wet and feel chewy (pineapple jerky) or crispy (oven baked pineapple chips).
- Take out of oven. Let cool completely on sheets.
- Store cooled homemade dried pineapple in airtight containers. This is storing dried pineapple.
- Check for moisture after 24 hours in storage.
This process gives you delicious homemade dried pineapple.
Table: Estimated Drying Times
This table gives you a rough idea. Your time may be different.
| Slice Thickness | Oven Temperature | Expected Drying Time (Chewy) | Expected Drying Time (Crispy) |
|---|---|---|---|
| 1/4 inch | 135-150°F | 8-12 hours | 12-16+ hours |
| 1/4 inch | 160-175°F | 6-10 hours | 10-14+ hours |
| 1/8 inch | 135-150°F | 6-10 hours | 8-12 hours |
| 1/8 inch | 160-175°F | 4-8 hours | 6-10 hours |
Remember, check often, especially the first time you do it. This table is just a guide for how long to dehydrate pineapple.
Frequently Asked Questions (FAQ)
Q: Can I add spices before drying?
A: Yes! Some people like to sprinkle a little cinnamon or chili powder on the pineapple slices before putting them in the oven. It adds extra flavor.
Q: Do I have to use parchment paper?
A: It is highly recommended. The pineapple can become very sticky as it dries. Parchment paper or a silicone mat prevents the dried pineapple from sticking to the baking sheet. It makes cleanup much easier.
Q: My oven’s lowest setting is 200°F. Can I still use it?
A: 200°F is a bit high for ideal dehydrating fruit in oven temperature. It is close to baking. You might be able to do it, but you will need to watch the pineapple very, very closely. The drying time will be shorter. There is a much higher chance of burning or getting crispy edges while the middle is still soft. If your oven doesn’t go below 200°F, you could try drying for a shorter time, maybe 2-4 hours, then turning the oven off and leaving the door propped open to let the heat slowly finish the drying. Or try using residual heat after baking something else. But ideally, you need a setting closer to 170°F or less for good low temperature oven drying.
Q: How much dried pineapple will I get from one fresh pineapple?
A: Pineapple shrinks a lot when dried because you remove most of the water. One medium to large fresh pineapple might give you about 1 to 2 cups of dried pineapple slices.
Q: Is oven-dried pineapple as good as machine-dried?
A: Yes, it can be just as good! The result is similar. The main difference is in the process: ovens use more energy and need the door propped, while dehydrators are designed for this specific task. But the final homemade dried pineapple can be just as delicious.
Q: What if my pineapple is not very sweet?
A: Drying concentrates the sugars. Even a less-than-sweet pineapple will taste sweeter when dried. You could also lightly brush the slices with a little honey or maple syrup before drying, but this will make them sticker and adds sugar. It is usually not needed for pineapple.
Conclusion
Learning how to dehydrate pineapple in the oven is simple and rewarding. With just a low oven temperature, some time, and a fresh pineapple, you can create tasty dried pineapple slices. This homemade dried pineapple is a healthier snack than many store-bought options. It is free from extra sugars and things you do not need.
You can make chewy pineapple jerky or crispy oven baked pineapple chips. The process of preparing pineapple for drying is easy. Setting the right dehydrating fruit in oven temperature and knowing how long to dehydrate pineapple just takes a little practice. Proper storing dried pineapple keeps your snack fresh for months.
Give it a try! Enjoy your delicious, homemade oven dried fruit. It is a simple pleasure that is good for you.