
Ever look at a stunning photograph and wonder how the photographer captured that perfect light and sharp focus? The secret often lies not just in the camera itself, but in the settings tucked away in the menus. Many new photographers feel overwhelmed when staring at the dials and screens, faced with choices like aperture, shutter speed, and ISO. It feels like a secret language you need to crack to take photos that truly pop.
Learning these settings is the key to unlocking your camera’s real power. Stop relying on the automatic mode that guesses what you want. When you master these basic controls, you stop fighting your camera and start telling it exactly what to do. This means clearer action shots, beautiful blurry backgrounds, and pictures that look exactly how you imagined them.
This guide will break down the essential camera settings step-by-step. We will explain what each setting does in plain language. By the end of this post, you will feel confident adjusting your manual controls. Get ready to take control of your camera and start creating amazing images today.
Top Camera Settings . Recommendations

- Judge, Al (Author)
- English (Publication Language)
- 50 Pages - 08/23/2014 (Publication Date) - CreateSpace Independent Publishing Platform (Publisher)
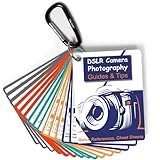
- Must-Have Camera Accessories for Photography: Includes 30 pages of the most useful photography tips, these 16 double-sided DSLR cheat sheets are color-coded. Suitable for any camera model, Canon, Nikon, Sony, etc.
- Photography Tips at Your Fingertips: Covers all the information you need when shooting! Concise and easy to understand. These Canon Rebel T7 accessories include Exposure, Shooting Modes, Composition, Lighting, and more
- Pocket-sized Photography Guides: Measures 3×4 in, this photography accessories for Canon is compact & highly portable. Easy to fit in a pocket or clip to the camera bag. Makes great photography gifts for photographers
- Great for Beginners & Advanced Users: Covers the most common shooting situations with specific instructions on how to capture fabulous photos, like fireworks, sunrise, sunset, portraits, waterfalls, etc.
- No More Overwhelming Manual & Complicated Lingo: Comes with a metal carabiner and a sturdy keyring, these Nikon d7500 d3200 d3300 accessories would be the ultimate photography props for you to carry around

- Amazon Kindle Edition
- Reeder, Kathleen (Author)
- English (Publication Language)
- 32 Pages - 11/01/2017 (Publication Date)

- Nook, Rocky (Author)
- English (Publication Language)
- 48 Pages - 05/21/2022 (Publication Date) - Rocky Nook (Publisher)

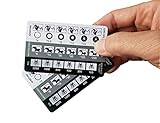
- QUICK REFERENCE CARDS - These cheat sheets include 20 pages of helpful photography tips, printed on 11 double-sided plastic cards. The information is concise, easy to understand, and suitable for any Nikon, Canon, or Sony brand DSLR camera model.
- POCKET-SIZED GUIDE - At 3x4 inches, they are easy to fit in your pocket and clip to your purse or camera bag for reference. A carabiner is included!
- DURABLE PLASTIC - Professionally printed on glossy plastic to withstand years of use! They're rip-proof, weather-proof and super sturdy.
- LIKE A PHOTOGRAPHY CLASS IN YOUR POCKET - Ditch your overwhleming manual and complicated lingo - these cards feature tips written in plain English, to help you get out of automatic mode. They are more than just a cheat sheet - they will teach you basic photography concepts that you can apply in any situation. Perfect for a beginner or when you need to refresh your memory!
- DSLR CAMERA PHOTOGRAPHY CONTENT - This deck has cards for exposure, aperture, depth of field, shutter speed, motion blur, iso, grain, manual mode, troubleshooting, light meter, histogram, how to avoid blurry pictures, how get good background blur, and how to freeze motion.

- Comprehensive Guide for Nikon, Canon, and Sony DSLRs:This 30-page photography guide is specifically designed for DSLR camera owners, offering essential tips and 16 double-sided, color-coded cheat sheets. Perfect for any camera model, it simplifies complex concepts and helps you master manual mode, whether shooting portraits, landscapes, or action
- Easy-to-Use Reference for Every Shooting Situation:Covering exposure, shooting modes, composition, and lighting, this quick reference guide makes photography accessible for all skill levels. Whether you're photographing fireworks, sunrises, or family portraits, you'll have all the information you need at your fingertips
- Compact and Portable Design – Ideal for On-the-Go Use:Measuring just 4×3 inches, this durable cheat sheet fits easily in your pocket or clips to your camera bag. Its compact size and sturdy design ensure it’s always ready when you need it, making it a perfect photography accessories gift for photographers of all levels
- Perfect for Beginners and Advanced Photographers Alike:From mastering basic settings to capturing stunning shots in challenging conditions, this cheat sheet helps you navigate any shooting situation with confidence. Whether you're new to manual mode or looking to refine your skills, this cards is your ultimate photography companion
- Perfect Photography Companion for Every Mom:These photography cheat sheets are designed to be both durable and practical, featuring a sturdy metal carabiner and a handy ring for easy portability. Packed with helpful descriptions, charts, and color-coded borders for quick reference, they empower moms to confidently master manual mode on their cameras,Perfect Photography Gifts for Women
- 📷 QUICK PHOTOGRAPHY REFERENCE CARDS - Printed on PVC plastic making them waterproof and durable.
- 📷 EASY TO UNDERSTAND – these cards offer a quick visual reference for aperture, shutter speeds, ISO, white balance, ND filter calculations and flash settings. They are suitable for any camera: Nikon, Canon, Sony etc. and FILM cameras as well.
- 📷 BEGINNING, INTERMEDIATE & ADVANCED PHOTOGRAPHERS – these cheat sheets are appropriate for all levels of photographers. They also make for great stocking stuffers for any aspiring shutter bug.
- 📷 POCKET SIZED Photography Cheat sheet - the size of a credit card, it fits in your wallet or any camera bag. 3.37" (85.6 mm) x 2.125" (53.98 mm)
- 📷 For advanced photographers the card includes Neutral Density filter calculations too.

- Used Book in Good Condition
- Vineyard, Jeremy (Author)
- English (Publication Language)
- 155 Pages - 07/01/2008 (Publication Date) - Michael Wiese Productions (Publisher)
The Ultimate Buying Guide: Mastering Your Camera Settings
Choosing the right camera settings makes a huge difference in your photos. This guide helps you understand what to look for and how to use your camera best. Good settings capture great moments!
Key Features to Look For in Camera Settings
When you look at a camera’s settings menu, some features really matter. These settings give you control over your pictures.
1. Aperture Control (f-stop)
- What it is: Aperture controls how much light enters the lens. Think of it like the pupil of your eye.
- Why it matters: A low number (like f/2.8) lets in lots of light and makes the background blurry. A high number (like f/16) lets in less light and keeps everything sharp.
2. Shutter Speed
- What it is: This setting controls how long the camera sensor sees the light.
- Why it matters: Fast speeds (like 1/1000th of a second) freeze fast action, like a running dog. Slow speeds (like 1 second) create motion blur, good for silky water.
3. ISO Sensitivity
- What it is: ISO measures how sensitive your camera sensor is to light.
- Why it matters: Low ISO (like 100 or 200) works best in bright light and gives the cleanest picture. High ISO (like 3200) helps in dark places but can add “noise” or graininess.
4. White Balance (WB)
- What it is: WB corrects the color cast from different light sources (sunlight, indoor bulbs).
- Why it matters: Correct white balance makes white things look truly white, not too blue or too orange.
Important Materials and Components Affecting Settings
While settings are digital, the hardware controls how well they work.
- Sensor Size: Bigger sensors handle high ISO settings better. They capture more detail and produce less noise in dark areas.
- Lens Quality: Good lenses allow more light in, which means you can often use lower ISOs or faster shutter speeds, improving image quality.
Factors That Improve or Reduce Quality
Your setting choices directly impact the final image quality.
Improving Quality:
- Always aim for the lowest possible ISO that still gives you a good exposure.
- Use Aperture Priority mode (Av or A) to control depth of field precisely.
- Shoot in RAW format instead of JPEG. RAW files keep much more data for editing later.
Reducing Quality:
- Using a very high ISO in bright light wastes the sensor’s potential.
- Setting the White Balance incorrectly colors your photo permanently (if shooting JPEG).
- Using a shutter speed that is too slow without a tripod causes blurry photos.
User Experience and Use Cases
Different situations need different settings. Thinking about where and what you shoot helps you choose.
Portraits (People Photos)
You usually want a shallow depth of field. Set your camera to Aperture Priority mode. Choose a wide aperture (low f-number, like f/2.8 or f/4) to make the background soft and the person sharp.
Sports and Action
Speed is key here. Switch to Shutter Priority mode (Tv or S). Select a very fast shutter speed (like 1/500th or faster) to freeze movement. You might need to raise your ISO to keep the picture bright enough.
Landscapes (Scenery)
Landscapes need everything sharp from front to back. Use a narrow aperture (high f-number, like f/8 or f/11). Keep your ISO low (100 or 200) for the best detail. A tripod is highly recommended.
Learning these settings takes practice. Start by using the automatic modes, then slowly try Aperture Priority, and finally, move to Manual mode for full creative control.
10 Frequently Asked Questions (FAQ) About Camera Settings
Q: What is the most important setting for beginners?
A: Aperture Priority (Av or A) is often the best starting point. It lets you control the background blur while the camera handles the shutter speed.
Q: Should I always use the lowest ISO number?
A: Yes, if you have enough light. Lower ISO gives you the cleanest image quality. Only raise it when the picture becomes too dark.
Q: What is the ‘Exposure Triangle’?
A: The Exposure Triangle is the relationship between Aperture, Shutter Speed, and ISO. Changing one affects the others, and they all work together to make the photo the right brightness.
Q: When should I use a slow shutter speed?
A: Use a slow shutter speed (slower than 1/60th of a second) when you want to show movement, like making waterfalls look misty, or when you are shooting in very dark environments with a tripod.
Q: How do I stop my photos from looking too blue or too yellow?
A: Adjust the White Balance (WB) setting. If it looks too blue, choose a setting like “Tungsten” or “Cloudy.” If it looks too yellow/orange, choose “Daylight” or “Flash.”
Q: What does it mean when my photo is “overexposed”?
A: An overexposed photo is too bright. Too much light hit the sensor. You fix this by using a faster shutter speed, a higher f-number (smaller opening), or a lower ISO.
Q: What does it mean when my photo is “underexposed”?
A: An underexposed photo is too dark. Not enough light reached the sensor. You fix this by using a slower shutter speed, a lower f-number (wider opening), or a higher ISO.
Q: Do I need a fast lens (low f-number) for good quality?
A: Fast lenses help a lot, especially in low light. They let you use lower ISOs. However, a sharp lens at f/8 can still produce better quality than a cheap lens at f/2.8.
Q: When should I switch from JPEG to RAW format?
A: Switch to RAW if you plan to edit your photos later on a computer. RAW files give you much more freedom to fix mistakes in brightness or color.
Q: How do I keep my subject sharp when taking a portrait?
A: Use a low f-number (like f/3.5) so only the subject is in focus. Make sure you focus precisely on the subject’s eyes!