
Want to know how to roast Anaheim chiles in the oven? Roasting Anaheim peppers in the oven is a fantastic way to unlock their rich, smoky flavor and tenderize their flesh, making them perfect for a variety of dishes. Can you roast Anaheim peppers in the oven? Absolutely! It’s one of the best ways to prepare them, offering a simple yet effective method for getting those delicious, charred results.
Anaheim peppers, with their mild heat and slightly sweet, earthy flavor, are a versatile ingredient in Southwestern and Mexican cuisine. Roasting them transforms their texture and taste, adding a depth that raw peppers simply can’t achieve. Whether you’re making chile rellenos, salsas, sauces, or just want to add a smoky kick to your salads and sandwiches, learning how to roast Anaheim chiles in the oven is a skill worth mastering. This guide will walk you through the process, from selecting your peppers to storing your perfectly roasted treasures.
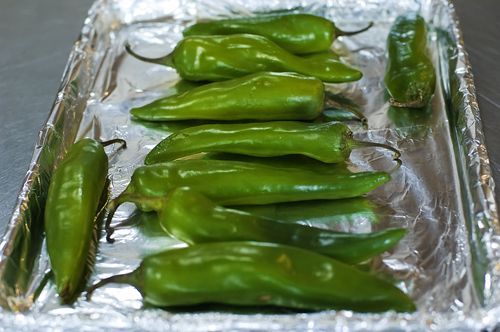
Image Source: hips.hearstapps.com
Why Roast Anaheim Chiles?
Roasting Anaheim peppers isn’t just about changing their appearance; it’s about enhancing their entire being. Here’s why roasting Anaheim chilies is such a popular and effective preparation method:
- Flavor Development: Heat breaks down cell walls and causes the natural sugars in the peppers to caramelize. This process creates a sweeter, deeper, and more complex flavor profile, often with a pleasant smoky undertone.
- Texture Improvement: Roasting softens the peppers, making them tender and easier to digest. The skins loosen and char, which can then be easily removed if desired, leaving you with silky-smooth pepper flesh.
- Versatility: Roasted Anaheim peppers can be used in countless ways. They are a key ingredient in many traditional dishes and can elevate even the simplest meals.
- Ease of Preparation: While other methods exist, oven roast Anaheim peppers is straightforward and requires minimal hands-on time. You can roast a batch at once, making it efficient for meal prep.
Selecting the Best Anaheim Peppers
The quality of your roasted peppers starts with the quality of the peppers you choose. When selecting Anaheim peppers for roasting, keep these points in mind:
- Firmness: Look for peppers that feel firm and have smooth, taut skin. Avoid those that are soft, shriveled, or have visible blemishes and soft spots.
- Color: Anaheim peppers are typically green when immature and turn red as they ripen. Both green and red Anaheims can be roasted, but red ones tend to be slightly sweeter. Choose the color that suits your preference for flavor.
- Size: For roasting, medium-sized peppers are usually ideal. They are easier to handle and roast evenly.
Preparing Your Anaheim Peppers for Roasting
Before you embark on the journey of making roasted Anaheim peppers, a little prep work goes a long way:
- Wash: Thoroughly wash the peppers under cool running water. Gently rub their skins to remove any dirt or debris.
- Dry: Pat the peppers completely dry with a clean kitchen towel or paper towels. Moisture can hinder the charring process and lead to steaming rather than roasting.
- Optional Stem Removal: Some people prefer to remove the stem before roasting. You can do this by making a small cut around the stem with a paring knife. However, leaving the stem attached can make handling the hot peppers easier after roasting.
How To Roast Anaheim Chiles In Oven: Step-by-Step Guide
The best way to roast Anaheim chilies in the oven is to ensure they get a good char without cooking through too quickly. This method focuses on achieving that desirable smoky flavor and tender texture.
Step 1: Preheat Your Oven and Prepare Your Baking Sheet
- Preheat: Set your oven to a high temperature. The ideal Anaheim chile roasting temperature is between 425°F (220°C) and 450°F (230°C). A hotter oven helps to char the skins effectively.
- Baking Sheet: Line a baking sheet with parchment paper or aluminum foil for easier cleanup. If you’re not using parchment, you might want to lightly oil the baking sheet.
Step 2: Arrange the Peppers
- Place the washed and dried Anaheim peppers on the prepared baking sheet.
- Arrange them in a single layer. Ensure they have some space between them so that hot air can circulate, promoting even roasting and charring. Overcrowding can lead to steaming, which is not what we’re aiming for when roasting chili peppers in oven.
Step 3: Roasting the Peppers
- Initial Roasting: Place the baking sheet in the preheated oven. Roast for about 10-15 minutes.
- Turning: After 10-15 minutes, use tongs to carefully turn the peppers. You want to expose all sides to the heat. Continue roasting for another 10-15 minutes, or until the skins are blistered, blackened, and appear charred in spots. The exact time will depend on your oven and the size of the peppers. The goal is to char Anaheim chilies to your desired level.
Step 4: Steam and Cool
- Transfer to a Bowl: Once the peppers are sufficiently charred, carefully remove the baking sheet from the oven. Immediately transfer the hot peppers into a heatproof bowl.
- Cover: Cover the bowl tightly with plastic wrap or a lid. You can also place the peppers in a resealable plastic bag and seal it. This steaming process is crucial; it traps the heat and moisture, which loosens the skins, making them easy to peel.
- Steaming Time: Let the peppers steam for about 15-20 minutes. This allows them to cool down enough to handle safely.
Step 5: Peel and Seed (Optional)
- Peeling: Once the peppers have cooled enough to touch, take them out of the bowl one by one. The skins should slip off easily. You can use your fingers or a small knife to gently peel away the charred skin. Don’t worry if a few charred bits remain; they add to the smoky flavor.
- Seeding and Stemming: If you removed the stems earlier, you can now easily remove the seeds. If you left the stems on, cut them off now. Make a slit down one side of the pepper and gently scrape out the seeds and membranes with your fingers or a spoon. For milder peppers, be sure to remove the white pith as well, as this is where most of the heat is concentrated.
Alternatives for Roasting Anaheim Peppers
While the above is the most common and effective method for Anaheim pepper roasting, there are a few variations you might consider:
Broiling for Faster Char
If you’re in a hurry, you can use the broiler.
- Preheat your broiler to high.
- Place peppers on a baking sheet.
- Broil for 3-5 minutes per side, watching them very closely as broilers can burn food quickly.
- Once charred, proceed with the steaming and cooling process as described above.
Caveat: Broiling can be less forgiving than oven roasting, requiring constant attention to prevent burning.
Roasting Whole vs. Halved
For maximum flavor and moisture retention, roasting Anaheim chilies whole is often preferred. However, if you want to speed up the process slightly or ensure more even cooking throughout, you can halve them lengthwise before roasting.
- Halved Method:
- Halve the peppers lengthwise and remove the stems and seeds.
- Place cut-side down on the baking sheet.
- Roast at 425-450°F (220-230°C) for about 15-20 minutes, or until softened and slightly charred.
- You can still steam them, but the skins might not loosen quite as dramatically since they weren’t fully enclosed.
Storing Your Roasted Anaheim Peppers
Once your Anaheim peppers are roasted, peeled, and seeded, they can be stored for later use.
- Refrigeration: Store the roasted peppers in an airtight container in the refrigerator for up to 5-7 days. You can pack them tightly, and even cover them with a little olive oil to help preserve their freshness and flavor.
- Freezing: For longer storage, freeze the roasted peppers. Spread them in a single layer on a baking sheet and freeze until solid, then transfer to a freezer-safe bag or container. They can last for several months in the freezer.
Delicious Uses for Roasted Anaheim Peppers
Now that you’ve mastered how to char Anaheim chilies, the culinary possibilities are endless! Here are some ideas:
- Salsas and Sauces: Finely chop them and add them to pico de gallo, salsa verde, or creamy sauces.
- Chile Rellenos: The classic! Stuff them with cheese, coat them in batter, and fry them for a delightful main course.
- Soups and Stews: Add a smoky depth to tortilla soup, chili, or stews.
- Salads and Grain Bowls: Slice them and toss them into your favorite salads or grain bowls for a flavorful boost.
- Sandwich and Burger Toppings: Layer them on sandwiches or burgers for an extra layer of flavor.
- Dips: Blend them into creamy dips or hummus for a unique flavor.
- Side Dish: Simply serve them as a flavorful side dish, perhaps drizzled with a little olive oil and a sprinkle of salt.
Anaheim Chile Roasting Temperature: A Quick Reference
| Oven Setting | Temperature | Approximate Roasting Time | Notes |
|---|---|---|---|
| Conventional Oven | 425°F – 450°F (220°C – 230°C) | 20-30 minutes | Turn halfway through for even charring. |
| Broiler | High | 3-5 minutes per side | Watch very closely to prevent burning. |
Frequently Asked Questions (FAQ)
Q1: What is the best temperature for roasting Anaheim peppers?
A1: The best way to roast Anaheim chilies in the oven typically involves a hot oven, ideally between 425°F and 450°F (220°C – 230°C). This heat is crucial for blistering and charring the skins effectively, which is key to developing that smoky flavor.
Q2: Can I roast Anaheim peppers without charring them?
A2: Yes, you can roast Anaheim peppers without achieving a significant char, but you will miss out on the depth of smoky flavor and the ease of peeling the skins. If you prefer them less charred, simply reduce the roasting time or use a slightly lower temperature. They will become tender but won’t have that characteristic roasted taste.
Q3: How do I know when Anaheim peppers are done roasting?
A3: Anaheim peppers are done roasting when their skins are significantly blistered, blackened, and appear charred in many spots. They will also soften considerably. The goal is to achieve a good amount of charring without burning them completely through.
Q4: Can I roast Anaheim peppers directly on the oven rack?
A4: While you can roast them directly on the oven rack to allow heat to circulate all around, it can be messy. Drippings will fall onto the oven floor. It’s generally recommended to use a baking sheet lined with parchment paper or foil for easier cleanup and to catch any escaping seeds or juices. If you do roast directly on the rack, place a baking sheet on the rack below to catch drips.
Q5: What’s the difference between roasting and baking Anaheim peppers?
A5: When people talk about baking Anaheim peppers, they often mean roasting them at a high temperature to achieve charring and smoky flavors. True “baking” usually implies a lower temperature and longer cooking time without the goal of charring. In the context of preparing Anaheim peppers for their best flavor, “roasting” is the more accurate term for the high-heat, charring method.
Q6: How do I prevent my roasted Anaheim peppers from becoming mushy?
A6: To prevent mushy peppers, ensure your oven is sufficiently hot to allow the skins to char. Also, avoid overcrowding the baking sheet, as this can lead to steaming. The crucial step of steaming them in a covered bowl after roasting helps loosen the skins without overcooking the flesh. Peeling them promptly after steaming also helps maintain their texture.
Q7: Is it necessary to peel the skins off roasted Anaheim peppers?
A7: It is not strictly necessary to peel the skins, as they are edible and contribute to the smoky flavor. However, many people prefer to remove the skins because they can be tough or slightly bitter. Peeling them is part of the traditional making roasted Anaheim peppers process and results in a smoother, more delicate texture.
Q8: Can I roast Anaheim peppers in a toaster oven?
A8: Yes, you can roast Anaheim peppers in a toaster oven. Use a similar temperature range (425°F – 450°F / 220°C – 230°C) and arrange the peppers on a small baking sheet or foil that fits inside your toaster oven. Keep a close eye on them as toaster ovens can cook faster than conventional ovens.
Q9: What if I don’t have an oven? Can I still roast Anaheim peppers?
A9: Absolutely! You can roast Anaheim peppers over an open flame on a gas stovetop or on an outdoor grill. The process is similar: turn the peppers frequently until they are charred on all sides. Then, proceed with the steaming and cooling process.
Q10: How can I use roasted Anaheim peppers in a dish?
A10: The applications are vast! Chop them for salsas, blend them into sauces, dice them for guacamole, stuff them for chile rellenos, add them to soups and stews, or simply serve them as a side dish. Their smoky, tender quality enhances many recipes.
Mastering the art of roasting Anaheim chilies in the oven is a simple yet rewarding culinary skill. It transforms a humble pepper into a flavorful ingredient that can elevate your cooking. By following these steps, you’ll be well on your way to making roasted Anaheim peppers that are perfectly charred, tender, and bursting with delicious flavor, ready to be enjoyed in all your favorite dishes. Enjoy the fruits of your labor!