
Do you want to know how long to cook pork shank in the oven to make it tender and get crispy skin? And can you really get that perfect, crunchy skin right in your home oven? Yes, you absolutely can! Cooking pork shank in the oven takes time, usually several hours at a low temperature followed by a shorter burst at high heat. This two-step method gives you meat that is wonderfully tender, often described as fall off the bone pork shank, with a delightful crunch on the outside. This guide will show you how to achieve this delicious result for a perfect pork hock oven recipe.
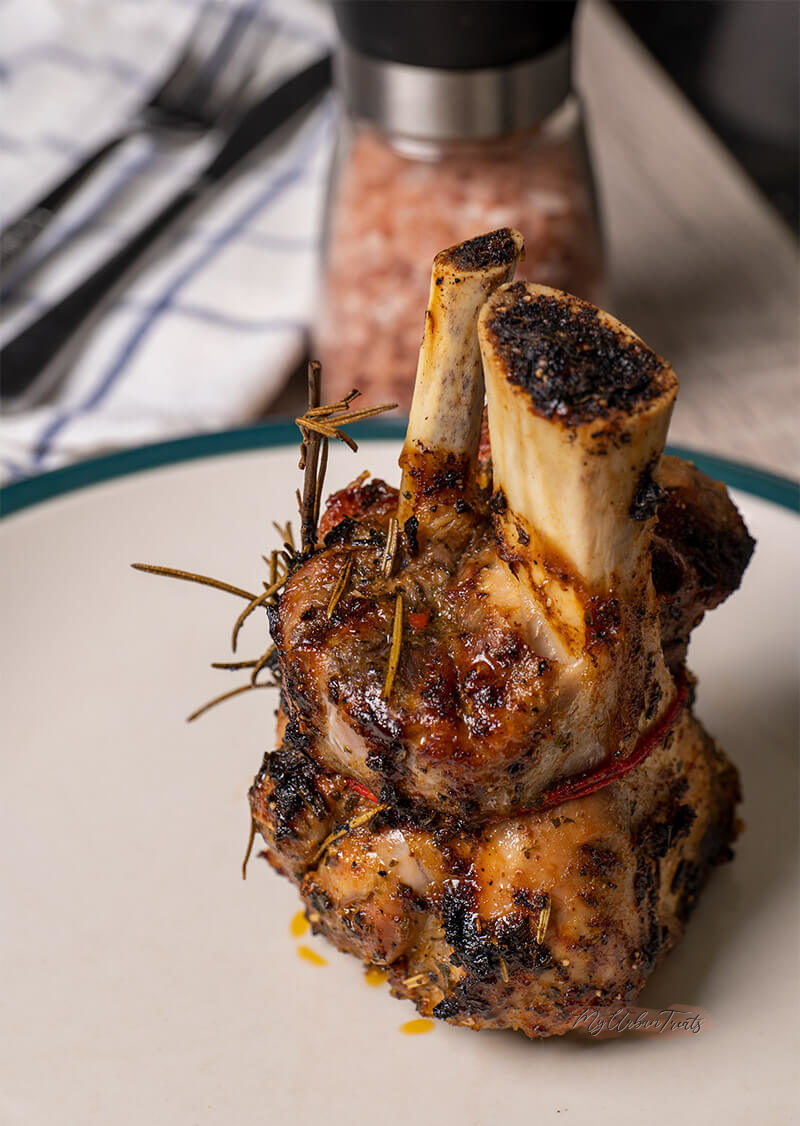
Image Source: myurbantreats.com
Grasping the Pork Shank
What exactly is a pork shank? A pork shank is the lower part of the pig’s leg, just above the foot. It’s also often called a pork hock or pork knuckle. This cut has a good amount of muscle and connective tissue, like collagen. It also has a layer of fat and thick skin covering it.
Because of all that connective tissue, shanks can be tough if cooked quickly. However, this same tissue breaks down slowly during long, slow cooking. It turns into gelatin, which makes the meat incredibly moist and tender. This is why cooking pork shank low and slow is the best way to go. The skin and fat also become very soft during the long cook. Then, a blast of high heat makes the skin turn into that sought-after crispy crackling.
Why Oven Cooking Works for Pork Shanks
Cooking pork shank in the oven is a fantastic method. It’s mostly hands-off once the initial setup is done. The dry heat of the oven helps soften the meat over time. It also sets up the skin to get really crispy later.
Many recipes use liquid during the first part of cooking, like a braised pork shank oven method. The liquid adds moisture and flavor, helping the connective tissues break down faster and more evenly. Whether you fully braise or just add a little liquid to the pan, the oven creates an even heat that surrounds the shank, cooking it gently.
This process is perfect for creating a tender pork shank. It’s a simple way to turn a less expensive, tougher cut into a truly special meal.
Steps to a Great Oven-Cooked Pork Shank
Cooking a pork shank in the oven to get both tender meat and crispy skin involves a few key steps. Think of it as a two-phase mission:
- Phase 1: The Slow Cook. This is all about making the meat super tender. You cook the shank slowly at a low or medium temperature for a long time. This melts the fat and breaks down the tough bits.
- Phase 2: The High Heat Blast. This phase is short but crucial. You turn the heat up high at the end to make the skin puff up and become wonderfully crispy.
Following these steps carefully will help you get the best results from your pork knuckle oven recipe.
Picking the Best Pork Shank
Start with good ingredients. Look for pork shanks that have a good amount of meat on them and a nice, thick layer of skin. Shanks usually weigh between 1 to 2 pounds each. Sometimes you might find them fresh, and sometimes cured (like for making split pea soup). For crispy skin, you need a fresh, uncured shank.
Ask your butcher for fresh pork hocks or knuckles. They might call them different names depending on where you live. Make sure the skin looks clean and is still attached well to the fat layer.
Prepping Your Pork Shank for the Oven
Good preparation is key to getting crispy pork shank skin. Here’s what you need to do:
Preparing the Skin
This is perhaps the most important step for crispiness.
- Score the Skin: You need to cut through the skin and maybe a little bit into the fat, but not down to the meat. Scoring helps the fat render (melt and run off) and lets the heat get under the skin to make it puff up. Use a very sharp knife or a razor blade. Make cuts in a diamond pattern, or just straight lines about 1/2 inch apart. Be careful not to cut your fingers!
- Dry the Skin: Moisture is the enemy of crispy skin. You need the skin to be as dry as possible before cooking. Pat the shank all over with paper towels, especially the skin.
- Salt the Skin: Rub a generous amount of salt all over the skin, pushing it down into the cuts you made. Salt helps draw out more moisture and helps the skin crisp up. Some cooks like to salt the skin a day ahead of time and leave the shank uncovered in the fridge. This is a great way to get the skin super dry. Place it on a wire rack set inside a tray so air can get all around it.
Seasoning the Meat
While the skin needs just salt (or mostly salt), the meat can take on more flavors.
- Rub the rest of the shank (underneath and sides) with salt and pepper. You can also add other seasonings like garlic powder, onion powder, paprika, or dried herbs like rosemary and thyme.
- Some people like to rub the meat with a little oil or mustard first to help the seasonings stick.
The Slow Cook Phase: Making Meat Tender
The goal here is to break down all that tough connective tissue and fat. This happens best over a long time at a gentle heat. This is where the slow cook pork shank oven method shines.
Setting Up the Pan
You’ll need a roasting pan or a sturdy baking dish. It’s a good idea to use a wire rack inside the pan. This lifts the shank up, allowing hot air to circulate all around it. It also lets the fat drip away from the shank, which helps the skin crisp later.
You can add some liquid to the bottom of the pan under the rack. This creates steam, which helps keep the meat moist during the long cook. It also catches the drippings, which you can use later for gravy. Good liquids include water, chicken broth, vegetable broth, apple cider, or even beer or wine. Add aromatics like onions, carrots, celery, garlic, and bay leaves to the liquid for extra flavor.
Cooking Time and Temperature
What is the right pork shank cooking time and temperature? For the slow cook phase, a common temperature is around 300°F to 325°F (150°C to 160°C).
How long does it take? This depends on the size of your shank, but plan for at least 2 to 3 hours, possibly up to 4 hours or more, for a typical 1.5 to 2-pound shank. The meat should be very tender, easily pierced with a fork, and starting to pull away from the bone. This slow and steady pace ensures you get a fall off the bone pork shank.
- Place the prepared shank on the wire rack in the pan.
- Add about 1-2 cups of liquid and your aromatics to the bottom of the pan.
- Cover the pan tightly with foil. This traps the steam and helps the meat cook gently and stay moist.
- Put the pan in the preheated oven.
- Check the liquid level every hour or so during the long cook. Add more hot liquid if it gets low.
The shank is ready for the next step when the meat feels very soft when you poke it through the foil. It should feel loose on the bone.
The High Heat Phase: Getting Crispy Skin
Once the meat is super tender, it’s time to focus on that amazing crispy skin. This step uses a higher temperature to finish the job.
Removing the Foil and Increasing Heat
Carefully remove the foil from the pan. Be careful of the hot steam.
- Increase the oven temperature. A common temperature for crisping skin is 400°F to 425°F (200°C to 220°C).
- If you had a lot of liquid in the pan, you might want to carefully pour some of it off now so the skin isn’t sitting too close to steaming liquid. Or, if you used a rack, the liquid below shouldn’t be an issue for the skin.
- Some cooks like to brush or pour a little hot oil or fat (like rendered pork fat) over the skin at this point. This can help it crisp up even more.
Watching the Skin
Put the shank back in the hot oven, uncovered. Keep a close eye on it now. The skin will start to bubble and puff up. It will turn a beautiful golden brown and become hard and crispy.
This crisping phase usually takes about 20 to 30 minutes. The exact time depends on your oven and the shank. Watch it carefully because crispy skin can turn to burnt skin quickly! If one part is crisping faster than another, you can loosely cover the crispy parts with small pieces of foil.
The skin is done when it’s puffed up and feels hard and brittle when you tap it. This is the moment you achieve that glorious crispy pork shank skin.
Resting the Meat
Once the pork shank is cooked and the skin is crispy, take it out of the oven. It’s important to let the meat rest before serving.
- Transfer the shank to a cutting board or serving platter.
- Tent it loosely with foil.
- Let it rest for 10 to 15 minutes.
Resting lets the juices inside the meat settle. If you cut it right away, the juices will run out, and the meat can be dry. Resting keeps the meat moist and ensures it’s truly a tender pork shank.
While the meat rests, you can make a simple sauce or gravy from the pan drippings if you like.
Making Gravy from Drippings
The liquid and fat left in the roasting pan are full of flavor.
- Carefully pour the pan contents into a heatproof jug. Let the fat separate and rise to the top.
- Skim off most of the fat, leaving the flavorful liquid (this is called the fond).
- You can use this liquid as a simple jus (just the defatted liquid) or turn it into a thicker gravy.
- To make gravy: Put a few tablespoons of the skimmed fat (or butter/oil) into a saucepan. Add a few tablespoons of flour and cook for a minute or two, stirring, to make a roux. Slowly whisk in the defatted pan liquid. Heat and stir until the gravy thickens. Taste and add salt and pepper if needed.
Summary of the Main Method: Slow Cook Then Crisp
Here is a breakdown of the popular how long to cook pork shank method that gives you both tender meat and crispy skin, perfect for any roasted pork hock recipe.
- Prepare the Shank: Score the skin deeply. Pat the skin very dry. Rub salt generously into the skin. Season the rest of the shank. (Optional: Salt and air-dry in the fridge overnight).
- Set Up Pan: Place the shank on a wire rack in a roasting pan. Add 1-2 cups of liquid and aromatics (onion, carrot, celery, garlic) to the bottom of the pan.
- Slow Cook: Cover the pan tightly with foil. Cook in a preheated oven at 300°F-325°F (150°C-160°C) for 2.5 to 4 hours, or until the meat is very tender and pulling from the bone. Check liquid levels and add more if needed.
- Crisp the Skin: Remove the foil. Increase oven temperature to 400°F-425°F (200°C-220°C). Return the uncovered shank to the oven. Cook for 20-30 minutes, watching carefully, until the skin is puffed and crispy.
- Rest: Remove from oven and let rest for 10-15 minutes before serving.
This pork hock oven recipe will yield a fantastic dish.
Pork Shank Cooking Time and Temperature Guide
Here’s a general guide. Remember that oven temperatures can vary, and the exact time depends on your specific shank size and shape. Always check for tenderness rather than relying strictly on time.
| Shank Weight (approx.) | Slow Cook Temp & Time | Crisping Temp & Time | Final Result (Goal) |
|---|---|---|---|
| 1.5 – 2 lbs | 300-325°F (150-160°C) for 2.5 – 3.5 hours | 400-425°F (200-220°C) for 20-30 min | Tender Meat, Crispy Skin |
| 2 – 3 lbs | 300-325°F (150-160°C) for 3.5 – 4.5 hours | 400-425°F (200-220°C) for 25-35 min | Fall off the bone result |
| Multiple Shanks | Adjust time slightly longer, ensure good space | Check crisping individually | Evenly cooked, tender shank |
Always verify the meat is tender before moving to the crisping step.
Other Oven Cooking Styles
While the slow cook then crisp method is popular for crispy pork shank skin, there are variations.
The Braise-First Method
This is a type of braised pork shank oven recipe. You might start by searing the shanks on the stovetop for color. Then, you place them in a deep pot or Dutch oven with plenty of liquid (covering the shanks partly or fully) and aromatics. Cover the pot tightly and cook in the oven at a low temperature (around 300°F-325°F / 150°C-160°C) for 2-3 hours. The liquid ensures the meat is incredibly moist and tender pork shank.
After the braising, you can remove the shanks from the liquid. Place them on a rack in a roasting pan. Then, proceed with the high heat crisping phase (400-425°F / 200-220°C for 20-30 minutes) as described earlier. Save the braising liquid to make a rich sauce. This method almost guarantees fall off the bone pork shank.
The High Heat Only Method (Not Recommended for Crispy Skin & Tenderness)
Cooking a pork shank at a single high temperature (like 375°F or 400°F) from start to finish would take a long time and likely result in dry, tough meat by the time the connective tissue breaks down. It also makes getting uniformly crispy skin harder because the fat under the skin doesn’t render out as effectively. For tender pork shank and great crispy skin, the two-phase approach is best.
Details on Getting Super Crispy Skin
Let’s dive a bit deeper into the science and practice of making that skin crunch. This is often the most challenging part of any roasted pork hock recipe.
The Role of Scoring and Drying
When you score the skin, you create channels. These channels let the fat underneath melt and escape during cooking. If the fat stays trapped, the skin will be chewy and soft, not crispy.
Drying the skin is crucial. Skin has moisture. When heated, this moisture turns to steam. Steam cooks the skin, making it tough, before it has a chance to crisp. Removing as much surface moisture as possible lets the skin dry out and then fry in its own rendered fat during the high heat stage. The salt helps by drawing out even more moisture through osmosis. Leaving it in the fridge uncovered overnight is a pro tip because the cold, dry air in the fridge pulls out moisture very effectively.
The Science of Crispiness
Crispy pork skin is basically a protein matrix (the skin itself) that has been dehydrated and then fried in its own rendered fat.
- Slow Cook: During the long, low temperature cook, the collagen in the skin and the fat under it soften. The fat starts to melt (render) slowly.
- High Heat: When you raise the temperature, the remaining moisture in the skin quickly turns to steam and puffs up the skin. The high heat then fries the now-puffed skin in the rendered fat that is running off. This frying action makes it hard and brittle – the perfect crackling.
If there’s too much moisture or the fat hasn’t rendered properly, the skin won’t crisp. It might just turn hard and chewy.
Troubleshooting Crispy Skin Problems
What if your skin isn’t getting crispy? Don’t panic!
- Skin is Chewy: This usually means there was too much moisture or not enough fat rendered. Make sure you score and dry the skin very well next time. You can try putting the shank back in a very hot oven (450°F / 230°C) for a few more minutes, watching it constantly. Sometimes, brushing with a little extra hot oil helps.
- Parts are Crispy, Parts Aren’t: Ovens often have hot spots. You can try turning the pan halfway through the crisping time. You can also use a kitchen torch on the non-crispy spots very carefully to finish them off.
- Skin is Hard but Not Puffed: This might happen if the skin wasn’t dried enough or if the initial slow cook didn’t render enough fat. Ensure proper scoring, drying, and the slow cook is long enough.
Serving Your Delicious Pork Shank
A beautifully cooked pork shank with crispy skin is a meal on its own. The rich, tender meat and crunchy skin are a wonderful contrast.
Serve the pork shank hot, right after resting. You can carve the meat off the bone, or often, after proper slow cooking, the meat will be so tender it just falls off the bone easily.
Classic sides for pork shank include:
- Mashed potatoes
- Sauerkraut
- Braised red cabbage
- Roasted root vegetables (carrots, potatoes, parsnips)
- Dumplings or noodles
- Apple sauce or other fruit compotes
Don’t forget the gravy or sauce you made from the pan drippings!
Key Tips for Success
- Start with a fresh, uncured pork shank with skin on.
- Score the skin well.
- Dry the skin as much as possible, preferably overnight in the fridge with salt.
- Cook low and slow first to get truly tender pork shank.
- Cover with foil during the slow cook to keep it moist.
- Uncover and crank up the heat to crisp the skin at the end.
- Watch the skin carefully during the high-heat phase to prevent burning.
- Let the meat rest before serving for maximum juiciness.
- Don’t skip making gravy from the pan drippings – it adds so much flavor.
By following these steps, you can master the art of cooking a pork shank in the oven to achieve that perfect combination of fall off the bone pork shank and incredible crispy pork shank skin. It’s a rewarding cooking project that results in a deeply satisfying meal, showcasing why the roasted pork hock recipe is a favorite for many. Whether you call it a pork shank, hock, or knuckle, cooking it this way guarantees delicious results.
Detailed Look at Braising Liquids and Aromatics
When doing a braised pork shank oven method or adding liquid to the pan for the slow cook phase, the liquid and aromatics you use can greatly affect the final flavor.
- Water or Broth: Simple and effective. Chicken or vegetable broth adds a basic layer of savory flavor.
- Beer: Dark beers like stout or ale add depth and a slightly malty note. Lighter lagers can also work.
- Wine: Red or white wine adds complexity. Red wine is classic with pork.
- Cider or Apple Juice: Adds sweetness and works wonderfully with pork.
- Combination: You can mix liquids, like broth and a splash of cider or beer.
Aromatics add more flavor as they cook down in the liquid:
- Onions: Quartered or roughly chopped.
- Carrots: Chunky pieces.
- Celery: Stalks or chunks.
- Garlic: Whole cloves (smashed slightly) or halved heads.
- Herbs: Bay leaves are a must. Sprigs of rosemary, thyme, or sage are great additions.
- Peppercorns: A few black peppercorns.
- Star Anise or Cloves: For a warmer, slightly sweeter spice note.
These ingredients contribute to the overall richness of the dish and make the drippings perfect for gravy.
Considering Shank Size and Number
If you are cooking multiple shanks, choose pieces that are similar in size so they cook evenly. Give them enough space in the roasting pan so hot air can move around them. Don’t crowd the pan. If needed, use two pans. The total cooking time for the slow cook might need to be slightly longer for multiple shanks, but check each one for tenderness before moving to the crisping phase.
For very large shanks (over 3 lbs), the slow cook time will definitely be longer. Plan for 4-5 hours or even more. The key is patience in the first phase to ensure tender pork shank.
The Importance of Oven Calibration
Every oven is a little different. An oven thermometer can tell you the true temperature inside your oven. If your oven runs hot or cold, this can affect cooking times. Using a thermometer helps you set the temperature correctly for both the low, slow cook and the high-heat crisping, improving your chances of getting that perfect crispy pork shank skin.
Recipe Refinement: Adding Extra Flavor
Beyond salt, pepper, and the basic aromatics, here are ways to add more flavor:
- Rub: Make a dry rub with spices like paprika, cumin, coriander, garlic powder, onion powder, and a little brown sugar. Rub this all over the meat part of the shank before cooking.
- Marinade: For a different flavor profile (less traditional for this method, but possible), you could marinate the shank for a few hours. However, be careful not to introduce too much moisture to the skin. Marinades work better if you remove the skin first (not the goal here!) or only apply it to the meat part.
- Glaze: In the last 15-20 minutes of the high-heat crisping phase, you could brush the meat (avoiding the crispy skin) with a glaze. Apple cider glaze, barbecue sauce, or a honey-mustard mix are good options.
Remember, the star flavors should be the pork itself and the amazing texture contrast. Don’t overpower them.
Enjoying Your Hard Work
Cooking a pork shank oven recipe from start to finish is a process that takes time and care, but the result is truly worth it. The reward is a dish with incredibly moist and flavorful meat that practically melts in your mouth, perfectly balanced by shards of crunchy, salty crackling. This is why a good roasted pork hock recipe is treasured. Achieving fall off the bone pork shank with crispy pork shank skin is a culinary triumph that will impress anyone lucky enough to share the meal with you.
It’s a comforting, hearty dish, ideal for a weekend project or a special dinner. So gather your ingredients, follow the steps, and get ready to enjoy a fantastic meal created right in your own oven.
Frequently Asked Questions
Here are some common questions about cooking pork shank in the oven.
h4 Is a pork shank the same as a pork hock or knuckle?
Yes, generally they refer to the same cut of meat, the lower part of the pig’s leg. The terms are often used interchangeably in pork hock oven recipe and pork knuckle oven recipe contexts.
h4 Can I use a cured pork shank for this recipe?
No, for crispy skin you need a fresh, uncured pork shank. Cured shanks are meant for simmering in soups or stews and the skin will not crisp up in the same way.
h4 Why do I need to dry the skin so much?
Moisture on the skin prevents it from getting crispy. It steams the skin instead of allowing it to fry in its own rendered fat. Drying, especially with salt and air exposure, is essential for achieving crispy pork shank skin.
h4 My skin isn’t crisping, what can I do?
Make sure the oven is hot enough (400-425°F or higher). Check if there’s still moisture on the skin or if it’s sitting in too much liquid or fat. You can try blotting the skin dry again, carefully pouring off excess pan liquid/fat, and putting it back in the hot oven. A kitchen torch can also be used carefully on stubborn spots.
h4 How do I know the meat is tender enough?
After the slow cook phase (covered, low heat), you should be able to easily pierce the thickest part of the meat with a fork or skewer. The meat should feel very soft and may start to pull away from the bone. This ensures tender pork shank.
h4 Can I cook the pork shank the day before?
You can cook the pork shank through the slow cook phase the day before. Let it cool, then store it in the fridge. On the day of serving, let it come to room temperature for about 30-60 minutes. Then, place it on a rack over a pan and proceed with the high heat crisping phase until the skin is crispy and the meat is heated through. This is a good way to plan ahead for a fall off the bone pork shank meal.
h4 What temperature should the meat reach?
For safety, pork should reach an internal temperature of 145°F (63°C). However, for fall off the bone pork shank, you are cooking far beyond this temperature, often reaching internal temperatures well over 190°F (88°C) during the long, slow cook. This high temperature is needed to break down the connective tissue, making it tender. The crisping step at the end adds texture without significantly raising the internal temperature further unless done for a very long time.
h4 Can I use an air fryer for the crisping step?
Yes, if your air fryer is large enough to hold the shank, you can transfer it to the air fryer after the slow oven cook. Cook at a high temperature (like 400°F/200°C) for 10-20 minutes, watching closely, until the skin is crispy. This can be very effective for getting crispy pork shank skin.
h4 What is the total how long to cook pork shank time including rest?
For a typical 1.5-2 lb shank, total cook time is around 2.5-4 hours (slow cook) + 20-30 minutes (crisp) = 3 to 4.5 hours. Add 10-15 minutes for resting. So, plan for roughly 3.5 to 5 hours total from oven to table. Larger shanks will take longer. This makes slow cook pork shank oven recipes a weekend or special occasion dish.
h4 Can I skip the liquid in the pan during the slow cook?
You could, but the liquid helps create a moist environment which aids in breaking down the connective tissue and keeping the meat juicy during the long cooking time. It also provides drippings for gravy. If you skip the liquid, cover the shank very tightly with foil to trap its own moisture. However, adding liquid is generally recommended for the most tender pork shank.